Dell V310 Series Скачать руководство пользователя страница 45

Copying

Automatic Document Feeder (ADF)
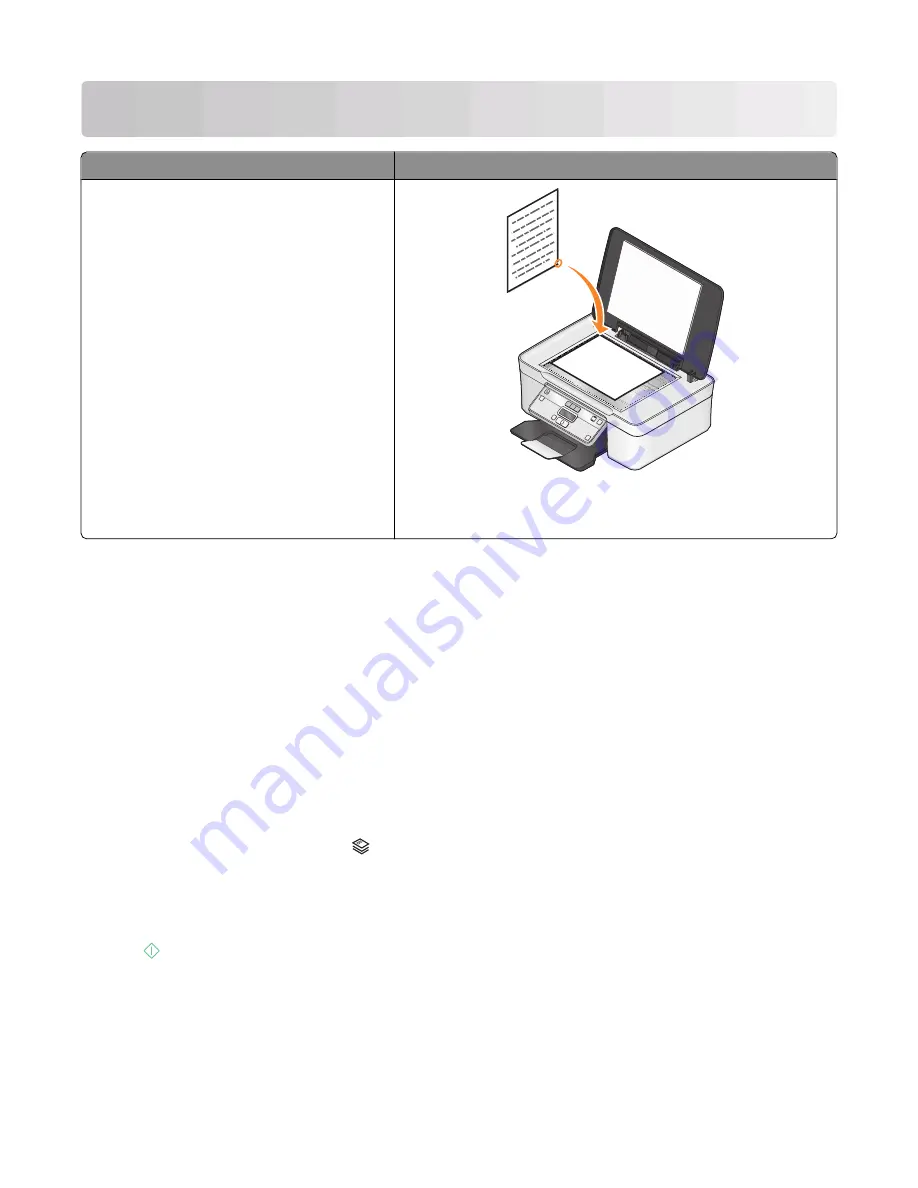
Scanner glass

Use the ADF for multiple-page documents.

Note: 

The ADF is available only on selected

models. If you purchased a printer without an
ADF, then load original documents or photos on
the scanner glass.

Use the scanner glass for single pages, small items (such as postcards
or photos), transparencies, photo paper, or thin media (such as
magazine clippings).

Tips for copying

When using the ADF, adjust the paper guide on the ADF to the width of the original document.

When using the scanner glass, close the top cover to avoid dark edges on the scanned image.

Do 

not

 load postcards, photos, small items, transparencies, photo paper, or thin media (such as magazine

clippings) into the ADF. Place these items on the scanner glass.

Making copies

1

Load paper.

2

Load an original document faceup into the ADF or facedown on the scanner glass.

3

From the printer control panel, press 

.

4

Press the arrow buttons to select the number of copies, and then press the 

Color/Black

 button to set a color or

black-and-white copy.

When you select color or black-only printing, the light near your choice comes on.

5

Press 

.

Copying

45

Содержание V310 Series

Страница 1: ...Dell V310 Series User s Guide April 2009 www dell com support dell com Machine type s 4443 Model s 1d1 1dw 5dw ...

Страница 2: ...bidden Trademarks used in this text Dell and the DELLlogoaretrademarks of DellInc Microsoftand Windows areregistered trademarksofMicrosoftCorporation Other trademarksandtradenames may be used in this document to refer to the entities claiming the marks and names of their products Dell Inc disclaims any proprietary interest in trademarks and trade names other than its own ...

Страница 3: ...rinter control panel 16 Using the printer menus 18 Changing temporary settings into new default settings 19 Changing the Power Saver timeout 20 Resetting to factory settings 21 Saving energy with Eco Mode 21 Using the printer software 23 Minimum system requirements 23 Using the Windows printer software 23 Updating the printer software Windows only 25 Reinstalling the printer software 25 Loading pa...

Страница 4: ... an image on one page 48 Copying multiple pages on one sheet 48 Making a duplex copy manually 48 Canceling copy jobs 49 Scanning 50 Tips for scanning 50 Scanning to a local or network computer 50 Scanning to a flash drive or memory card 51 Scanning photos into an editing application 51 Scanning documents into an editing application 52 Scanning directly to e mail 53 Scanning to a PDF 53 Scanning FA...

Страница 5: ...oot 76 Using the Service Center to solve printer problems 76 If Troubleshooting does not solve your problem 76 Setup troubleshooting 76 Jams and misfeeds troubleshooting 81 Print troubleshooting 83 Copy and scan troubleshooting 84 Memory card troubleshooting 86 Wireless troubleshooting 88 Index 103 Contents 5 ...

Страница 6: ...6 ...

Страница 7: ...bject the power cord to abrasion orstress Do not pinchthe powercord betweenobjects such as furniture and walls If any of these things happen a risk of fire or electrical shock results Inspect the power cord regularly for signs of such problems Remove the power cord from the electrical outlet before inspecting it Refer service or repairs other than those described in the user documentation to a pro...

Страница 8: ...fter the printer is left idle for 10 minutes Eco Mode is enabled by default in your printer Select thelowest PowerSavertimeout The Power Saver feature putsthe printer in a minimum powerstandby mode after the printer has been idle for a set amount of time the Power Saver timeout Share your printer Wireless network printers allow you to share a single printer among multiple computers thus conserving...

Страница 9: ...re you looking for Find it here Initial setup instructions Connecting the printer Installing the printer software Setup documentation The setup documentation came with the printer Additional setup and instructions for using the printer Selecting and storing paper and specialty media Loading paper Performing printing copying scanning and faxing tasks depending on your printer model Configuring prin...

Страница 10: ...g information ready when you contact support so that they may serve you faster Service Tag Express Service Code Note The ServiceTag and Express ServiceCode appear on labels located on your printer Software and Drivers Certified drivers for your printer and installers for Dell printer software Readme files Last minute technical changes or advanced technical reference material for experienced users ...

Страница 11: ...ate that a memory card is being accessed 4 Memory card slots Insert a memory card 5 PictBridge and USB port Connect a PictBridge enabled digital camera USB Bluetooth adapter or a flash drive to the printer 6 Paper exit tray Hold paper as it exits 7 Printer control panel Operate the printer 8 Top cover Access the scanner glass 9 Paper feed guard Prevent items from falling into the paper slot 10 Pap...

Страница 12: ...ect the printer to a power source 4 USB port Connect the printer to a computer using a USB cable Warning Potential Damage Do not touch the USB port except when plugging in or removing a USB cable or installation cable 5 Printhead Install replace or remove ink cartridges 6 Scanner unit Access the ink cartridges and printhead Remove paper jams About your printer 12 ...

Страница 13: ...moving the old ones or the ink remaining in the printhead nozzles may dry out 1 Turn on your printer 2 Open the printer Note The printhead moves to the cartridge installation position 3 Press the release tab and then remove the used ink cartridge or cartridges 2 1 Note Do not reinstall used ink cartridges once you remove them from the printhead Ordering and replacing supplies 13 ...

Страница 14: ...ds available at www dell com supplies For best results use only Dell ink cartridges Item Licensed cartridge1 Regular cartridge Black cartridge Series 21 Series 21R Black cartridge high yield2 Series 22 Series 22R Color cartridge Series 21 Series 21R Color cartridge high yield2 Series 22 Series 22R 1 Licensed for a single use only After use return this cartridge to Dell for remanufacturing refillin...

Страница 15: ... All Programs or Programs and then select the printer program folder from the list 3 Select Printer Home 4 Choose your printer from the printer drop down list 5 Click Order supplies in the Maintenance tab 6 Click 7 Follow the instructions on the computer screen Ordering and replacing supplies 15 ...

Страница 16: ...aver mode Note When the printer is on press to switch to Power Saver mode Press and hold for threeseconds to turn off the printer 2 Copy button Access the copy menu and make copies 3 Scan button Access the scan menu and scan documents 4 Photo button Access the photo menu and print photos 5 Color Black Switch to color mode or black and white mode 6 Start button Start a print scan or copy job depend...

Страница 17: ... off in Power Saver mode View Printer status Messages Menus 9 Select button Select menu options Save settings Feed or eject paper Press and hold for 3 seconds to feed or eject paper from the printer 10 Arrow buttons Choose a menu or submenu item that appears on the display 11 Back button Return to the previous screen Exit from one menu level to a higher one 12 Setup button Access the setup menu an...

Страница 18: ...idge port Photo menu Easy Photo Print Last Photo All Photos Date Range Photo Number Paper Size Photo Size Print Photos Print Last Photo All Photos Date Range Photo Number Print DPOF1 Lighter Darker Photo Effects None Auto Enhance Sepia Antique Grey Antique Brown Paper Size Photo Size Paper Type Layout Quality Proof Sheet Print Last 20 Print All Print Date Range Scan Sheet Save Photos Computer USB ...

Страница 19: ...Demo Mode On Off 1 This menu appears only in printers that support wireless printing 2 This menu appears only when a USB Bluetooth adapter is inserted into the USB port Note The File Print menu is enabled when you insert a memory device that contains document files into the printer The menu is composed of the folders and files stored on the memory device Changing temporary settings into new defaul...

Страница 20: ...he printer control panel press 2 Press the arrow buttons to scroll to Device Setup and then press 3 Press the arrow buttons to scroll to Clear Settings Timeout and then press 4 Press the arrow buttons to scroll to Never and then press 5 Press until you exit Setup or press another mode button Changing the Power Saver timeout The Power Saver timeout is the time it takes for the printer to switch to ...

Страница 21: ... the for three seconds to turn off the printer 2 From the printer control panel press and hold and and then press to turn the printer on 3 Release all three buttons 4 When prompted to set the initial settings of your printer make your selections using the printer control panel buttons Initial Setup Complete appears on the display Saving energy with Eco Mode The Eco Mode feature optimizes energy ef...

Страница 22: ... Press the arrow buttons to scroll to Eco Mode 4 Select the Eco Mode setting and then press 5 Press until you exit Setup or press another mode button Using the printer control panel buttons and menus 22 ...

Страница 23: ... The following table provides an overview of various software programs and what they can help you do If you did not install these additional programs during initial installation then reinsert the installation software CD runtheinstallationsoftware andthenselectInstallAdditionalSoftware from theSoftwareAlreadyInstalledscreen Printer software Use the To Dell Printer Home referred to as Printer Home ...

Страница 24: ...program is installed automatically with the printer software if the printer has wireless capability Dell Service Center referred to as Service Center Troubleshoot the printer Access the printer maintenance functions Contact technical support Notes This program is installed automatically with the printer software You may be prompted to install this program from the Web depending on your printer mod...

Страница 25: ...r Programs and then select the printer program folder from the list 3 Select the uninstall option 4 Follow the instructions on the computer screen to remove the software 5 Once the uninstall process in complete restart your computer Installing the printer software Note If you installed the printer software on this computer before but need to reinstall the software then uninstall the current softwa...

Страница 26: ...e printer The paper should be flat against the paper support and the edges should be flush against both paper guides Paper and specialty media guidelines Load up to Make sure that 100 sheets of plain paper 1 2 The paper guides rest against the edges of the paper Youload letterhead paper with theprintside faceupand the top of the letterhead going into the printer first Loading paper and original do...

Страница 27: ...aper guides rest against the edges of the envelopes You print the envelopes with Landscape orientation Note If you are mailing within Japan then the envelope can be printed in Portrait orientation with the stamp in the lower right corner or in Landscape orientation with the stamp in the lower left corner If you are mailing internationally then print in Landscape orientation with the stamp in the u...

Страница 28: ...rest against the edges of the transfer You select Automatic Normal or Photo print quality 50 transparencies The rough side of the transparencies is faceup The paper guides rest against the edges of the transparencies Saving paper default settings You can set the default paper size paper type and photo print size for the documents and photos that you print Note These default settings apply only to ...

Страница 29: ... Size c Press the arrow buttons to select the default photo print size for the printer and then press 3 Press until you exit Setup or press another mode button Loading original documents on the scanner glass 1 Open the top cover and place the document facedown on the scanner glass 2 Close the top cover Loading paper and original documents 29 ...

Страница 30: ...int the type of paper to use and how the pages should print d Click OK to close any printer software dialogs e Click OK or Print Collating printed copies If you print multiple copies of a document then you can choose to print each copy as a set collated or to print the copies as groups of pages not collated Collated Not collated Notes The collate option is available only when you are printing mult...

Страница 31: ...p 3 From the Layout list of the Advanced tab select Pages per sheet 4 Select the number of page images to print on each page If you want each page image to be surrounded by a border then select Print Page Borders 5 Click OK to close any printer software dialogs 6 Click OK or Print Printing documents from a memory card or flash drive To enable the File Print function The printer must be connected t...

Страница 32: ...ocument Notes You may be prompted to enter a PIN if the computer requires it Enter the PIN using the keypad To assign a computer name and a PIN to the computer see the Help for the printer software associated with your operating system Printing specialty documents Printing envelopes 1 Load the envelopes in the printer 2 Send the print job a With a document open click File Print b Click Properties ...

Страница 33: ...nst the edges of the label sheet Use full label sheets Partial sheets with areas exposed by missing labels may cause labels to peel off during printing resulting in a paper jam Note Labels require more drying time Remove each label sheet as it exits and then allow it to dry to avoid ink smudging Printing on custom size paper Before beginning these instructions load the custom size paper in the pri...

Страница 34: ... 5 Click OK The printer prints the odd numbered pages and the instruction sheet 6 Flip and reload the paper following the directions on the instruction sheet to complete the print job 3 1 2 Note To return to single sided printing return to the Advanced tab From the 2 Sided Printing section select Off from the drop down menu Printing 34 ...

Страница 35: ...ter For more information see Supported memory cards and file types on page 36 Notes The flash drive uses the same port that is used for a PictBridge camera cable An adapter may be necessary if your flash drive does not fit directly into the port Warning Potential Damage Do not touch any cables any network adapter any connector the memory device or the printer in the areas shown while actively prin...

Страница 36: ...ument files are stored in the memory device then press the arrow buttons to select Photos 4 Press the arrow buttons to scroll to Easy Photo or Print Photos and then press Notes Select Easy Photo if you want to print photos quickly Select Print Photos if you want to customize the photos before printing them 5 Press the arrow buttons to select a photo printing option and then press Note You can choo...

Страница 37: ...ra set to mass storage mode If document files and image files are stored on the memory device then press the arrow buttons to scroll to Photos Press 4 Transfer or print the photos If the printer is using a USB connection FastPicslaunchesautomaticallywhenyouinsertthememorydevice Followthe instructionsonthecomputer screen to transfer the photos to the computer or to print If the printer is using a W...

Страница 38: ...mation see the camera documentation The printer reads only one memory device at a time Warning Potential Damage Do not touch the USB cable any network adapter any connector or the printer in the area shown while actively printing from a PictBridge enabled digital camera A loss of data can occur 3 If the PictBridge connection is successful then the following message appears on the display PictBridg...

Страница 39: ...ing selections make sure to fill in the circles completely 8 Load the proof sheet facedown on the scanner glass Scan Proof Sheet appears on the display Note If this option does not appear on the display then press the arrow buttons until it appears on the display 9 Press The printer scans the proof sheet 10 Load photo paper with the glossy or printable side faceup If you are not sure which side is...

Страница 40: ...urface with your fingers or sharp objects For best results remove each printed sheet individually from the paper exit tray and allow the prints to dry at least 24 hours before stacking displaying or storing Printing from a Bluetooth enabled device This printer is compliant with Bluetooth Specification 2 0 It supports the following profiles Object Push Profile OPP and Serial Port Profile SPP Check ...

Страница 41: ...o send a print job to the printer To set up a connection between the printer and a Bluetooth enabled device 1 Insert a USB Bluetooth adapter into the USB port located on the front of the printer Bluetooth R Bluetooth Dongle Connected appears on the display Note A Bluetooth adapter is not included with the printer 2 From the printer control panel press 3 Press the arrow buttons to scroll to Bluetoo...

Страница 42: ...then press Select Low to allow Bluetooth devices to connect and send print jobs to your printer without requiring users to enter a pass key Select High to require users to enter a four digit numeric pass key on the Bluetoothdevice before connecting and sending print jobs to the printer 6 The Bluetooth Pass Key menu appears on the display if you set the security level to High Use the keypad to ente...

Страница 43: ...anaging print jobs Setting your printer as the default printer Yourprintershouldbeselectedautomaticallyfromthe Printdialogwhenyou senda printjob Ifyou havetomanually select your printer then it is not the default printer To set the default printer 1 Click or click Start and then click Run 2 In the Start Search or Run box type control printers 3 Press Enter or click OK The printer folder opens 4 Ri...

Страница 44: ...r folder opens 4 Right click the printer and then select Open 5 Resume the print job If you want to resume a particular print job then right click the document name and then select Resume If you want to resume all print jobs in the queue then click Printer and then clear the selection for Pause Printing Canceling print jobs Tocancelaprintjobfromtheprintercontrolpanel press Tocancelaprintjobfromthe...

Страница 45: ...the width of the original document When using the scanner glass close the top cover to avoid dark edges on the scanned image Do not load postcards photos small items transparencies photo paper or thin media such as magazine clippings into the ADF Place these items on the scanner glass Making copies 1 Load paper 2 Load an original document faceup into the ADF or facedown on the scanner glass 3 From...

Страница 46: ...t facedown on the scanner glass 3 From the printer control panel press 4 Press until Resize appears 5 Press the arrow buttons until the setting that you want appears Notes If you select Custom Resize then press and then press the arrow buttons to select the desired custom percent value Press to save the setting If you select Borderless then the printer will reduce or enlarge the document or photo ...

Страница 47: ...ach copy as a set collated or to print the copies as groups of pages not collated Collated Not collated 1 Load paper 2 Load an original document faceup into the ADF or facedown on the scanner glass 3 From the printer control panel press 4 Press the arrow buttons to select the number of copies and then press 5 Press until Collate appears 6 Press the arrow buttons to scroll to On 7 Press to save the...

Страница 48: ...nto the ADF or facedown on the scanner glass 3 From the printer control panel press 4 Press until Pages per Sheet appears 5 Pressthe arrowbuttons to select the numberof pagesthatyou want to copyon a sheetof paper You may choose to copy one two or four page images on a sheet Note If you are copying four pages in landscape format scan pages 3 and 4 first and then scan pages 1 and 2 6 Press to save t...

Страница 49: ...ying a one sided document then load the next page faceup into the ADF or facedown on the scanner glass If you are copying a two sided document then flip the original document and then reload it faceup into the ADF or facedown on the scanner glass 7 Remove the paper from the paper exit tray and then reload the paper to print the other side of the document 3 1 2 8 Press Canceling copy jobs To cancel...

Страница 50: ... into the ADF Place these items on the scanner glass Select the PDF file type if you want to scan multiple pages and save them as one file Scanning to a local or network computer 1 Load an original document faceup into the ADF or facedown on the scanner glass 2 From the printer control panel press 3 Press the arrow buttons to scroll to Computer or Network and then press 4 Press the arrow buttons t...

Страница 51: ...ou make a selection 6 Press to start scanning The scan is complete when a message appears on the printer control panel indicating that the file you scanned has been saved Scanning photos into an editing application Using the printer control panel 1 Load the photo or photos facedown on the scanner glass 2 From the printer control panel press 3 Press the arrow buttons to scroll to Computer or Networ...

Страница 52: ...s dialog appears 7 Save the photo or photos and open in a photo editing application to edit Scanning documents into an editing application An Optical Character Recognition OCR application allows you to edit an original text document that has been scanned In order for this to work you must have an OCR application stored on a local or network computer and you must be able to choose it from the list ...

Страница 53: ...nto the ADF or facedown on the scanner glass 2 Click or Start 3 Click All Programs or Programs and then select the printer program folder from the list 4 Select Printer Home 5 Choose your printer from the printer drop down list 6 Click PDF Scanning starts and the scan progress dialog appears 7 Save the document as a PDF Scanning FAQ How can I improve the quality of a scan Make sure your original d...

Страница 54: ...which application to use to open it on your computer The printer downloads this application list from your computer when scanning for the first time If you do not see the application you want on the list or if you install new applications on your computer then update the application list in the printer Updating the application list 1 From the printer control panel press 2 Press the arrow buttons t...

Страница 55: ...rk from the street or from your neighbors homes WEP WEP Wireless Equivalent Privacy is the most basic and the weakest type of wireless security WEP security relies on a series of characters called the WEP key Every device on the wireless network must use the same WEP key WEP security can be used on both ad hoc and infrastructure networks A valid WEP key has Exactly 10 or 26 hexadecimal characters ...

Страница 56: ...ssphrase that allows other devices to communicate on the network if encryption was used to secure your network You can locate your network WEP key or WPA passphrase by accessing your wireless access point or router and checking the security information If your wireless access point wireless router is using Wired Equivalent Privacy WEP security the WEP key should be Exactly 10 or 26 hexadecimal cha...

Страница 57: ...ick Start and then click Run b In the Start Search or Run box type D setup exe where D is the letter of your CD or DVD drive 3 Follow the instructions on the computer screen for installing a configured printer on a new computer Interpreting the colors of the Wi Fi indicator light The colors of the Wi Fi indicator light show the network status of the printer Off means one of the following The print...

Страница 58: ...creen From the list that appears in the Choose your wireless network dialog select your network and then click Continue If your wireless network does not appear in the list a Select Unlisted Network and then click Continue b Enter the details about your wireless network Note YourWEP WPA orWPA2 keymaybe obtained from the bottom of the box the user sguide thatcame with the box or from the box Web pa...

Страница 59: ...ings Advanced wireless setup Creating an ad hoc wireless network The recommended way to set up your wireless network is to use a wireless access point wireless router A network set up this way is called an infrastructure network If you have an infrastructure network you should configure the printer for use on that network Note The printer can communicate on only one wireless network at a time Conf...

Страница 60: ...up software 9 When the available networks are displayed provide the network name and the security information you created in step 6 The installer will configure the printer for use with your computer 10 Store a copy of your network name and security information in a safe place for future reference In Windows XP 1 Click Start 2 Click Control Panel 3 Click Network and Internet Connections 4 Click Ne...

Страница 61: ... then click Connect If the network does not appear wait a minute and then click Refresh network list 24 Insert the installation software CD and follow the directions for wireless installation Note Do not connect the installation or network cables until instructed to do so by the setup software 25 When the available networks are displayed provide the network name and the security information you cr...

Страница 62: ...ter See related topics on troubleshooting specific connection types if you encounter difficulties during configuration Using the printer wirelessly 1 Click or Start 2 Click All Programs or Programs and then select the printer program folder from the list 3 Select Printer Home 4 Click the Settings tab 5 Click the Wireless setup utility link 6 Follow the instructions on the computer screen to set up...

Страница 63: ... 2 on page 62 The name should be in the form server printer g Click OK h Click Close on the Printer Ports dialog i Make sure the new port is selected on the Ports tab and then click Apply The new port is listed with the printer name j Click OK Networking FAQ What is Wi Fi Protected Setup Wi Fi Protected Setup WPS is a product certification that provides simple and secure configuration WPS assists ...

Страница 64: ...oadcast for security reasons If the SSID of your wireless network is not broadcast it cannot be detected automatically and will not show up in the list of available wireless networks You must enter the network information manually in this situation An SSID can contain up to 32 alphanumeric characters Where do I find my SSID You can find the SSID for the wireless network by viewing the settings on ...

Страница 65: ...figured For desktop computers laptops and printers to communicate with each other over a network they must be connected by cables and or have wireless network adapters built in or installed in them There are many different ways a network can be set up Four common examples appear below Note The printers in the following diagrams represent printers with internal print servers built into them so that...

Страница 66: ...without Internet access A computer is directly connected to a printer without going through a wireless router This configuration is referred to as an ad hoc network The network has no connection to the Internet Note Most computers can connect to only one wireless network at a time If you access the Internet over a wireless connection you will lose Internet access if you are connected to an ad hoc ...

Страница 67: ...Continue following the on screen instructions How are infrastructure and ad hoc networks different Wireless networks can operate in one of two modes infrastructure or ad hoc In infrastructure mode all devices on a wireless network communicate with each other through a wireless router wireless access point Devices on the wireless network must have valid IP addresses for the current network and shar...

Страница 68: ...rformance Easier setup Finding the signal strength Wireless devices have built in antennas that transmit and receive radio signals The signal strength listed on the printer network setup page indicates how strongly a transmitted signal is being received Many factors can affect the signal strength One factor is interference from other wireless devices or other devices such as microwave ovens Anothe...

Страница 69: ...rs This distance could be longer or shorter depending upon the layout of the network and the limitations of the access point REMOVE OBSTACLES BETWEEN THE ACCESS POINT AND THE PRINTER The wireless signal from your access point will pass through most objects Most walls floors furniture and other objects will not block the wireless signal However there are materials that are too dense for the signal ...

Страница 70: ...will be displayed e Write down the SSID Note Make sure you copy it exactly including any capital letters 2 Print the printer network setup page In the Wireless section look for SSID 3 Compare the SSID of the computer and SSID of the printer If the SSIDs are the same then the computer and the printer are connected to the same wireless network If the SSIDs are not the same then run the utility again...

Страница 71: ... When installing the printer on a network make sure you select the printer with the correct MAC address The MAC address label is located inside the printer MAC XX XX XX XX XX XX The MAC address of the internal print server is a series of letters and numbers Other devices sometimes use a type of MAC address called Universally Administered Address UAA MAC XX XX XX XX XX XX UAA XX XX XX XX XX XX Note...

Страница 72: ...and then click Run 2 In the Start Search or Run box type cmd 3 Press Enter or click OK The Command Prompt window opens 4 Type ipconfig and then press Enter The IP address appears as four sets of numbers separated by periods such as 192 168 0 100 How to locate a printer IP address You can locate the printer IP address by viewing the printer network setup page How are IP addresses assigned An IP add...

Страница 73: ...drop down list 5 From the Maintenance tab click Check ink levels Aligning the printhead If the characters or lines on your printer image appear jagged or wavy then you may need to align the printhead Using the printer control panel 1 Load plain paper 2 From the printer control panel press 3 Press the arrow buttons to scroll to Maintenance and then press 4 Press the arrow buttons to scroll to Align...

Страница 74: ...ntrol panel press 2 Press the arrow buttons to scroll to Maintenance and then press 3 Press the arrow buttons to scroll to Clean Printhead or Deep Clean Printhead and then press 4 Press to clean the printhead nozzles A cleaning page prints Using the printer software 1 Click or Start 2 Click All Programs or Programs and then select the printer program folder from the list 3 Select Printer Home 4 Fr...

Страница 75: ...nterior may cause damage to your printer 5 Make sure the paper support and paper exit tray are dry before beginning a new print job Cleaning the scanner glass 1 Dampen a clean lint free cloth with water 2 Gently wipe the scanner glass clean Note Make sure all ink or corrective fluid on a document is dry before placing the document on the scanner glass Maintaining the printer 75 ...

Страница 76: ...back on Using the Service Center to solve printer problems The Service Center provides step by step troubleshooting help and contains links to printer maintenance tasks and customer support To open the Service Center use one of these methods Method 1 Method 2 If it appears on an error message dialog click the For additional assistance use the Service Center link 1 Click or Start 2 Click All Progra...

Страница 77: ...faults and then press 3 Press the arrow buttons to scroll to Set Defaults and then press 4 Press the arrow buttons to scroll to Use Factory and then press 5 Complete the initial printer setup CHANGE THE LANGUAGE USING A BUTTON COMBINATION IF YOU CANNOT READ THE CURRENT LANGUAGE 1 Turn the printer off 2 Press and hold down and and then press to turn the printer on The printer resets and starts the ...

Страница 78: ...encountered problems while installing or if your printer does not appear in the list in the Printers folder or as a printer option when sending a print job then try removing and reinstalling the software Before you reinstall the software do the following MAKE SURE THAT YOUR COMPUTER MEETS THE MINIMUM SYSTEM REQUIREMENTS LISTED ON THE PRINTER BOX TEMPORARILY DISABLE SECURITY PROGRAMS IN WINDOWS BEF...

Страница 79: ...RE THE INK CARTRIDGES ARE INSERTED CORRECTLY 1 Turn the printer on and then open the printer 2 Make sure the cartridges are inserted correctly The cartridges should click firmly into the matching color slot of the printhead 3 Close the printer SELECT YOUR PRINTER FROM THE PRINT DIALOG BEFORE SENDING THE PRINT JOB MAKE SURE THE PRINT JOB IS NOT PAUSED MAKE SURE YOUR PRINTER IS SET AS THE DEFAULT PR...

Страница 80: ...lign Printer and the press An alignment page prints Note Do not remove the alignment page until printing is finished Printer is busy or does not respond If the Before you troubleshoot checklist does not solve the problem then try one or more of the following MAKE SURE THE PRINTER IS NOT IN POWER SAVER MODE If the power light is blinking on and off slowly then the printer is in Power Saver mode Pre...

Страница 81: ...the USB port of the computer The USB port is marked with a USB symbol MAKE SURE THE USB PORT IS ENABLED IN WINDOWS 1 Click or click Start and then click Run 2 In the Start Search or Run box type devmgmt msc 3 Press Enter or click OK The Device Manager opens 4 Click the plus sign beside Universal Serial Bus controllers If USB Host Controller and USB Root Hub are listed then the USB port is enabled ...

Страница 82: ...reful not to tear the paper while removing it 3 Press to turn the printer back on Paper or specialty media misfeeds These are possible solutions if paperor specialty media misfeeds or skews orif multiple sheetsfeed orstick together Try one or more of the following CHECK PAPER CONDITION Use only new unwrinkled paper CHECK PAPER LOADING Load a smaller amount of paper into the printer Load paper with...

Страница 83: ...r Top margin 1 7 mm 0 067 in Bottom margin 12 7 mm 0 5 in SELECT THE BORDERLESS PRINT FEATURE 1 With a document or photo open click File Print 2 Click Properties Preferences Options or Setup 3 From the Paper Options section of the Print Setup tab select Borderless Streaks or lines on printed image If the Before you troubleshoot checklist does not solve the problem then try one or more of the follo...

Страница 84: ...NTER SOFTWARE Computer slows down when printing These are possible solutions Try one of the following IF YOU ARE USING A USB CONNECTION THEN TRY A DIFFERENT USB CABLE IF YOU ARE ON A NETWORK THEN RESET THE POWER OF THE ACCESS POINT ROUTER 1 Unplug the power cord from the access point 2 Wait ten seconds and then insert the power cord Copy and scan troubleshooting Copier or scanner does not respond ...

Страница 85: ...NNER GLASS ADJUST THE SCAN QUALITY FROM THE PRINTER SOFTWARE REVIEW THE TIPS FOR COPYING SCANNING AND IMPROVING PRINT QUALITY USE A CLEARER VERSION OF THE ORIGINAL DOCUMENT OR IMAGE MAKE SURE THE DOCUMENT OR PHOTO IS LOADED FACEDOWN ON THE SCANNER GLASS AND IN THE CORRECT CORNER Partial copies or scans of documents or photos If the Before you troubleshoot checklist does not solve the problem then ...

Страница 86: ...er over a network If the Before you troubleshoot checklist does not solve the problem then try one or more of the following MAKE SURE THE PRINTER AND THE DESTINATION COMPUTER ARE CONNECTED TO THE SAME NETWORK MAKE SURE THE PRINTER SOFTWARE IS INSTALLED ON THE DESTINATION COMPUTER Memory card troubleshooting Memory card troubleshooting checklist on page 86 Nothing happens when a memory card is inse...

Страница 87: ...nt documents from a memory card or flash drive If the Memory card troubleshooting checklist does not solve the problem then try the following CHECK THE USB CONNECTION 1 Check the USB cable for any obvious damage If the cable is damaged then use a new one 2 Firmly plug the square end of the USB cable into the back of the printer 3 Firmly plug the rectangular end of the USB cable into the USB port o...

Страница 88: ... troubleshooting checklist Before beginning to troubleshoot the wireless printer verify the following The printer the computer and the wireless access point are all plugged in and turned on The wireless network is working properly Try accessing other computers on your wireless network If your network has Internet access try connecting to the Internet over a wireless connection Your SSID is correct...

Страница 89: ...g a print job then you can try uninstalling and reinstalling the software Before you reinstall the software check the troubleshooting checklist and then do the following MAKE SURE YOUR COMPUTER IS CONNECTED TO YOUR WIRELESS ACCESS POINT WIRELESS ROUTER See if you have access to the Internet by opening your Web browser and accessing any site If there are other computers or resources on your wireles...

Страница 90: ...omputer and the printer are connected to the same wireless network If the SSIDs are not the same then run the utility again to set up the printer on the wireless network used by the computer CHECK YOUR WEP KEY OR WPA PASSPHRASE If your wireless access point is using Wireless Equivalent Privacy WEP security then the WEP key should be Exactly 10 or 26 hexadecimal characters Hexadecimal characters ar...

Страница 91: ...inter then you might need to disconnect the USB cable and reconnect it MAKE SURE THAT THE USB PORT ON THE COMPUTER IS WORKING Test the USB port by connecting other devices to it If you can successfully use other devices from the port then the port is working If the USB port on the computer is not working then try using the other USB ports on the computer MAKE SURE THAT THE USB CABLE IS WORKING Try...

Страница 92: ...anager recognizes the USB connection If there is activity on Device Manager but none of the previous solutions worked call Customer Support If there is no activity on Device Manager there may be a problem with your computer and its USB support The computer must recognize the USB connection in order for installation to work Cannot print and there is a firewall on the computer Third party non Micros...

Страница 93: ...on cable until you see the Wireless Setup Successful screen ENABLE THE PRINTER Confirm that the printer is enabled 1 Click or click Start and then click Run 2 In the Start Search or Run box type control printers 3 Press Enter or click OK The printer folder opens 4 Right click the new printer from the menu select Use Printer Online 5 Close the Printers or Printers and Faxes window and try printing ...

Страница 94: ...printer is Not configured in infrastructure mode Waiting to make an ad hoc connection to another wireless device The printer may be unable to join the network because of interference its distance from the wireless access point wireless router or until its settings are changed These are possible solutions Try one or more of the following CHECK NETWORK NAME Make sure your network does not have the s...

Страница 95: ...orange during installation When the Wi Fi indicator light is blinking orange it indicates that the printer has been set up for wireless networking but cannot connect to the network for which it has been configured The printer may be unable to join the network because of interference its distance from the wireless access point wireless router or until its settings are changed These are possible sol...

Страница 96: ... will not have a security key Using a wireless network with nosecurityisnotrecommendedbecauseitcanallowintruderstouseyournetworkresourceswithoutyourconsent CHECK MAC ADDRESS If your network uses MAC address filtering make sure that you include the MAC address of the printer in the MAC address filter list This will allow the printer to operate on the network For more information see How do I find t...

Страница 97: ...tart and then click Run 3 In the Start Search or Run box type cmd 4 Press Enter or click OK The Command Prompt window opens 5 Type ping followed by a space and the IP address of the printer For example ping 192 168 1 100 6 Press Enter 7 If the printer responds you will see several lines that display the number of bytes received from the printer This ensures that your computer is communicating with...

Страница 98: ...he printer is capable of wireless printing try the following CHECK POWER Make sure the light is on Communication not available message displays when printing wirelessly These are possible solutions Try one or more of the following MAKE SURE YOUR COMPUTER AND PRINTER HAVE VALID IP ADDRESSES FOR THE NETWORK If you are using a laptop and have power saving settings enabled you may see the Communicatio...

Страница 99: ...ike large file transfers or network games If the network is too busy it is possible that the printer is not receiving the IP address within the allowed time Make sure your DHCP server which may also be your wireless router is working and is configured to assign IP addresses If you are not sure how to do this refer to the manual that came with your wireless router for more information If the printe...

Страница 100: ...ions issues You may notice that your printer works for a short time and then stops working although apparently nothing has changed on your wireless network Many different issues can interrupt network communications and sometimes more than one problem exists at the same time These are possible solutions Try one or more of the following DISCONNECT FROM ALL VPNS WHEN ATTEMPTING TO USE THE WIRELESS NE...

Страница 101: ...Many wireless networks use the SSID that the router was originally configured by the manufacturer to use Using the default SSID can cause problems when more than one network is operating in the same area with the same SSID The printer or computer may attempt to attach to the wrong network although it will appear to be trying to connect to the correct network To avoid this type of interference chan...

Страница 102: ...less router if you are not sure how to reach the manufacturer Web site CHECK FOR WIRELESS ADAPTER UPDATES If you are having trouble printing from one particular computer check the Web site of the manufacturer of the network adapter card in that computer It is possible that there is an updated driver available that could resolve the issue CHANGE ALL NETWORK DEVICES TO THE SAME TYPE While it is poss...

Страница 103: ...bleshooting 86 cleaning exterior of the printer 74 cleaning printhead nozzles 74 Club Internet 58 collating copies 47 Communication not available message 98 computer slows down when printing 84 configuring IP address 58 connection configurations 70 conserving energy ink and paper 8 conserving paper using Eco Mode 21 continue button greyed out 91 continue button not working 91 continue button unava...

Страница 104: ...e 25 installing wireless printer additional computers 57 interference wireless network 69 internal wireless print server resetting to factory default settings 89 IP address 71 72 configuring 58 IP address assigning 72 iron on transfers 28 J jams and misfeeds troubleshooting paper jam in the paper support 82 paper jam in the printer 81 paper or specialty media 82 K key index 72 L labels 27 printing...

Страница 105: ... quality at the edges of page 83 poor scanned image quality 85 postcards 28 Power Saver timeout changing 20 power supply port 12 print job canceling 44 pausing 44 resuming 44 print media greeting cards 28 labels 27 print speed is slow 84 print troubleshooting cannot delete documents from print queue 81 computer slows down when printing 84 poor quality at the edges of page 83 slow print speed 84 st...

Страница 106: ... operating systems 23 switching from USB to wireless 62 switching from wireless to USB 62 T TCP IP 72 technical support 76 temporary settings changing into default 19 tips for copying 45 printing 30 scanning 50 top cover 11 transparencies 28 troubleshooting checking an unresponsive printer 76 contacting technical support 76 Service Center 76 solving basic printer problems 76 wireless network 88 tr...

Страница 107: ...ing 56 installing printer on Windows 57 interference 69 resolving communication problems 100 security 55 security information 65 signal strength 68 SSID 64 troubleshooting 88 types of wireless networks 67 wireless network compatibility 55 wireless print server not installed 98 wireless setup information needed for 56 wireless signal strength 68 wireless signal absorption 69 wireless troubleshootin...

Отзывы: