


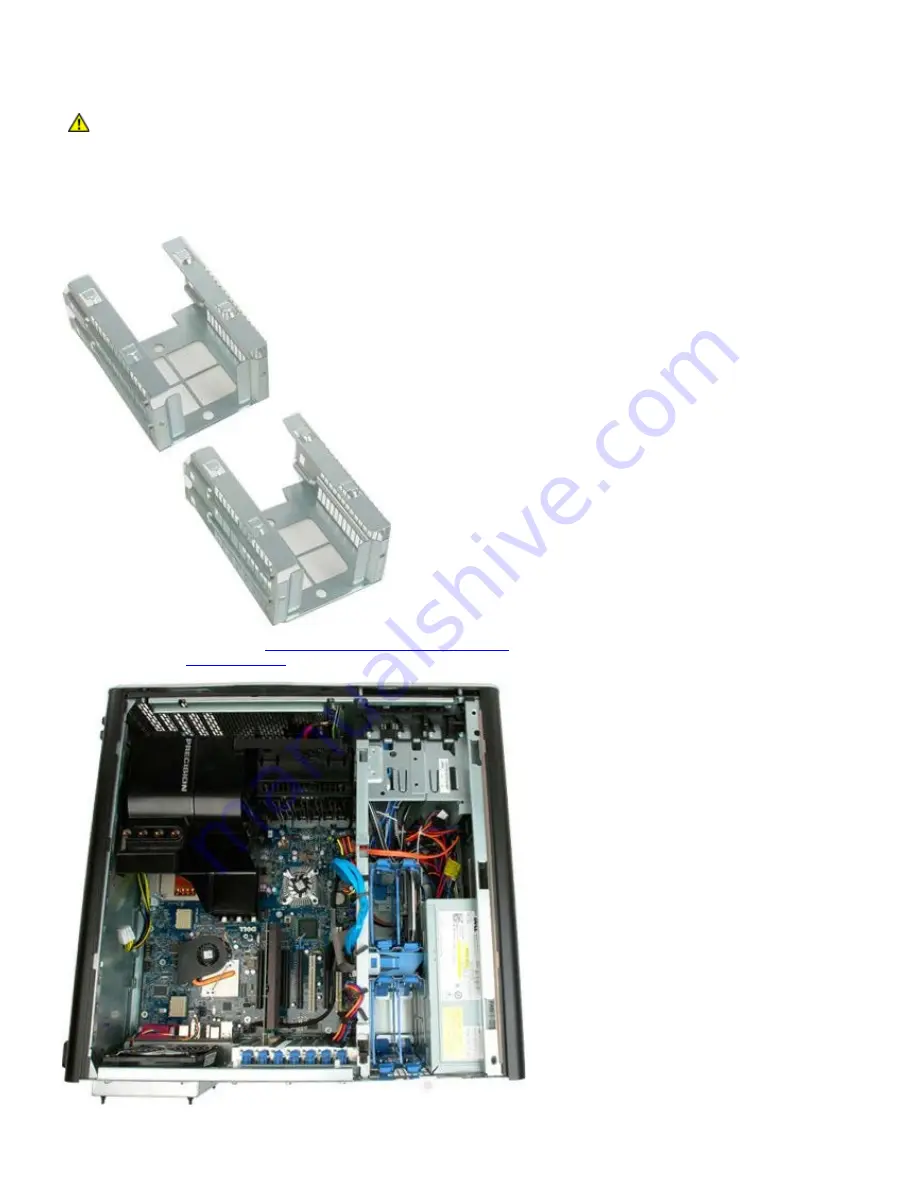
Hard-drive Cage
Dell Precision™ T7500 Service Manual
WARNING:
Before working inside your computer, read the safety information that shipped with your
computer. For additional safety best practices information, see the Regulatory Compliance Homepage
at www.dell.com/regulatory_compliance.
Removing the Hard-drive Cage
1. Follow the procedures in
Before Working Inside Your Computer
.
2. Remove the
computer cover
.
3. Remove any installed hard drives and the hard-drive guides.
Содержание Precision T7500
Страница 19: ...NOTE If any DIMMs are 30mm tall possible early 16GB DIMMs they must be installed on the system board only ...
Страница 26: ...3 Pull the cover away from the computer 4 Remove the cover from the computer ...
Страница 27: ......
Страница 29: ...5 Remove the coin cell battery from the computer ...
Страница 30: ......
Страница 34: ......
Страница 36: ...4 Remove the screws securing the first hard drive cage to the chassis 5 Remove the first hard drive cage ...
Страница 37: ...6 Repeat the process for the second hard drive cage ...
Страница 38: ......
Страница 41: ...7 Remove the fan assembly from the computer ...
Страница 42: ......
Страница 44: ...3 Remove the memory shroud from the computer ...
Страница 47: ......
Страница 50: ...6 Remove the chipset fan from the computer ...
Страница 51: ......
Страница 55: ......
Страница 59: ......
Страница 62: ...5 Slide the intrusion switch toward the center of the computer 6 Remove the intrusion switch from the computer ...
Страница 63: ......
Страница 66: ......
Страница 69: ......
Страница 72: ...5 Slide the optical drive out of the front of the chassis and remove the optical drive from the computer ...
Страница 73: ...5 ...
Страница 76: ...5 Remove the fan from the computer ...
Страница 77: ......
Страница 80: ......
Страница 82: ...4 Loosen the four captive screws on the heat sink 5 Remove the heat sink from the computer ...
Страница 83: ...6 Press down and out on the processor holder arm to release it 7 Lift the processor cover ...
Страница 84: ...8 Remove the processor from the computer ...
Страница 85: ......
Страница 93: ...17 Open the dual processor cover 18 Remove the dual processor from the dual processor board ...
Страница 94: ......
Страница 96: ...5 Disconnect the data cable 6 Disconnect the USB cable ...
Страница 97: ...7 Remove the screws securing the I O panel to the computer chassis 8 Remove the I O panel from the computer ...
Страница 98: ......
Страница 100: ...8 Disconnect the rear fan cable 9 Disconnect the front panel audio cable ...
Страница 101: ...10 Disconnect the intrusion switch cable 11 Disconnect the 1394 cable ...
Страница 102: ...12 Disconnect the floppy cable 13 Disconnect the I O panel cable ...
Страница 103: ...14 Disconnect the hard drive fan cable 15 Disconnect any hard drive data cables ...
Страница 104: ...16 Disconnect the power supply cable 17 Disconnect the optical drive data cable ...
Страница 105: ...18 Disconnect the power supply data cable 19 Remove the nine screws securing the system board ...
Страница 107: ...22 Remove the system board from the chassis ...
Страница 108: ......