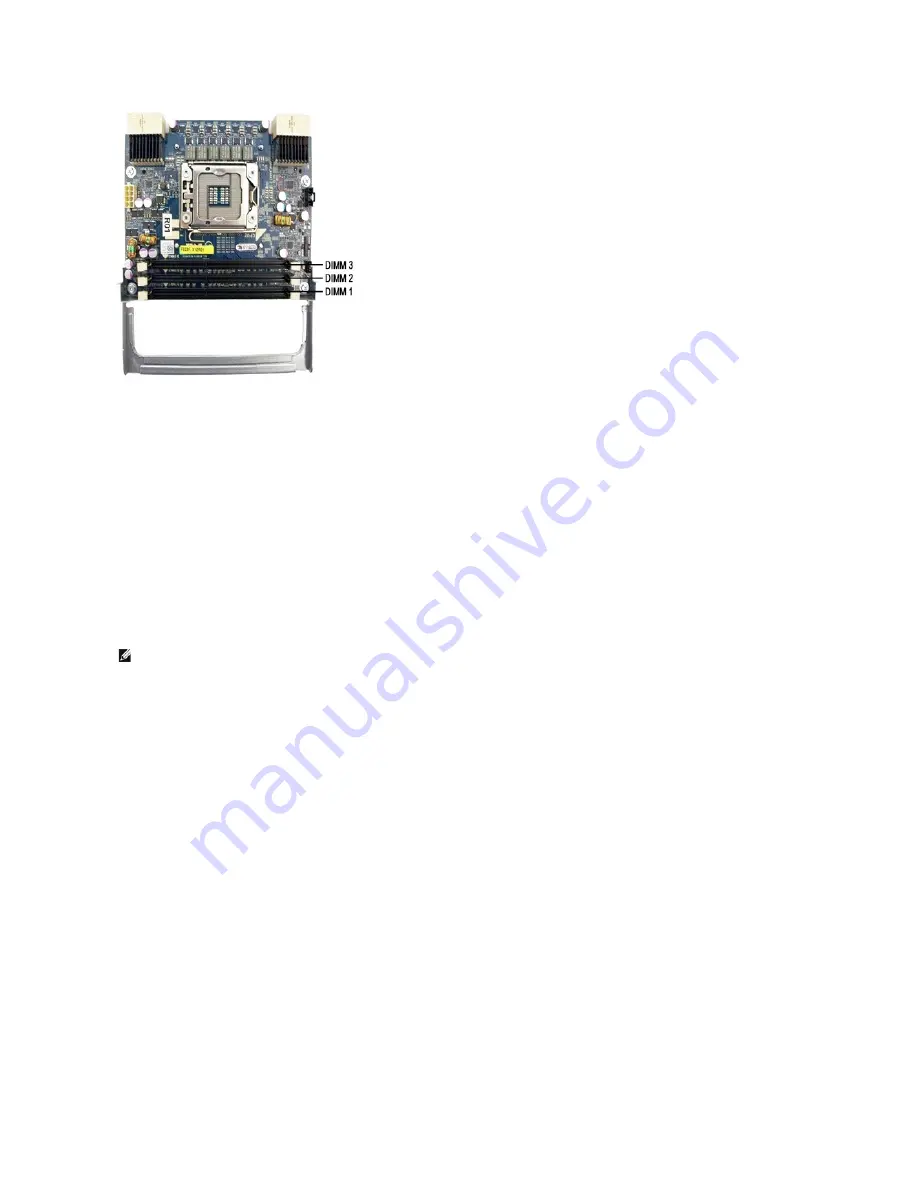
Memory Population Rules
Your computer requires DIMMs within a channel to be populated starting with the DIMMs farthest from the processor first. This means the DIMM slots 1, 2 and
3 must be populated before DIMM slots 4, 5 and 6. In addition, when populating a Quad-rank DIMM with a Single- or Dual-rank DIMM in the same channel, the
Quad-rank DIMM must be populated farthest from the CPU.
To maximize available memory bandwidth, DIMMs within a configuration should generally be spread across as many channels as possible before populating
multiple DIMMs per channel. The population guidelines below help to achieve this.
Single CPU configurations (6 DIMM slots on MB)
l
If configuration contains DIMMs of all the same size, populate in the following order: DIMM1, DIMM2, DIMM3, DIMM4, DIMM5, DIMM6
l
If configuration contains DIMMs of mixed sizes, populate the larger DIMMs first. For example, for a 4GB configuration consisting of one 2GB DIMM and two
1GB DIMMs, the population would be DIMM1=2GB, DIMM2=1GB, DIMM3=1GB, DIMM4=empty, DIMM5=empty, DIMM6=empty.
Dual CPU configurations (6 DIMM slots on MB plus 3 DIMM slots on Riser)
l
If configuration contains DIMMs of all the same size, populate in the following order: MB_DIMM1, Riser_DIMM1, MB_DIMM2, Riser_DIMM2, MB_DIMM3,
Riser_DIMM3, MB_DIMM4, MB_DIMM5, MB_DIMM6.
l
If configuration contains DIMMs of mixed sizes, populate the larger DIMMs in the Riser.
NOTE:
If any DIMMs are >30mm tall (possible early 16GB DIMMs), they must be installed on the system board only.
Содержание Precision T5500
Страница 19: ...5 Remove the coin cell from the computer ...
Страница 21: ...4 Remove the cover from the computer ...
Страница 23: ...4 Remove the hard drive bezel ...
Страница 24: ......
Страница 26: ...4 Slide the front bezel toward the top of the computer 5 Remove the front bezel from the computer ...
Страница 27: ......
Страница 29: ...6 Remove the screw that secures the front fan assembly 7 Remove the fan assembly from the computer ...
Страница 30: ......
Страница 33: ...4 Disconnect the power cable from the first hard drive 5 Disconnect the data cable from the first hard drive ...
Страница 35: ......
Страница 37: ...4 Lift and rotate the hard drive tray toward the bottom of the computer ...
Страница 38: ......
Страница 41: ...6 Remove the intrusion switch from the computer ...
Страница 42: ......
Страница 46: ......
Страница 50: ...6 Slide the optical drive out of the front of the chassis and remove from the computer ...
Страница 51: ...5 ...
Страница 54: ...7 Lift the processor cover 8 Lift the processor straight up and remove it from the computer ...
Страница 55: ......
Страница 63: ...16 Remove the dual processor from the dual processor board ...
Страница 64: ......
Страница 68: ......
Страница 74: ...18 Disconnect the optical drive data cable 19 Remove the system board ...
Страница 75: ......
Страница 77: ...4 Pull back the expansion card retention clip 4 Remove the expansion card from the computer ...
Страница 78: ......


