


Installing the air shroud
1. Arrange CPU power cables before installing.
2. Place the shroud into its position.
3. Make sure that the two securing holes of the air shroud is completely inserted into the two holes on the middle fan bracket
and the other latch is fixed on the cooler.
4. Press down the shroud to lock it with a click.
5. Install the
.
After working inside your computer
.
Memory
Removing the memory module
Before working inside your computer
.
2. Remove the following:
a.
b.
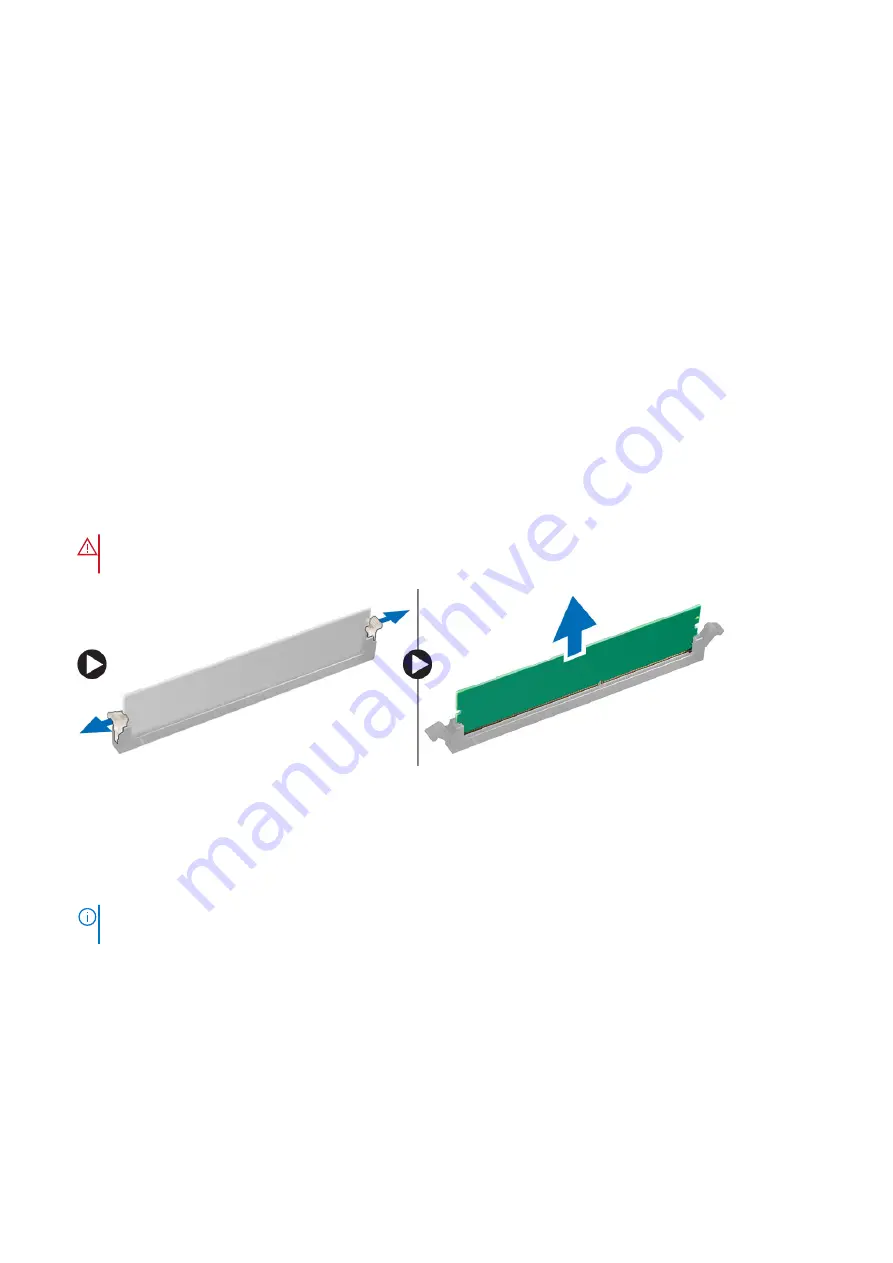
3. Press the memory module retention tabs on each side of the memory module.
4. Lift the memory module out of the memory slot on the system board.
WARNING:
Rotating the memory module out of the slot will cause damage to the memory module. Ensure to
pull it straight out of the memory module slot.
Installing the memory module
1. Align the notch on the memory module with the tab on the memory module connector.
2. Insert the memory module into the memory module slot.
3. Press the memory module firmly until the retention tabs click into place.
NOTE:
Do not pull the retention levers up. Always press down firmly on the module until the levers lock into place
unassisted.
4. Install the:
a.
b.
After working inside your computer
52
Removing and installing components
Содержание Precision 5820 Tower
Страница 22: ...b Rotate the bezel forward and lift the front bezel away from the system 22 Removing and installing components ...
Страница 25: ...b Pull the latch to slide the carrier out of the HDD slot Removing and installing components 25 ...
Страница 29: ...b Pull the latch to slide the carrier out of the HDD slot Removing and installing components 29 ...
Страница 36: ...b Slide the slim ODD out of the system 36 Removing and installing components ...
Страница 38: ...b Lift the bezel from the chassis 38 Removing and installing components ...
Страница 51: ...Removing and installing components 51 ...
Страница 69: ...e Remove the screws that secure the system board to the chassis Removing and installing components 69 ...
Страница 71: ...g Lift the system board up to remove it from the chassis Removing and installing components 71 ...
Страница 75: ...c Lift and remove the RAID controller battery Removing and installing components 75 ...
Страница 76: ...76 Removing and installing components ...
Страница 78: ...78 Removing and installing components ...


