background image

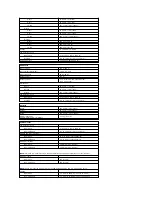
Display 


Option 1: High Definition 

Maximum resolution 

1366 (H) x 768 (V) at 262K colors 

Typical brightness 

220 nits 

Refresh rate 

60 Hz 

Viewing angle 


       Horizontal


40 degrees/40 degrees 

       Vertical


15 degrees/30 degrees 

Pixel pitch 

0.250 mm x 0.250 mm 

Option 2: High Definition and Wide View Anti-Glare 

Maximum resolution 

1600 (H) x 900 (V) at 262K colors 

Typical brightness 

250 nits 

Refresh rate 

60 Hz 

Viewing angle 


       Horizontal


55 degrees/55 degrees 

       Vertical


45 degrees/45 degrees 

Pixel pitch 

0.216 mm x 0.216 mm 

Option 3: Full High Definition 

Maximum resolution 

1920 (H) x 1080 (V) at 262K colors  

Maximum brightness 

300 nits 

Refresh rate 

60 Hz 

Viewing angle 


       Horizontal


55 degrees/55 degrees 

       Vertical


45 degrees/45 degrees 

Pixel pitch 

0.179 mm x 0.179 mm 

Type and size 

396.24 mm (15.6 inch) diagonal TFT with white LED 
backlight 

Active area (X/Y) 

344.2 mm x 193.5 mm (13.55 inches x 7.61 inches) 

Dimensions 

Height 

210 mm (8.26 inches) 

Width 

360 mm (14.17 inches) 

Diagonal 

417 mm (16.41 inches) 

Keyboard 


Number of keys 

United States: 83 keys 
Europe: 84 keys 
Japan: 87 keys 

Layout 

QWERTY/AZERTY/Kanji 

Backlit keyboard 

yes 

Touchpad 


Active area 


X-axis 

80 mm (3.15 inches) 

Y-axis 

45 mm (1.77 inches) 

Battery 


Type 

6-cell "smart" lithium ion (60 WHr) 
3-year life-time 9-

cell "smart" lithium ion (81 WHr)


9-cell "smart" lithium ion (90 WHr) 
12-cell "smart" lithium ion (88 WHr) 

Charge time with computer off 

6-,9-cell 

 approximately 1 hour to 80% capacity and 

2 hours to 100% capacity. 
12-cell 

 approximately 3 hours 20 minutes to 100% 

capacity. 

Operating time 

battery operating time varies depending on operating 
conditions and can significantly reduce under certain 
power-intensive conditions. 

Life span 

approximately 300 charge/discharge cycles 

Dimensions 


Depth 


       6

-cell 

206.00 mm (8.11 inches) 

       9

-cell 

208.00 mm (8.18 inches) 

       12

-cell 

14.48 mm (0.57 inch) 

Height 


Содержание Latitude E6510

Страница 1: ...ray Disc is a trademark of the Blu ray Disc Association Microsoft Windows Windows Vista and the Windows Vista start button are either trademarks or registered trademarks of Microsoft Corporation in the United States and or other countries Adobe the Adobe logo and Adobe Flash Player are trademarks of Adobe Systems Incorporated Other trademarks and trade names may be used in this document to refer t...

Страница 2: ... computer 4 Lift the access panel up and away from the computer Replacing the Access Panel To replace the access panel perform the above steps in reverse order Back to Contents Page WARNING Before working inside your computer read the safety information that shipped with your computer For additional safety best practices information see the Regulatory Compliance Homepage at www dell com regulatory...

Страница 3: ... from the computer Replacing the Battery To replace the battery perform the above steps in reverse order Back to Contents Page WARNING Before working inside your computer read the safety information that shipped with your computer For additional safety best practices information see the Regulatory Compliance Homepage at www dell com regulatory_compliance NOTE You may need to install Adobe Flash Pl...

Страница 4: ...rd 13 Remove the wireless local area network WLAN card 14 Remove the heat sink and fan assembly 15 Remove the Processor 16 Remove the palm rest assembly 17 Remove the Bluetooth card 18 Remove the Express Card Board 19 Remove the SD Media Board 20 Remove the I O Port Card Replacing the Bottom Chassis Assembly To replace the bottom chassis assembly perform the above steps in reverse order Back to Co...

Страница 5: ...t sequence without changing the boot sequence permanently in the system setup To access the Boot menu 1 Turn on or restart your computer 2 When the blue DELL logo is displayed press F12 immediately Navigation Keystrokes Use the following keystrokes to navigate System Setup screens System Setup Menu Options The following tables describe the menu options for the System Setup program CAUTION Unless y...

Страница 6: ...S2 and ECP Serial Port Allows you to avoid resource conflicts between devices by disabling or remapping the address of the port The options are Disabled COM1 COM2 COM3 and COM4 SATA Operation Allows you to configure the operating mode of the internal SATA hard drive controller The options are Disabled ATA and AHCI Miscellaneous Devices Allows you to enable or disable the following devices l Intern...

Страница 7: ...ges to the setup option are permitted when an administrator password is set If disabled the setup option is locked by the admin password It cannot be modified unless setup is unlocked Setup is unlocked when there is no admin password or when the admin password has been entered When enabled the device setting can be modified even when other setup options are locked by the admin password Default set...

Страница 8: ...only when the operating system supports Simple Boot Flag Default setting Minimal Intel Fast Call for Help Used in conjunction with iAMT 4 0 Allows you to initiate contact with a management console while residing outside of the corporate infrastructure i e remote location behind a firewall or NAT etc Use the check box to enable disable this feature Default setting Disabled Virtualization Support Op...

Страница 9: ...e as well as the name of the event Power Events Allows you to view and clear power events It includes the date and time of the event as well as the power state and reason BIOS Progress Events Allows you to view and clear BIOS Progress events It includes the date and time of the event as well as the power state ...

Страница 10: ...rd 10 Disconnect the Bluetooth cable from its connector on the system board and remove the Bluetooth card from the computer 11 Disconnect the Bluetooth cable from the Bluetooth card Replacing the Bluetooth Card To replace the Bluetooth card perform the above steps in reverse order Back to Contents Page WARNING Before working inside your computer read the safety information that shipped with your c...

Страница 11: ...anel 8 Disconnect the data cable from the camera and microphone and remove lift the camera and microphone up and away from the display panel Replacing the Camera and Microphone To replace the camera and microphone perform the above steps in reverse order Back to Contents Page WARNING Before working inside your computer read the safety information that shipped with your computer For additional safe...

Страница 12: ... Lift the coin cell battery up and away from the computer Replacing the Coin Cell Battery To replace the coin cell battery perform the above steps in reverse order Back to Contents Page WARNING Before working inside your computer read the safety information that shipped with your computer For additional safety best practices information see the Regulatory Compliance Homepage at www dell com regula...

Страница 13: ...sink and fan assembly 15 Remove the processor 16 Remove the palm rest assembly 17 Remove the Bluetooth card 18 Remove the ExpressCard board 19 Remove the SD card board 20 Remove the system board 21 Remove the I O port card 22 Release the DC in port from its routing guides on the chassis 23 Lift the DC In port up and remove it from the chassis Replacing the DC In Port To replace the DC In port perf...

Страница 14: ...conds If no lights appear the battery is in good condition and more than 80 percent of its original charge capacity remains Each light represents incremental degradation If five lights appear less than 60 percent of the charge capacity remains and you should consider replacing the battery Keyboard Status Lights The green lights located above the keyboard indicate the following LED Error Codes The ...

Страница 15: ...installed remove one and test Try the other module in the same slot and test Test the other slot with both modules 3 Replace the memory 4 Replace the system board OFF FLASH FLASH Modem error 1 Reseat the modem 2 Replace the modem 3 Replace the system board FLASH FLASH FLASH System board error 1 Replace the system board FLASH FLASH OFF Option ROM error 1 Reseat the device 2 Replace the device 3 Rep...

Страница 16: ... screws that secure the ExpressCard board to the system board 11 Disconnect the ExpressCard board from the system board and remove it from the computer Replacing the ExpressCard Board To replace the ExpressCard board perform the above steps in reverse order Back to Contents Page WARNING Before working inside your computer read the safety information that shipped with your computer For additional s...

Страница 17: ...xpressCard To replace the ExpressCard perform the above steps in reverse order Back to Contents Page WARNING Before working inside your computer read the safety information that shipped with your computer For additional safety best practices information see the Regulatory Compliance Homepage at www dell com regulatory_compliance NOTE You may need to install Adobe Flash Player from Adobe com in ord...

Страница 18: ...ata cable and disconnect it from the system board 8 Push the fingerprint reader from the back of the computer to remove the fingerprint reader from the computer Replacing the Fingerprint Reader To replace the fingerprint reader perform the above steps in reverse order Back to Contents Page WARNING Before working inside your computer read the safety information that shipped with your computer For a...

Страница 19: ...ew that secures the face plate to the hard drive 6 Pull out the face plate to remove it from the hard drive Replacing the Hard Drive To replace the hard drive perform the above steps in reverse order Back to Contents Page WARNING Before working inside your computer read the safety information that shipped with your computer For additional safety best practices information see the Regulatory Compli...

Страница 20: ...r of the computer and then slide the heat sink and fan assembly out of the computer 7 Remove the screws that secure the fan to the heat sink 8 Remove the fan from the heat sink Replacing the Heat Sink and Fan Assembly To replace the heat sink and fan assembly perform the above steps in reverse order Back to Contents Page WARNING Before working inside your computer read the safety information that ...

Страница 21: ...sink and fan assembly 15 Remove the processor 16 Remove the palm rest assembly 17 Remove the Bluetooth card 18 Remove the ExpressCard board 19 Remove the system board 20 Remove the screw labeled I that secures the I O board to the computer 21 Remove the screws that secure the I O board to the computer 22 Remove the I O board from the computer Replacing the I O Board To replace the I O board perfor...

Страница 22: ...he keyboard at an angle and slide it out of the computer Replacing the Keyboard To replace the keyboard perform the above steps in reverse order Back to Contents Page WARNING Before working inside your computer read the safety information that shipped with your computer For additional safety best practices information see the Regulatory Compliance Homepage at www dell com regulatory_compliance NOT...

Страница 23: ...e Latitude ON Flash card out of its connector on the system board Replacing the Latitude ON Flash Card To replace the Latitude ON Flash card perform the above steps in reverse order Back to Contents Page WARNING Before working inside your computer read the safety information that shipped with your computer For additional safety best practices information see the Regulatory Compliance Homepage at w...

Страница 24: ...at secure the display assembly to the computer 8 Disconnect and release the antenna cables from wireless wide area network WWAN card 9 Remove the screws that secure the display assembly to the computer 10 Lift the display assembly up and away from the computer Replacing the Display Assembly To replace the display assembly perform the above steps in reverse order Back to Contents Page WARNING Befor...

Страница 25: ...nside out from the display assembly 7 Remove the bezel from the display assembly Replacing the Display Bezel To replace the display bezel perform the above steps in reverse order Back to Contents Page WARNING Before working inside your computer read the safety information that shipped with your computer For additional safety best practices information see the Regulatory Compliance Homepage at www ...

Страница 26: ... Remove the display panel 8 Remove the camera and microphone Replacing the Display Cover To replace the display cover perform the above steps in reverse order Back to Contents Page WARNING Before working inside your computer read the safety information that shipped with your computer For additional safety best practices information see the Regulatory Compliance Homepage at www dell com regulatory_...

Страница 27: ...uter 6 Slide the left and right hinge covers toward the back of the computer and remove them from the computer Replacing the Hinge Covers To replace the hinge covers perform the above steps in reverse order Back to Contents Page WARNING Before working inside your computer read the safety information that shipped with your computer For additional safety best practices information see the Regulatory...

Страница 28: ...e screw that secures the display hook to the display panel 7 Remove the display hook from the display panel Replacing the Display Hook To replace the display hook s perform the above steps in reverse order Back to Contents Page WARNING Before working inside your computer read the safety information that shipped with your computer For additional safety best practices information see the Regulatory ...

Страница 29: ...able from the display panel 10 Remove the display panel from the display assembly 11 Remove the screws on either sides of the display panel to release the display brackets 12 Remove the display brackets from the display panel Replacing the Display Panel To replace the display panel perform the above steps in reverse order Back to Contents Page WARNING Before working inside your computer read the s...

Страница 30: ...de facing up and remove the LED cover from the computer Replacing the LED Cover To replace the LED cover perform the above steps in reverse order Back to Contents Page WARNING Before working inside your computer read the safety information that shipped with your computer For additional safety best practices information see the Regulatory Compliance Homepage at www dell com regulatory_compliance NO...

Страница 31: ...sor 16 Remove the palm rest assembly 17 Remove the Bluetooth card 18 Remove the ExpressCard board 19 Remove the SD card board 20 Remove the system board 21 Remove the I O board 22 Release the modem cable from its routing guides at the bottom of the computer 23 Release the modem cable from its routing guides inside the computer 24 Lift the modem connector up and away from the computer Replacing the...

Страница 32: ...puter Replacing the Modem Port Plug To replace the modem port plug slide the modem port plug back into the modem port Back to Contents Page WARNING Before working inside your computer read the safety information that shipped with your computer For additional safety best practices information see the Regulatory Compliance Homepage at www dell com regulatory_compliance NOTE You may need to install A...

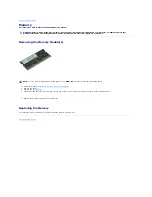
Страница 33: ...e memory module pops up 5 Remove the memory module from the connector Replacing the Memory To replace the memory modules s perform the above steps in reverse order Back to Contents Page WARNING Before working inside your computer read the safety information that shipped with your computer For additional safety best practices information see the Regulatory Compliance Homepage at www dell com regula...

Страница 34: ... Disconnect the modem cable from the modem and remove the modem from the computer Replacing the Modem To replace the modem perform the above steps in reverse order Back to Contents Page WARNING Before working inside your computer read the safety information that shipped with your computer For additional safety best practices information see the Regulatory Compliance Homepage at www dell com regula...

Страница 35: ...ve from the computer 4 Slide the optical drive out of the computer Replacing the Optical Drive To replace the optical drive perform the above steps in reverse order Back to Contents Page WARNING Before working inside your computer read the safety information that shipped with your computer For additional safety best practices information see the Regulatory Compliance Homepage at www dell com regul...

Страница 36: ... computer with a contactless Smart Card reader you must disconnect the RFID cable 12 Release the palm rest from the computer a Starting from the back of the computer lift the right side of the palm rest to release it from the computer b Gently pull the palm rest forward and flip the palm rest over 13 Disconnect the HAL sensor cable from the system board 14 Remove the palm rest from the computer Re...

Страница 37: ...Area Network WWAN Card Heat Sink and Fan Assembly Display Assembly Display Hook Camera and Microphone Palm Rest Assembly Bluetooth Card ExpressCard Board I O Board Modem Connector Secure Digital SD card Smart Card PCMCIA Card Hard Drive Keyboard Memory Hinge Covers Modem Port Plug Wireless Local Area Network WLAN Card Latitude ON Flash Card Processor Display Bezel Display Panel Display Cover PCMCI...

Страница 38: ... PCMCIA card from the computer 4 Slide the PCMCIA card out of the computer Replacing the PCMCIA Card To replace the PCMCIA card perform the above steps in reverse order Back to Contents Page WARNING Before working inside your computer read the safety information that shipped with your computer For additional safety best practices information see the Regulatory Compliance Homepage at www dell com r...

Страница 39: ... 13 Remove the screws that secure the PCMCIA card cage to the chassis 14 Press down the PCMCIA card cage and lift it by the edge to release the PCMCIA card cage from the securing tabs 15 Remove the PCMCIA card cage from the computer Replacing the PCMCIA Card Cage To replace the PCMCIA card cage perform the above steps in reverse order Back to Contents Page WARNING Before working inside your comput...

Страница 40: ...rocessor To replace the processor perform the above steps in reverse order Back to Contents Page WARNING Before working inside your computer read the safety information that shipped with your computer For additional safety best practices information see the Regulatory Compliance Homepage at www dell com regulatory_compliance NOTE You may need to install Adobe Flash Player from Adobe com in order t...

Страница 41: ...ct the SD card data cable from the system board 11 Remove the screw that secures the SD card board to the computer 12 Lift the SD card board up and away from the computer Replacing the SD Card Board To replace the SD card board perform the above steps in reverse order Back to Contents Page WARNING Before working inside your computer read the safety information that shipped with your computer For a...

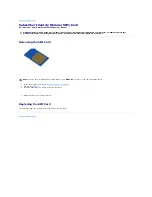
Страница 42: ...the SD Card To replace the SD card perform the above steps in reverse order Back to Contents Page WARNING Before working inside your computer read the safety information that shipped with your computer For additional safety best practices information see the Regulatory Compliance Homepage at www dell com regulatory_compliance NOTE You may need to install Adobe Flash Player from Adobe com in order ...

Страница 43: ...ide the SIM card out of the computer Replacing the SIM Card To replace the SIM card perform the above steps in reverse order Back to Contents Page WARNING Before working inside your computer read the safety information that shipped with your computer For additional safety best practices information see the Regulatory Compliance Homepage at www dell com regulatory_compliance NOTE You may need to in...

Страница 44: ...Smart Card To replace the Smart Card perform the above steps in reverse order Back to Contents Page WARNING Before working inside your computer read the safety information that shipped with your computer For additional safety best practices information see the Regulatory Compliance Homepage at www dell com regulatory_compliance NOTE You may need to install Adobe Flash Player from Adobe com in orde...

Страница 45: ...z Processor Types Intel Core i5 series Intel Core i7 series L2 cache Intel Core i5 520M 540 M Dual Core 3 MB Intel Core i7 620M Dual Core 4 MB Intel Core i7 720QM Quad Core 6 MB Intel Core i7 820QM Quad Core 8 MB Intel Core i7 920XM Quad Core Extreme 8 MB External bus frequency 1333 MHz Memory Type DDR3 Speed 1066 MHz or 1333 MHz NOTE Intel Core i5 and i7 dual core and Intel Core i7 quad core proc...

Страница 46: ... MiniSD MicroSD SDIO Contactless Smart Cards Optional Supported Smart Cards and Technologies ISO14443A 106 kbps 212 kbps 424 kbps and 848 kbps ISO14443B 106 kbps 212 kbps 424 kbps and 848 kbps ISO15693 HID iClass FIPS201 NXP Desfire Fingerprint Reader Optional Type swipe fingerprint sensor FIPS 140 2 FIPS 201 Ports and Connectors Audio microphone connector stereo headphone speakers connector Video...

Страница 47: ...LED backlight Active area X Y 344 2 mm x 193 5 mm 13 55 inches x 7 61 inches Dimensions Height 210 mm 8 26 inches Width 360 mm 14 17 inches Diagonal 417 mm 16 41 inches Keyboard Number of keys United States 83 keys Europe 84 keys Japan 87 keys Layout QWERTY AZERTY Kanji Backlit keyboard yes Touchpad Active area X axis 80 mm 3 15 inches Y axis 45 mm 1 77 inches Battery Type 6 cell smart lithium ion...

Страница 48: ...inches Temperature range Operating 0 C to 35 C 32 F to 95 F Storage 40 C to 65 C 40 F to 149 F Physical Depth 253 30 mm 9 97 inches Height 29 10 mm 1 14 inches Width 374 30 mm 14 73 inches Weight minimum with HD panel and 6 cell battery 2 73 kg 6 00 lb Environmental Temperature range Operating 0 C to 35 C 32 F to 95 F Non operating 40 C to 65 C 40 F to 149 F Relative humidity maximum Operating 10 ...

Страница 49: ...Back to Contents Page ...

Страница 50: ...mbly 16 Remove the ExpressCard board 17 Remove the Bluetooth card 18 Release the cable tab and disconnect the SD media board cable from the system board 19 Remove the screws that secure the system board to the chassis 20 Disconnect the system board from I O board and flip the system board over s 21 Disconnect the DC in cable from the system board 22 Remove the system board from the chassis Replaci...

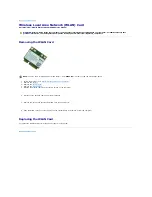
Страница 51: ...move the screw that secures the WLAN card to the computer 8 Slide the WLAN card out of its connector on the system board and remove it from the computer Replacing the WLAN Card To replace the WLAN card perform the above steps in reverse order Back to Contents Page WARNING Before working inside your computer read the safety information that shipped with your computer For additional safety best prac...

Страница 52: ...the Regulatory Compliance Homepage at www dell com regulatory_compliance CAUTION Many repairs may only be done by a certified service technician You should only perform troubleshooting and simple repairs as authorized in your product documentation or as directed by the online or telephone service and support team Damage due to servicing that is not authorized by Dell is not covered by your warrant...

Страница 53: ...n them off After Working Inside Your Computer After you complete any replacement procedure ensure you connect any external devices cards and cables before turning on your computer 1 Connect any external devices such as a port replicator battery slice or media base and replace any cards such as an ExpressCard 2 Connect any telephone or network cables to your computer 3 Replace the battery 4 Connect...

Страница 54: ...system board 6 Slide the WWAN card out of its connector on the system board and remove it from the computer Replacing the WWAN Card To replace the WWAN card perform the above steps in reverse order Back to Contents Page WARNING Before working inside your computer read the safety information that shipped with your computer For additional safety best practices information see the Regulatory Complian...

Отзывы: