NOTE:
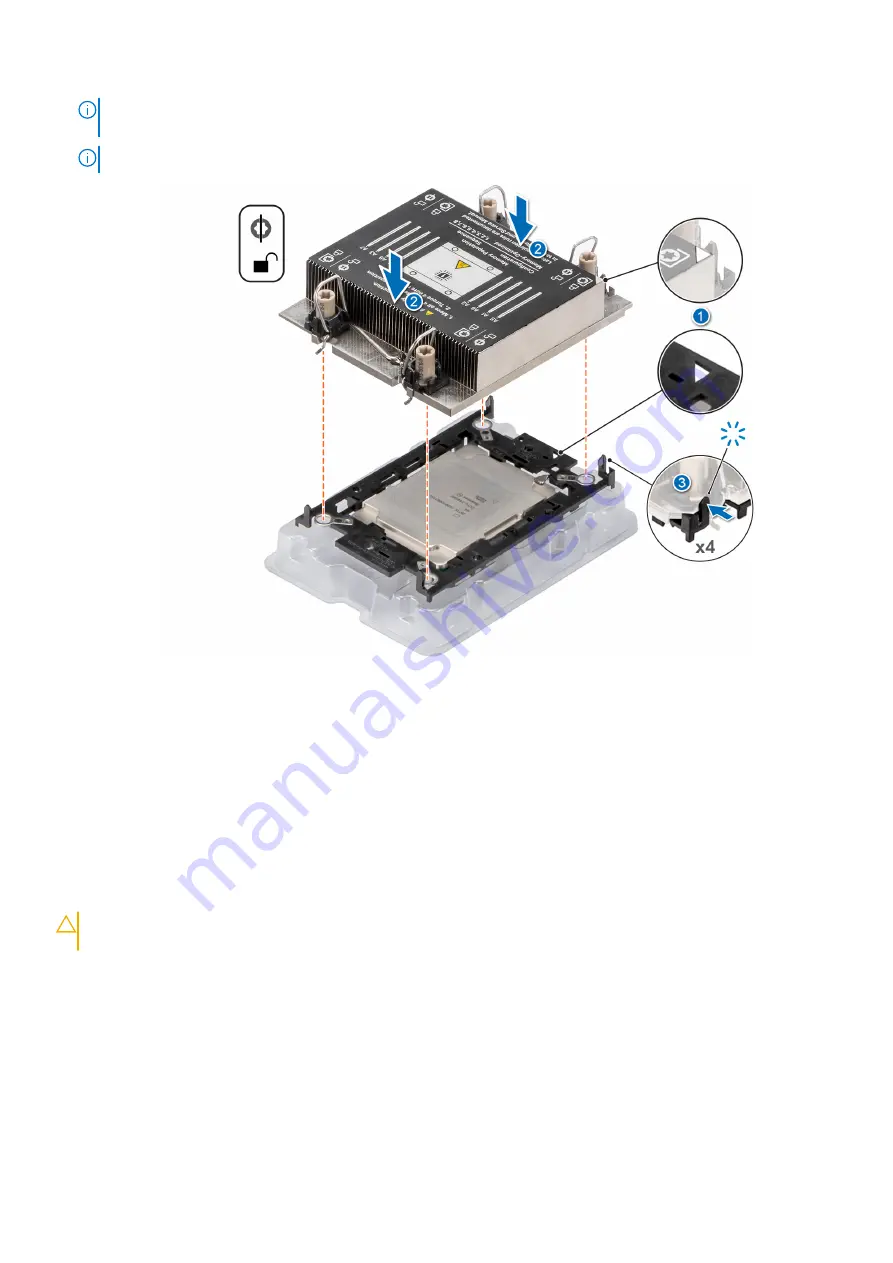
Ensure that the pin 1 indicator on the heat sink is aligned with the pin 1 indicator on the carrier before placing the
heat sink onto the processor carrier.
NOTE:
Ensure latching features on processor carrier and heat sink are aligned during assembly.
Figure 67. Installing the heat sink onto the processor
Next steps
1.
Install the processor and heat sink module
.
2.
.
3. Follow the procedure listed in
After working inside your system
.
Installing the processor and heat sink module
Prerequisites
CAUTION:
Never remove the heat sink from a processor unless you intend to replace the processor. The heat
sink is necessary to maintain proper thermal conditions.
●
Follow the safety guidelines listed in the
.
●
Follow the procedure listed in
Before working inside your system
●
.
●
If installed, remove the processor dust cover.
Steps
1. Set the Anti-Tilt wires to the unlocked position on the heat sink (inward position).
2. Align the pin 1 indicator of the heat sink to the system board, and then place the processor and heat sink on the processor
socket.
64
Installing and removing system components
Содержание EMC XC Core XC6520
Страница 1: ...Dell EMC XC Core XC6520 Installation and Service Manual December 2021 ...
Страница 19: ...Figure 22 System tasks Processor 1 heat sink and BOSS SATA M 2 Dell EMC XC Core XC6250 Overview 19 ...
Страница 41: ...Figure 40 Removing an expansion card from riser 2 Installing and removing system components 41 ...
Страница 44: ...Figure 44 Removing the expansion card filler bracket for riser 2 44 Installing and removing system components ...


