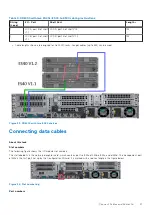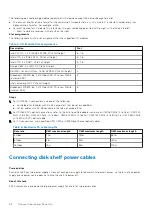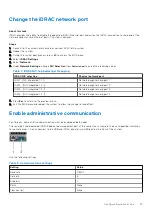
Table 8. Communications settings (continued)
Setting
Value
Emulation
VT-100
Establish a serial connection
1. Connect the DB-9 cable to the serial port on the back panel of the system (#2 in the figure above).
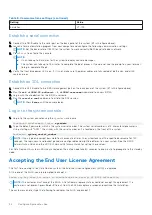
2. Launch a terminal emulation program from your computer and configure the following communication settings:
NOTE:
Set the baud rate to 115200 for the system to work correctly; 9600 baud rate does not work.
3. Press
Enter
to activate the console.
NOTE:
●
It can take up to 5 minutes for the system to display console messages.
●
The system can take up to 15 minutes to complete the boot process. If you do not see the prompt on your terminal
to log in, complete Step 4.
4. Verify the front blue power LED is on. If it is not, make sure the power cables are fully seated at both ends, and all AC
sources are on.
Establish an SOL connection
1. Connect the RJ-45 cable to the iDRAC management port on the back panel of the system (#1 in the figure above).
2. Run the
ssh <iDRAC-IP-address> -l <iDRAC-username>
command to access iDRAC
3. Log in with the credentials for the iDRAC username.
4. Run the
console com2
command to initiate the SOL session.
NOTE:
Press
Enter
until the console loads.
Log in to the system console
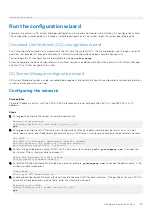
1. Log in to the system console using the
sysadmin
username.
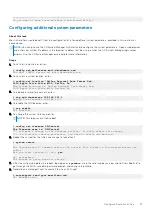
localhost.localdomain login:
sysadmin
2. Type the default password, which is the system serial number. The system serial number is a 14-character alphanumeric
string starting with "APM." The sticker with the serial number on it is located on the front of the system.
Password:
system_serial_number
NOTE:
If you type an incorrect password four consecutive times, the system locks out the specified username for 120
seconds. The login count and lockout period are configurable and might be different on your system. See the
DDOS
Administration Guide
and the
DDOS Command Reference Guide
for setting these values.
For Data Domain HA systems, SSH keys created on the active node take 30 seconds to one minute to propagate to the standby
node.
Accepting the End User License Agreement
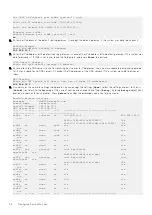
The first time you log in to a Data Domain system, the End User License Agreement (EULA) is displayed.
At the end of the EULA, you are prompted to accept it:
Press any key then hit enter to acknowledge the receipt of EULA information
NOTE:
The customer must accept the EULA. A Data Domain representative should not accept this agreement. If a
customer is not present, press
Ctrl-C
to exit from the EULA acceptance screen and continue the installation.
The customer can later type the following to redisplay the EULA and accept it:
34
Configure System for Use


