


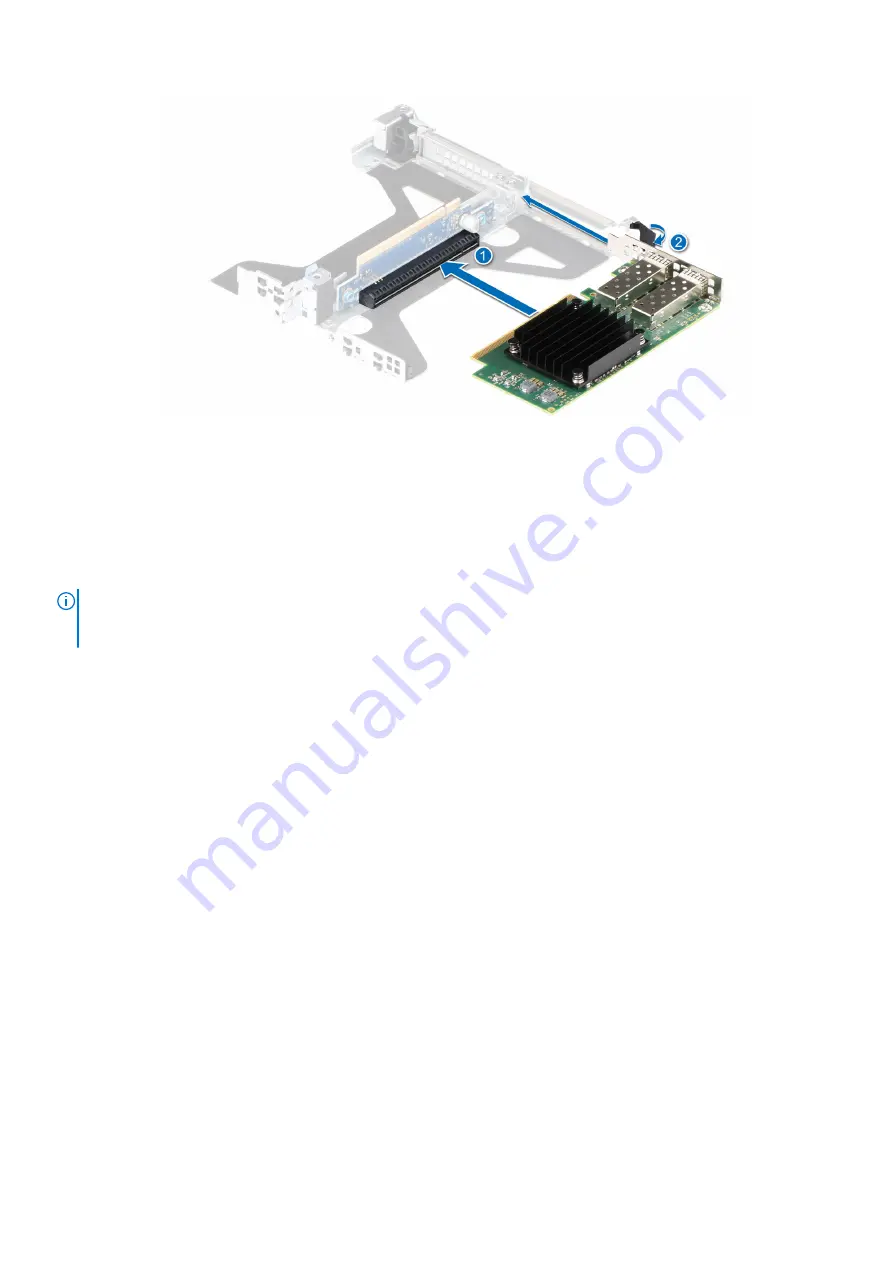
Figure 92. Installing an expansion card into a Riser 2c
Next steps
1. If applicable, connect the cables to the expansion card.
2.
.
3. Follow the procedure listed in
After working inside your system
on page 26.
4. Install any device drivers required for the card as described in the documentation for the card.
NOTE:
While replacing faulty storage controller, FC, or NIC card with the same type of card, after you power on the
system; the new card automatically updates to the same firmware and configuration of the faulty one. For more information
about the Part replacement configuration, see the
Lifecycle Controller User's Guide
at
https://www.dell.com/idracmanuals
.
Drive cage
This is a service technician replaceable part only.
Removing the 2.5-inch rear drive cage
Prerequisites
1. Follow the safety guidelines listed in
.
2. Follow the procedure listed in
Before working inside your system
.
4.
.
5. Disconnect the cables from the rear drive cage.
Steps
1. Using a Phillips #2 screwdriver, loosen the blue thumbscrew that secures the rear drive cage to the system.
2. Slide the rear drive cage towards the front of the chassis and lift it away from the system.
Installing and removing system components
93


