Dell E176FPc
11
User Preset
'User Preset': Use the plus and minus buttons to increase or decrease each of the
three colors (R, G, B) independently, in single digit increments, from '0' to '100'.
NOTE:
'
Color temperature
'
is a measure of the 'warmth' of the image colors
(red/green/blue). The two available presets ('Blue' and 'Red') favor blue and red
accordingly. Select each one to see how each range suits your eye; or utilize the
'User Preset' option to customize the color settings to your exact choice.
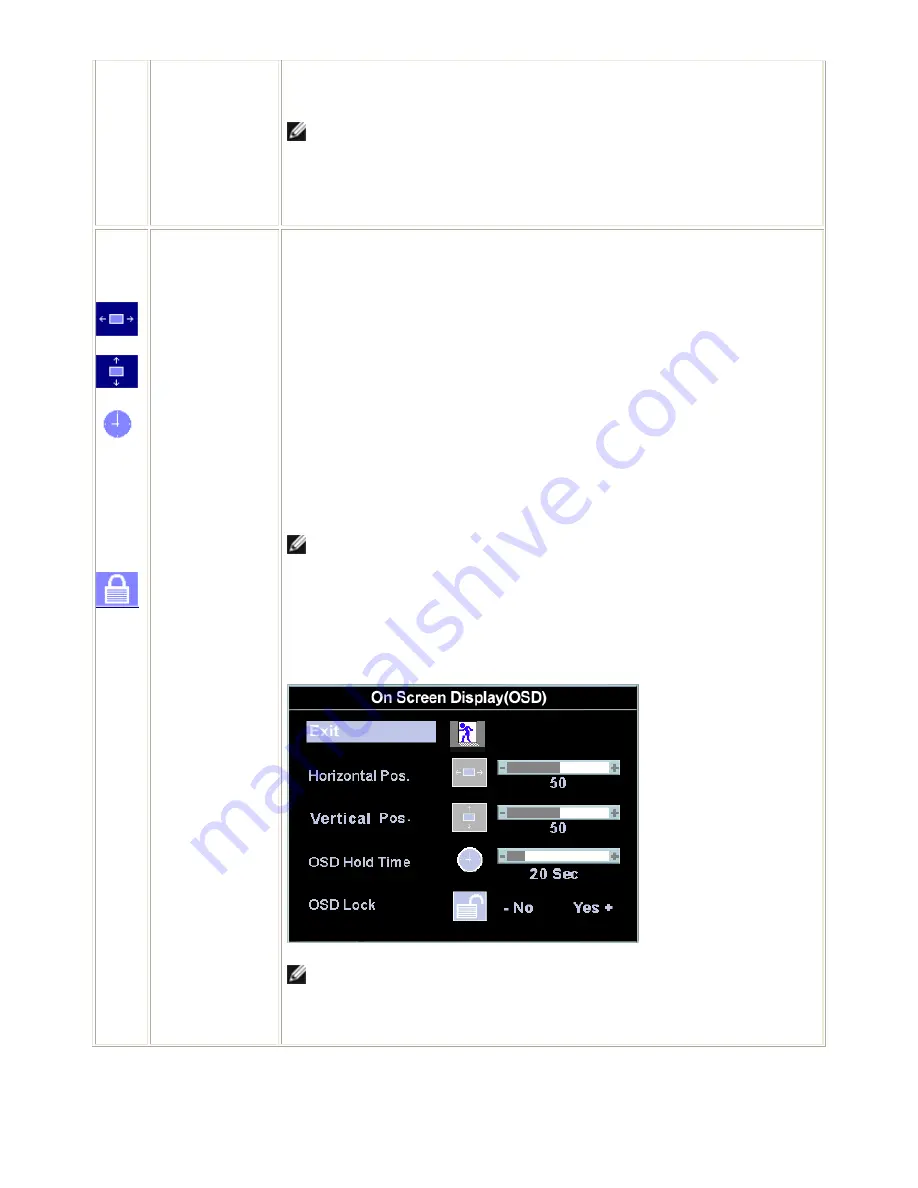
OSD Settings:
Each time the OSD opens, it displays in the same location on the screen. 'OSD
Settings' (horizontal/vertical) provides control over this location.
Horizontal Position - and + buttons move OSD to the left and right.
Vertical Position
- and + buttons move OSD down and up.
OSD Hold Time:
The OSD stays active for as long as it is in use.
'OSD Hold Time': Sets the length of time the OSD will remain active after the last time
you pressed a button.
Use the - and + buttons to adjust the slider in 5 second increments, from 5 to 60
seconds.
NOTE: Default 'OSD hold time' is 20 seconds.
OSD Lock
'OSD Lock': Controls user access to adjustments. When 'Yes' (+) is selected, no user
adjustments are allowed. All buttons are locked except the menu button.
All buttons can be locked or unlocked press the 'Menu' button for over 15 seconds. to
unlock the OSD 'Menu'.
NOTE: When the OSD is locked, pressing the
'
Menu
'
button will take the user
directly to the
'
OSD settings
'
menu, with 'OSD Lock' preselected on entry. Select
'
No
'
(-) to unlock and allow user access to all applicable settings.
Содержание E176FPc
Страница 16: ...Dell E176FPc 16 4 4 2 Optical Characteristics For LM170E01 TLB3 TLB4 panel ...
Страница 17: ...Dell E176FPc 17 Optical Characteristics For CLAA170EA07 panel ...
Страница 18: ...18 5 Block Diagram 5 1 Monitor Exploded View ...
Страница 19: ...19 5 2 Software Flow Chart 1 2 N Y 5 Y N 10 Y N 12 Y N 7 Y N 6 4 3 8 9 14 11 13 Y N 15 Y N 16 17 19 Y N 18 ...
Страница 22: ...Dell E176FPc 22 5 3 2 Inverter Power Board ...
Страница 35: ......
Страница 36: ...Dell E176FPc 36 8 PCB Layout 8 1 Main Board ...
Страница 37: ...Dell E176FPc 37 ...
Страница 38: ...Dell E176FPc 38 8 2 Inverter Power Board ...
Страница 39: ...Dell E176FPc 39 ...
Страница 40: ...Dell E176FPc 40 8 3 Key Board ...
Страница 52: ...Dell E176FPc 52 b Click the Select Chip button and choose the type you re going to program ...
Страница 53: ...Dell E176FPc 53 c Click the Select Bank0 button and selecting a file which a binary Format required ...
Страница 54: ...Dell E176FPc 54 d Select the communication Setting Port Name e Click the ConNect button ...
Страница 71: ...Dell E176FPc 71 ...


