background image

33

ENglIsh

use high‑speed steel twist drill bits or hole saws. Use a 
cutting lubricant when drilling metals. The exceptions 
are cast iron and brass which should be drilled dry. For 
MASONRY, such as brick, cement, cinder block, etc., use 
carbide‑tipped bits rated for percussion drilling.

3.  Always apply pressure in a straight line with the bit. Use 

enough pressure to keep drill biting, but do not push 
hard enough to stall the motor or deflect the bit.

4.  Hold tool firmly with both hands to control the twisting 

action of the drill. If model is not equipped with side 
handle, grip drill with one hand on the handle and one 
hand on the battery pack.


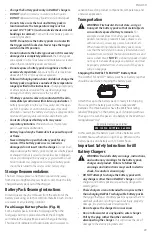
WARNING:

 Drill may stall if overloaded causing a 

sudden twist. Always expect the stall. Grip the drill 
firmly to control the twisting action and avoid injury.

5.  IF DRILL STALLS, it is usually because it is being 

overloaded or improperly used. RELEASE TRIGGER 
IMMEDIATELY, remove drill bit from work, and determine 
cause of stalling. DO NOT depress TRIGGER ON AND OFF 
IN AN ATTEMPT TO START A STALLED DRILL — THIS CAN 
DAMAGE THE DRILL.

6.  To minimize stalling or breaking through the material, 

reduce pressure on drill and ease the bit through the last 
fractional part of the hole.

7.  Keep the motor running when pulling the bit back out of 

a drilled hole. This will help prevent jamming.

8.  With variable speed drills there is no need to center 

punch the point to be drilled. Use a slow speed to start 
the hole and accelerate by squeezing the trigger harder 
when the hole is deep enough to drill without the bit 
skipping out.

Drilling in Metal

An SDS plus

®

 to round shank adaptor chuck is required. 

Ensure that tool is in drill‑only mode. Start drilling with slow 
speed and increase to full power while applying firm pressure 
on the tool. A smooth even flow of metal chips indicates 
the proper drilling rate. Use a cutting lubricant when drilling 
metals. The exceptions are cast iron and brass which should 
be drilled dry.

NoTE: 

Large (5/16" to 1/2" [7.9 mm to 12.7 mm]) holes in 

steel can be made easier if a pilot hole (5/32" to 3/16" [4 mm 
to 4.8 mm]) is drilled first.

Drilling in Wood

An SDS plus

®

 to round shank adaptor chuck is required. 

Ensure that tool is in drill‑only mode. Start drilling with slow 
speed and increase to full power while applying firm pressure 
on the tool. Holes in wood can be made with the same twist 
drills used for metal. These bits may overheat unless pulled 
out frequently to clear chips from the flutes. For larger holes, 
use spade bits, power auger bits, or hole saws. Work that is 
apt to splinter should be backed up with a block of wood.

Drilling in Masonry

When drilling in masonry, use carbide‑tipped bits rated for 
percussion drilling and be certain that the bits are sharp. Use 
a constant and firm force on the tool to drill most effectively. 
A smooth, even flow of dust indicates the proper drilling rate.

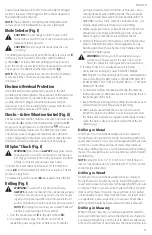
Drilling (Fig. I)


WARNING: 

To reduce the risk of personal injury, 

ALWAYS

 operate the tool with the side handle properly 

installed. Failure to do so may result in the side handle 
slipping during tool operation and subsequent loss of 
control. Hold tool with both hands to maximize control.

NOTICE: 

If drilling thin material, use a wood “back‑up” 

block to prevent damage to the material.

1.  Turn the mode selector 

 5 

 to the drill symbol 

 16 

.

2.  Use sharp drill bits only. For Wood, use twist bits, 

spade bits, power auger bits or hole saws. For Metal, 

SDS plus® Chuck (Fig. J)


WARNING:

 Burn Hazard. 

ALWAYS

 wear gloves when 

changing bits. Accessible metal parts on the tool and 
bits may get extremely hot during operation. Small bits 
of broken material may damage bare hands.

To insert bit, insert shank of bit about 3/4" (19 mm) into 
chuck 

 14 

. Push and rotate bit until it locks in place. The bit 

will be securely held.
To release bit, pull the sleeve 

 15 

 back and remove the bit.

Shocks – Active Vibration Control (Fig. A)

For best vibration control, hold the tool with one hand on the 
main handle 

 6 

 and the other hand on the side handle 

 1 

Apply just enough pressure so the SHOCKS 

 10 

 in the rear 

handle are halfway depressed. The hammer only needs 
enough pressure to engage the internal active vibration 
control. Applying too much pressure will not make the tool 
drill faster and active vibration control will not engage.

Electronic Overload Protection

If the drill bit becomes jammed, the power to the drill 
spindle will be interrupted by the activation of the electronic 
overload protection. To reactivate the power to the drive 
spindle, the tool's trigger should be released and then 
depressed. Due to the resulting forces, always hold the tool 
with both hands and take a firm stance.

Mode Selector (Fig. I)


CAUTION:

 Do not change to drill or hammerdrill 

mode with a chisel bit in the chuck. Personal injury and 
damage to tool may result.


CAUTION:

 Never change the mode while the unit 

is running.

For drilling (non‑percussion) push the mode selector lever 

 5 


in the up position until the line aligns with the drill bit 
symbol 

 16 

. For rotary hammer drilling (with percussion) 

push the mode selector lever in the down position until the 
line aligns to the drill bit and hammer symbol 

 17 

.

NoTE: 

The mode selector lever must be in drill or hammer 

mode at all times. There are no operable positions 
in between.

and will automatically turn off 20 seconds after the trigger 
switch is released. If the trigger switch remains depressed, 
the worklight will remain on.

NoTE: 

The worklight is for lighting the immediate work 

surface and is not intended to be used as a flashlight.

Содержание DCH172

Страница 1: ...m www DeWALT com br Questions See us on the World Wide Web at www DeWALT com DCH172 Martillo Rotatorio Compacto SDS plus 20 V Máx Martelete Rotativo 20 V Máx Compact SDS plus 20V Max Compact SDS plus Rotary Hammer Manual de Instrucciones Manual de Instruções Instruction Manual ...

Страница 2: ...Español traducido de las instrucciones originales 4 Português traduzido das instruções originais 15 English original instructions 26 ...

Страница 3: ...pagado 5 Palanca de selector de modo 6 Manija principal 7 Luz de trabajo 8 Paquete de batería 9 Botón de liberación de batería 10 AMORTIGUADORES Control activo de vibración 11 Gancho utilitario 12 Punto de conexión Lanyard Ready Componentes 1 Empunhadura lateral 2 Vareta de ajuste de profundidade 3 Interruptor do gatilho 4 Botão de controle de avanço e recuo botão de trava 5 Alavanca seletora de m...

Страница 4: ... 74 charged 50 cargada 50 carregado 50 charged La batería tiene que cargarse O pacote deve ser recarregado Pack needs to be charged Indicador Indicadoras Indicators Unidad en Proceso de Carga Carregando Charging Unidad Cargada Completamente carregado Fully Charged Restraso por Unidad Caliente Fría Atraso quente frio Hot Cold Pack Delay ...

Страница 5: ...3 Fig J Fig L Fig H Fig K Fig M Fig I 12 4 7 15 14 16 5 17 ...

Страница 6: ... Un momento de descuido mientras se opera una herramienta eléctrica puede provocar lesiones personales graves b Utilice equipos de protección personal Siempre utilice protección para los ojos En las condiciones adecuadas el uso de equipos de protección ADVERTENCIAS GENERALES DE SEGURIDAD PARA HERRAMIENTAS ELÉCTRICAS ADVERTENCIA Lea todas las advertencias de seguridad instrucciones ilustraciones y ...

Страница 7: ...la batería puede provocar irritación o quemaduras e No use un paquete de batería o herramienta que estén dañados o modificados Las baterías dañadas como máscaras para polvo calzado de seguridad antideslizante cascos o protección auditiva reducirá las lesiones personales c Evite el encendido por accidente Asegúrese de que el interruptor esté en la posición de apagado antes de conectarlo a la fuente...

Страница 8: ...imiento pueden causar lesiones No golpee las brocas atascadas con un martillo para sacarlas Los fragmentos de metal o virutas de material podrían desprenderse y causar lesiones Instrucciones de Seguridad Adicionales para Rotomartillos Use protección para los oídos La exposición al ruido puede causar pérdida de audición Use la s manija s auxiliar es si se suministra con la herramienta La pérdida de...

Страница 9: ...entar el riesgo de incendio Si el contenido de la batería entra en contacto con la piel lave de inmediato el área con jabón suave y agua Si el líquido de la batería entra en los ojos enjuague con agua sobre el ojo abierto durante 15 minutos o hasta que desaparezca la irritación Si se necesita atención BATERÍAS Y CARGADORES El paquete de batería no está completamente cargado cuando se retira del ca...

Страница 10: ...nera el paquete de batería es de 120 Watts hora médica el electrólito de la batería está compuesto por una mezcla de carbonatos orgánicos líquidos y sales de litio El contenido de las celdas de batería abiertas puede causar irritación respiratoria Proporcione aire fresco Si los síntomas persisten busque atención médica El líquido de la batería puede ser inflamable si se expone a chispas o llamas N...

Страница 11: ...tizo de metal o un remolque sin aislamiento 2 Si la batería no se carga correctamente a Verifique la operación del receptáculo conectando una lámpara u otro aparato Los hilos del alargador deben ser de un calibre apropiado para su seguridad Mientras menor sea el calibre del hilo mayor la capacidad del cable Es decir un hilo calibre 16 tiene mayor capacidad que uno de 18 Un cable de un calibre insu...

Страница 12: ...a el cordón lejos del área de corte de la herramienta Conexión de Cordón Fig A L Accesorio opcional Advertencias de seguridad específicas para uso en lugares elevados ADVERTENCIA Si se deja caer la herramienta por cualquier razón se debe revisar la conexión del cordón y recibir servicio adecuadamente antes de volver a usarla La conexión de cordón está diseñada para estirarse para absorber el impac...

Страница 13: ...aquete de batería fuera de la manija de la herramienta Insértelo en el cargador como se describe en la sección de cargador de este manual OPERACIÓN ADVERTENCIA Para reducir el riesgo de lesiones personales apague la unidad y retire el paquete de batería antes de realizar cualquier ajuste o retirar instalar conexiones o accesorios Una activación de arranque accidental puede causar lesiones Gancho U...

Страница 14: ...e modo hacia abajo hasta que la línea se alinee con la broca y el símbolo del martillo 17 NOTA La palanca selectora de modo debe estar en modo taladro o martillo en todo momento No hay posiciones operativas intermedias Selector de Modo Fig I ATENCIÓN No cambie al modo de taladro o rotomartillo con una broca de cincel en el mandril Se pueden producir lesiones personales y daños a la herramienta ATE...

Страница 15: ...e un lubricante de corte cuando perfore metales Las excepciones son hierro fundido y latón que se deben perforar en seco Para MAMPOSTERÍA como ladrillo cemento bloques de hormigón etc use brocas con punta de carburo para perforación de percusión 3 Siempre aplique presión en línea recta con la broca Use suficiente presión para mantener la broca perforando pero no presione demasiado para ahogar el m...

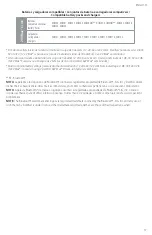
Страница 16: ...ngar la vida útil de las herramientas y los accesorios Consulte a su distribuidor para obtener más información acerca de los sistemas de extracción de polvo adecuados Capacidades Máximas de Corte RPM 0 1060 BPM 4980 Brocas perforación de mampostería 5 32 3 8 rango óptimo de perforación Accesorios ADVERTENCIA Debido a que no se han probado con este producto otros accesorios que no sean los que ofre...

Страница 17: ...trial ou proteção de audição deve ser usado nas condições apropriadas para reduzir ferimentos corporais c Evite um acionamento acidental da ferramenta Se certifique que o disjuntor está na posição de desligado antes de ligar a energia elétrica e ou o conjunto de baterias levantar ou transportar a ferramenta Transportar ferramentas elétricas com ADVERTÊNCIAS GERAIS DE SEGURANÇA DE FERRAMENTAS ELÉTR...

Страница 18: ...por fornecedores de serviços autorizados seu dedo no disjuntor ou ligar a energia ferramentas elétricas ligadas pode resultar em acidentes d Remova chaves de ajuste ou chaves fixas antes de ligar a ferramenta Se deixar uma chave de ajuste ou chave ligada a uma peça móvel da ferramenta elétrica pode resultar em injúrias pessoais e Não a sobrecarregue Mantenha sempre o equilíbrio e o apoio para os p...

Страница 19: ...sar perigo de alguém tropeçar ou de cair Algumas ferramentas com conjunto de bateria ficam de pé em cima do conjunto de bateria mas podem facilmente cair Instruções Adicionais de Segurança para Marteletes Rotativos Use protetores auriculares A exposição a ruídos pode causar perda auditiva Use a s empunhadora s auxiliar es se fornecida s com a ferramenta A perda de controle da ferramenta pode causa...

Страница 20: ...r Instruções de Limpeza do Conjunto de Baterias Pode remover sujeira e graxa do exterior do conjunto de baterias usando um pano ou uma escova não metálica macia Não use água nem soluções de limpeza LEIA TODAS AS INSTRUÇÕES Instruções de Segurança Importantes para Todos os Conjuntos de Baterias ATENÇÃO Leia todas as advertências instruções e todas as marcações preventivas do conjunto de baterias ca...

Страница 21: ... interno excessivo Posicione o carregador bem afastado de qualquer fonte de aquecimento O carregador é ventilado através das aberturas na parte superior e inferior do invólucro Instruções de Segurança Importantes para Todos os Carregadores de Baterias ATENÇÃO Leia todas as advertências instruções e todas as marcações preventivas do conjunto de baterias carregador e produto O não respeito as advert...

Страница 22: ... tomada de CA antes de limpar Sujeira e graxa podem ser removidas do exterior do carregador usando um pano ou uma escova não metálica macia Não use água nem soluções de limpeza Não opere o carregador com um fio ou plugue danificado Substitua os imediatamente Não opere o carregador se esse sofreu uma pancada forte caiu ou se está danificado de outra forma Entregue a um centro de assistência técnica...

Страница 23: ...ionado somente em alguns modelos e tem de ser instalado por um centro de serviços autorizado Conexão do Cordão de Segurança Fig A L Acessório opcional Avisos específicos de segurança para uso em altura ATENÇÃO Se a ferramenta for derrubada por qualquer motivo a conexão do cordão de segurança deve ser inspecionada e receber a devida manutenção antes de ser reutilizada O cordão de segurança foi proj...

Страница 24: ...justes ou remover instalar fixações ou acessórios Um acionamento acidental pode causar ferimentos corporais Gancho de Ferramentas Fig E ATENÇÃO Para reduzir o risco de lesões corporais sérias use SOMENTE o gancho de ferramentas para pendurar a ferramenta em um cinto de trabalho NÃO use o gancho de ferramentas para amarrar ou segurar a ferramenta a uma pessoa ou a um objeto durante o uso NÃO suspen...

Страница 25: ...a o pino aproximadamente 3 4 19 mm no mandril 14 Empurre e gire a broca até que trave no lugar Então a broca está fixa firmemente Para soltar a broca puxe a luva 15 para trás e retire a broca Shocks Controle de Vibração Ativo Fig A Para melhor controle de vibração segure a ferramenta com uma mão na empunhadura principal 6 e a outra mão na empunhadura lateral 1 Aplique pressão suficiente para que o...

Страница 26: ... Certifique se de que a ferramenta esteja no modo perfuração apenas Inicie a perfuração com velocidade lenta e aumente para carga total enquanto aplica pressão firmemente sobre ferramenta Um fluxo macio e uniforme de lascas de metal indicam uma perfuração apropriada Use um lubrificante de lâminas ao furar metais As exceções são o ferro fundido e latão que devem ser perfurados a seco NOTA Furos gra...

Страница 27: ...anutenção e ajustes incluindo inspeção e substituição de escovas devem ser feitos por um centro de serviços de fábrica DeWALT ou um centro de serviços DeWALT autorizado Use apenas peças de reposição idênticas A DeWALT possui uma das maiores Redes de Serviços do País Ligue 0800 7034644 ou consulte nosso site www dewalt com br para saber qual é a mais próxima de sua localidade ...

Страница 28: ...n personal injury e Do not overreach Keep proper footing and balance at all times This enables better control of the power tool in unexpected situations f Dress properly Do not wear loose clothing or jewelry Keep your hair clothing and gloves away from moving parts Loose clothes jewelry or long hair can be caught in moving parts GENERAL POWER TOOL SAFETY WARNINGS WARNING Read all safety warnings i...

Страница 29: ...e providers g If devices are provided for the connection of dust extraction and collection facilities ensure these are connected and properly used Use of dust collection can reduce dust related hazards h Do not let familiarity gained from frequent use of tools allow you to become complacent and ignore tool safety principles A careless action can cause severe injury within a fraction of a second 4 ...

Страница 30: ... could result WARNING ALWAYS use safety glasses Everyday eyeglasses are NOT safety glasses Also use face or dust mask if cutting operation is dusty ALWAYS WEAR CERTIFIED SAFETY EQUIPMENT ANSI Z87 1 eye protection CAN CSA Z94 3 ANSI S12 6 S3 19 hearing protection NIOSH OSHA MSHA respiratory protection WARNING Some dust created by power sanding sawing grinding drilling and other construction activit...

Страница 31: ...er liquids DO NOT allow water or any liquid to enter battery pack Do not store or use the tool and battery pack in locations where the temperature may reach or exceed 104 F 40 C such as outside sheds or metal buildings in summer For best life store battery packs in a cool dry location NOTE Do not store the battery packs in a tool with the trigger switch locked on Never tape the trigger switch in t...

Страница 32: ...ery pack does not charge properly a Check operation of receptacle by plugging in a lamp or other appliance Make sure that the cord is located so that it will not be stepped on tripped over or otherwise subjected to damage or stress Do not use an extension cord unless it is absolutely necessary Use of improper extension cord could result in risk of fire electric shock or electrocution When operatin...

Страница 33: ... ready attachment kit is intended for use by competent personnel who are trained and knowledgeable Lanyard Connection Fig A L Optional Accessory Safety Warnings Specific for Use At Height WARNING If the tool is dropped for any reason the lanyard connection must be inspected and properly serviced prior to re use The lanyard connection is designed to stretch to absorb the shock of a drop Any permane...

Страница 34: ...klight 7 located on the front of the tool The worklight is activated when the trigger switch is depressed Forward Reverse Control Button Fig A H A forward reverse control button 4 determines the direction of bit rotation and also serves as a lock off button To select forward rotation release the trigger switch 3 and depress the forward reverse control button on the right side of the tool To select...

Страница 35: ...carbide tipped bits rated for percussion drilling and be certain that the bits are sharp Use a constant and firm force on the tool to drill most effectively A smooth even flow of dust indicates the proper drilling rate Drilling Fig I WARNING To reduce the risk of personal injury ALWAYS operate the tool with the side handle properly installed Failure to do so may result in the side handle slipping ...

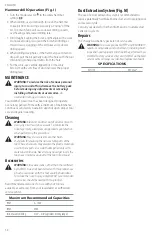
Страница 36: ...nts or other harsh chemicals for cleaning the non metallic parts of the tool These chemicals may weaken the plastic materials used in these parts Use a cloth dampened only with water and mild soap Never let any liquid get inside the tool never immerse any part of the tool into a liquid MAINTENANCE WARNING To reduce the risk of serious personal injury turn unit off and remove the battery pack befor...

Страница 37: ......

Страница 38: ......

Страница 39: ... baterias de lítio íon DeWALT 60V Max combinadas Maximum initial battery voltage measured without a workload is 12 20 60 or 120 volts Nominal voltage is 10 8 18 54 or 108 120V Max is based on using 2 DeWALT 60V Max lithium ion batteries combined BT Bluetooth NOTA La palabra y los logotipos de Bluetooth son marcas registradas propiedad de Bluetooth SIG Inc y DeWALT utiliza dichas marcas bajo licenc...

Страница 40: ... Importado por Black and Decker S A de C V Antonio Dovali Jaime 70 Torre C Piso 8 Col Santa Fé Alvaro Obregón Ciudad de México México C P 01210 Tel 52 55 53267100 R F C BDE8106261W7 Importado por Black Decker do Brasil Ltda Rod BR 050 s n Km 167 Dist Industrial II Uberaba MG Cep 38064 750 CNPJ 53 296 273 0001 91 Insc Est 701 948 711 00 98 S A C 0800 703 4644 Máquinas Y Herramientas Black Decker de...

Отзывы: