


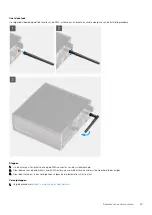
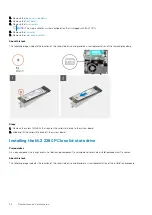

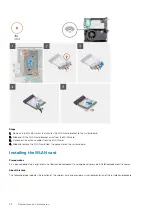


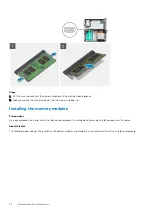


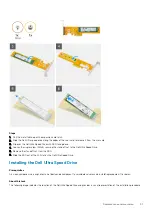

Steps
1. Align the notch on the solid-state drive with the tab on the solid-state drive connector on the system board.
2. Insert the solid-state drive at a 45-degree angle into the solid-state drive connector.
3. Replace the screw (M2x3.5) that secures the M.2 2280 PCIe solid-state drive to the system board.
Next steps
1. Install the
.
2. Install the
.
3. Install the
NOTE:
This step is valid for system configuration that is shipped with 80 W CPU.
4. Install the
5. Install the
6. Install the
.
7. Follow the procedure in
after working inside your computer
.
WLAN-kaart
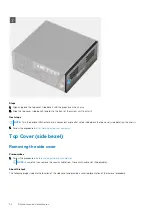
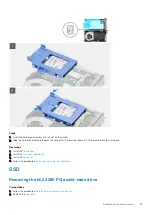
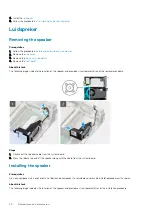
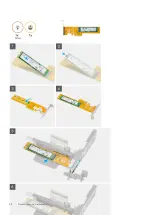
Removing the WLAN card
Prerequisites
1. Follow the procedure in
before working inside your computer
2. Remove the
3. Remove the
.
4. Remove the
.
5. Remove the
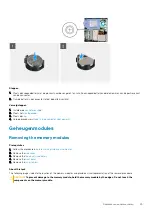
About this task
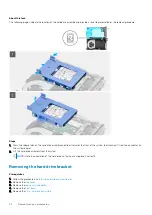
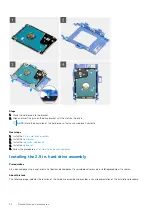
The following images indicate the location of the wireless card and provide a visual representation of the removal procedure.
Demonteren en hermonteren
37
Содержание D16S
Страница 5: ...Hoofdstuk 6 Hulp verkrijgen en contact opnemen met Dell 78 Inhoudsopgave 5 ...
Страница 17: ...3 Belangrijke componenten van uw systeem 17 ...
Страница 18: ...Belangrijke componenten van uw systeem 18 Belangrijke componenten van uw systeem ...
Страница 25: ...Steps 1 Loosen the thumbscrew 6x32 that secures the side cover to the system Demonteren en hermonteren 25 ...
Страница 52: ...52 Demonteren en hermonteren ...
Страница 58: ...Figure 6 Heat sink shipped with system configuration shipped with 65 W CPU 58 Demonteren en hermonteren ...
Страница 65: ...Demonteren en hermonteren 65 ...
Страница 67: ...Demonteren en hermonteren 67 ...


