


Interposer module
Removing the interposer module
Prerequisites
before working inside your computer
.
2. Remove the
.
3. Remove the
4. Remove the
.
5. Remove the
NOTE:
This step is valid for system configuration that is shipped with 80 W CPU.
6. Remove the
.
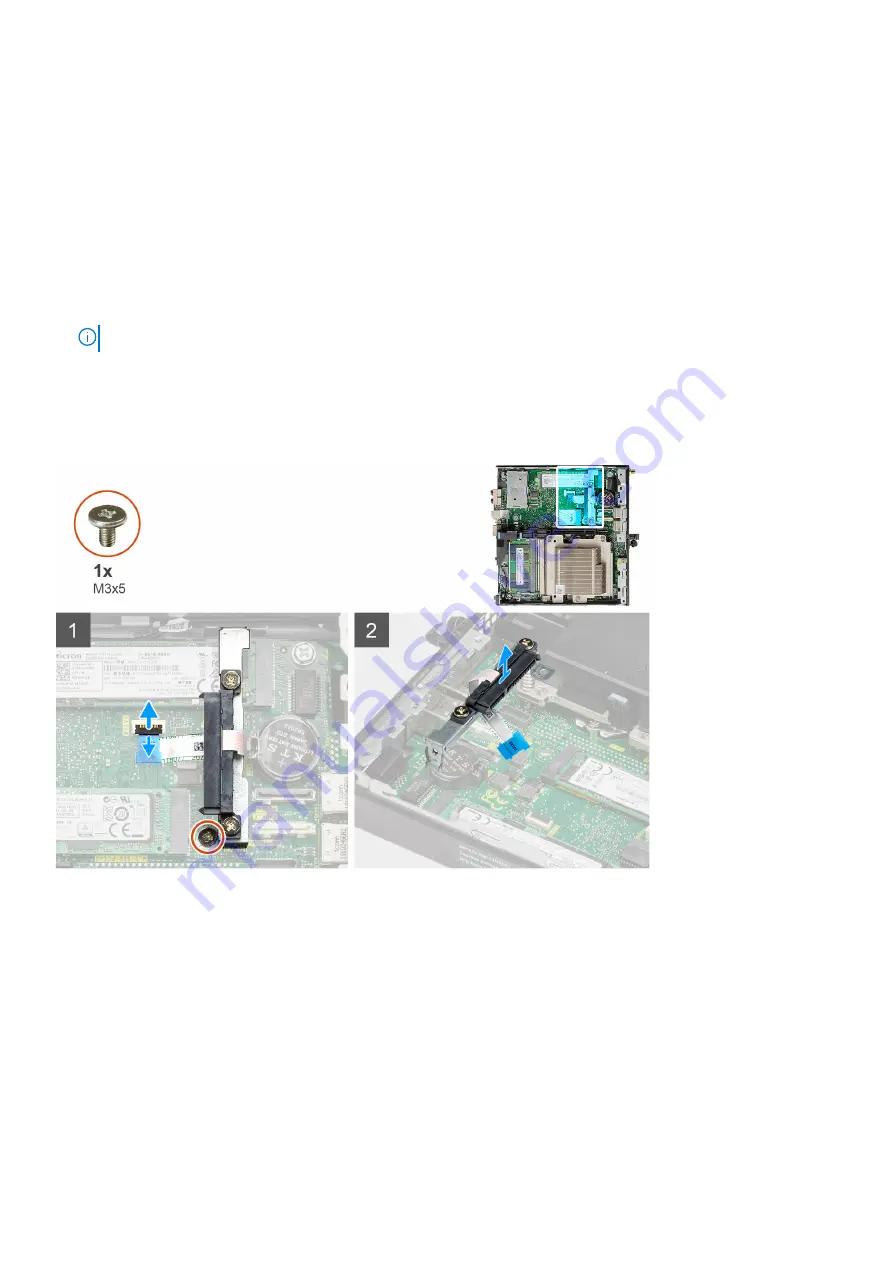
About this task
The following images indicate the location of the interposer module and provide a visual representation of the removal
procedure.
Steps
1. Flip open the actuator and disconnect the SATA FPC cable from the system board.
2. Loosen and remove the single screw (M3x5) securing the interposer module to the system board.
Installing the interposer module
Prerequisites
If you are replacing a component, remove the existing component before performing the installation procedure.
Disassembly and reassembly
63
Содержание D16S
Страница 17: ...3 Major components of your system 17 ...
Страница 18: ...Major components of your system 18 Major components of your system ...
Страница 24: ...Steps 1 Loosen the thumbscrew 6x32 that secures the side cover to the system 24 Disassembly and reassembly ...
Страница 48: ...48 Disassembly and reassembly ...
Страница 59: ...Figure 4 Heat sink shipped with system configuration shipped with 65 W CPU Disassembly and reassembly 59 ...
Страница 61: ...Figure 6 Heat sink shipped with system configuration shipped with 65 W CPU Disassembly and reassembly 61 ...
Страница 68: ...68 Disassembly and reassembly ...
Страница 70: ...70 Disassembly and reassembly ...
Страница 75: ...Disassembly and reassembly 75 ...
Страница 77: ...Disassembly and reassembly 77 ...


