background image

Page 8   


Delkin Devices User’s Manual

2.

Select 

FlashPath MultiMediaCard

 from the product list. 

(See Figure 7)

3.

Click the button labeled Install and follow the on screen instructions. Select

Restart Computer 

after installation is complete. Installation will place a        

Read-

MMC-Flash

 icon on the desktop.

Basic Operation for Macintosh

Make sure no applications other than the Finder are running.  The 

Read-MMC-

FlashPath 

utility is time-critical and is designed for single-task usage.

Before running the

 Read-MMC-FlashPath

 application, 

PC Exchange

 or 

File Exchange

(depending on your computer) in the 

Control Panels

 menu of the 

Apple Menu Items

must be turned off.  They can also be disabled in the 

Extension Manager

.  These

programs may be reactivated when you are done using FlashPath.

1.

Insert a MultiMediaCard into the FlashPath with the gold contacts facing the black
plastic face and away from the metallic cover.  

(See Figure 1).

2.

Double-click on Read-MMC-FlashPath icon. Wait until the menu bar switches
completely to the FlashPath access application.

3.

On the menu bar, go to 

File > “Import from FlashPath…”

.

4.

When prompted, insert the FlashPath, metal side up, into the 3.5” Floppy Disk
Drive of the computer in the direction of the arrow.  

(See Figure 4)

5.

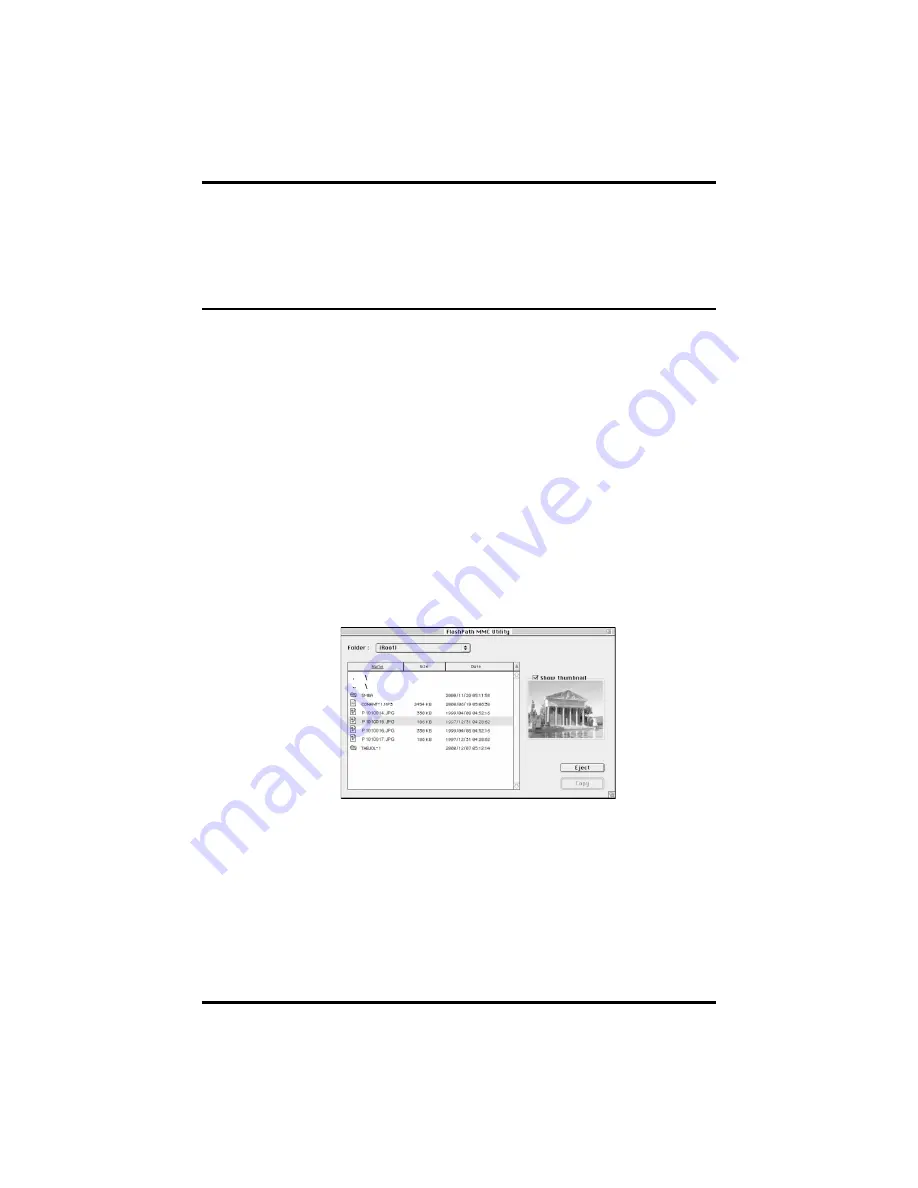
Follow the on screen instructions to open the MultMediaCard window. For digital
photo files: if your camera supports thumbnails, they can be displayed for each
image. 

 (See Figure 8)

Figure 8:

The

MultiMediaCard

window

FlashPath Floppy Adapter for MultiMediaCard        

DDFLSPTH2-AD

6.

Open the appropriate folder to transfer the images you want to your hard drive.
Note: Folders cannot be transferred.  If you intend to transfer All Files, you must
open the folder first.

7.

Select All Files (in a folder) or press and hold the Command key while selecting
only the files you want to transfer.

8.

Click 

Open

 and select the hard drive destination for your images.

9.

Click 

Save

 to transfer your pictures to the selected destination. (See Figure 9)

Note: for cards that contain more than one folder, you can go up one folder level
by selecting the .. \ line.

Содержание FlashPath DDFLSPTH2-AD

Страница 1: ...s Delkin Devices and eFilm are registered trademarks of Delkin Devices Inc All other brand names trademarks and part numbers are the property of their respective owners They are used for identificatio...

Страница 2: ...FlashPath for IBM Compatible PCs 3 PC System Requirements 3 Driver Software Installation for Windows 2000 ME 98 95 NT4 0 3 Basic Operation for Windows 4 FlashPath Utilities for Windows 5 Uninstalling...

Страница 3: ...it is recommended that you test the functionality and compatibility of all of your equipment before attempting to transfer important pictures or files Test the FlashPath with expendable files To conse...

Страница 4: ...s User s Manual Installing new Batteries in FlashPath The FlashPath is packaged with batteries pre installed When the batteries run out replace them with new ones Always replace both batteries at the...

Страница 5: ...d systems Alpha AXP MIPS R4x00 or PowerPC Driver Software Installation for Windows 2000 ME 98 95 NT4 0 Before using the FlashPath you must install the device drivers located on the accompanying CD ROM...

Страница 6: ...s the FlashPath files to the directory C Program Files Smartdisk FlashMMC or FlashPath for SD It is strongly recommended that the files be copied to the default directory Basic Operations for Windows...

Страница 7: ...vated by clicking on the Status Monitor icon in the system tray See Figure 5 Figure 5 The FlashPath Status Monitor Diskette Mode No FlashPath or FlashPath without MultiMediaCard Normal Operation Flash...

Страница 8: ...n 3 Select FlashPath from the program list and click Add Remove Follow the on screen instructions The computer must be rebooted to complete the uninstall Cleaning the FlashPath Remove the FlashPath fr...

Страница 9: ...h won t work in a Floppy Disk Drive installed in the left side expansion bay FlashPath is not compatible with removable floppy drives or external floppy drives serial parallel PC Card or USB FlashPath...

Страница 10: ...ck on Read MMC FlashPath icon Wait until the menu bar switches completely to the FlashPath access application 3 On the menu bar go to File Import from FlashPath 4 When prompted insert the FlashPath me...

Страница 11: ...uption are Unsteady power supply while transferring files such as a low camera battery or improperly connected reader Card removed from reader or camera or any other type of interruption while transfe...

Страница 12: ...t it Recheck that the MultiMedia Card is properly inserted Check that batteries are installed correctly Error writing to the FlashPath or can t format the MultiMedia Card in the FlashPath The batterie...

Страница 13: ...terface Internal 3 5 1 44MB floppy disk drive Transfer Rate Approximately 100 KB s sustained Read 50 KB s sustained Write Batteries CR2016 x2 Lithium Dimensions 90mm W x 94mm L x 3 3mm H Weight 1 23 o...

Страница 14: ...re no express or implied warranties of mer chantability or fitness for a particular purpose Under no circumstances will DDI be liable in any way for any damages including but not limited to lost reven...

Отзывы: