


6
2
wiring the light Fixture
Installation
WARNING:
Turn the power off at the circuit breaker or
fuse. Place tape over the circuit breaker switch and verify
power is off at the light fixture.
NOTE:
Firmly pull on the mounting bracket to verify it is
securely mounted to the junction box. If necessary, use the
screws that were removed from the existing light fixture.
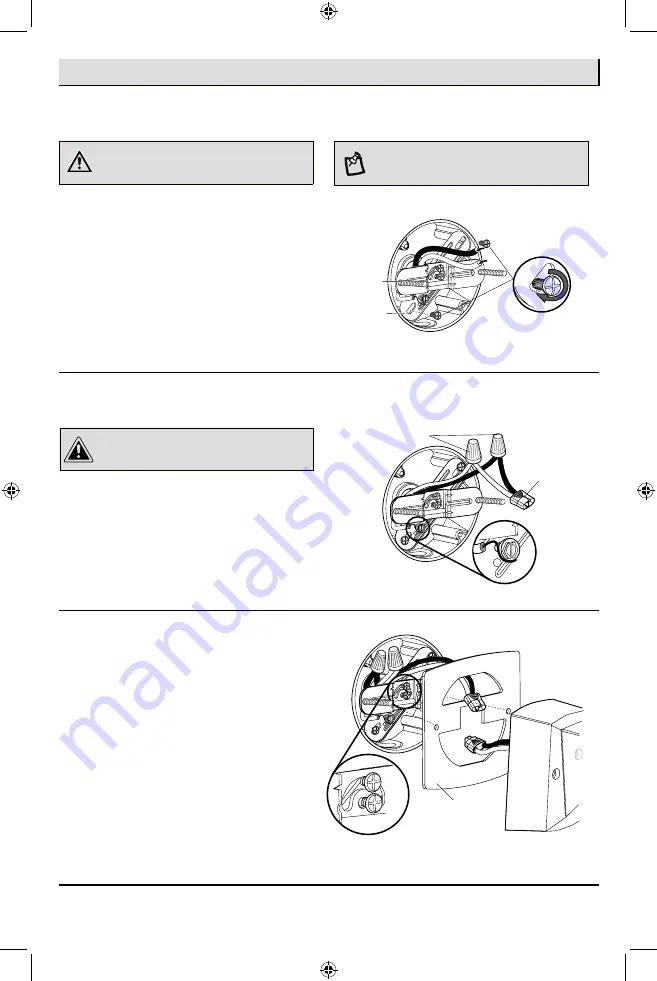
1
installing the Mounting Bracket
□
Remove the existing light fixture.
□
Thread the shorter of the two sets of long
mounting bracket screws (GG) all the way
through the outer mounting bracket from the
back, so the threads come out through the front.
□
Install the mounting bracket to the junction box
by using the screws (EE or FF) and going through
the slots of the rear mounting bracket.
Select the screws (EE or FF) that best fit the holes
of your junction box, or if necessary, reuse the
original screws.
CAUTION:
Do not cut any wires with factory installed
wire connectors or remove the wire connectors.
EE or FF
DD
GG
or
HH
1
AA
BB
3
Attaching the gasket
□
Insert the wires with connector into the junction
box.
□
Attach the gasket (CC) to the mounting bracket.
See final gasket position in the diagram in
section 4 for your reference.
□
Tighten the mounting bracket screws (2).
2
CC
□
Connect the connector wire (BB) to the junction
box wires with wire connectors (AA):
□
White to white
□
Black to black
□
Connect the ground wire to the ground screws (1)
on the mounting bracket, then tighten the ground
screw.
151209-IQA HD-2703-FA.indd 6
9/12/2015 10:18:35 AM