-6-
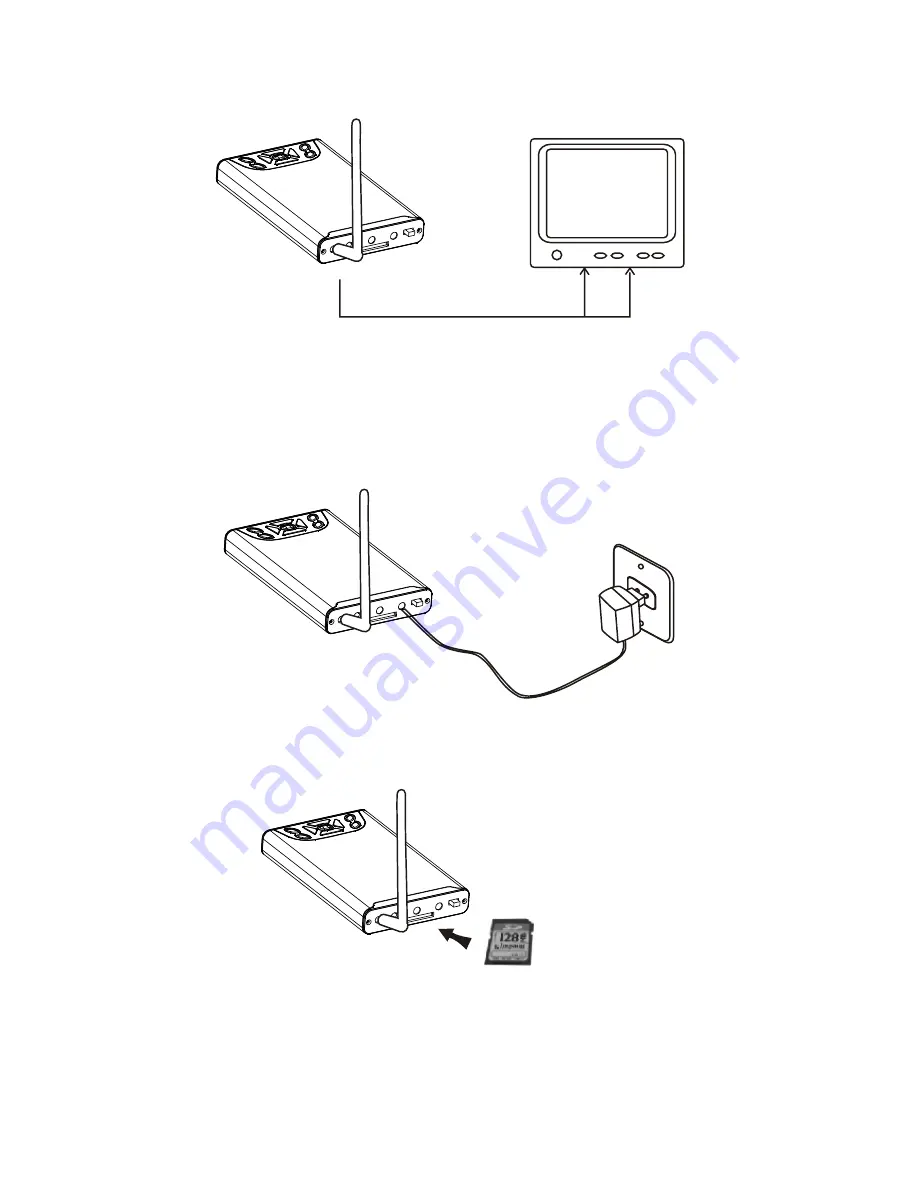
AV Cable
5. Connect the adapter for receiver to the receiver.
4. Connect the receiver to a monitor/TV with AV cable.
6. Please insert SD Card to SD Card Slot of receiver.
Usable capacity:32M-2G
1G-2G recommended
Страница 1: ...2 4GHz Wireless Camera with Detecting Recorder Model No 812BF Operation Guide Version No 1 0 Please read this user Manual carefully before using this product...
Страница 2: ...CONTENTS 1 Overview 2 Features 4 Connection Diagram 3 Packing List 5 Structure 6 Installation 7 Receiver Operation 8 Specifications 9 FCC EU 1 1 2 3 4 5 9 12 Back Cover...
Страница 3: ...is expensive and has to be installed and operated by trained personnel However the wireless SDR harddisk recorder is easy to install and use can be used once the power is connected featuring a set of...
Страница 4: ...z Wireless Camera x 1 2 4GHz Wireless Receiver x 1 Antenna for Receiver x 1 Adapter for Receiver x 1 Adapter for Camera x 1 Video Cable x 2 Camera adapter Camera Receiver adapter Receiver Monitor TV A...
Страница 5: ...3 Structure Camera GP 812T Power Jack Antenna Infrared Lights Lens Universal Bracket...
Страница 6: ...OK Button Down Button Right Button Channel Switch Record Button Channel Indicator Power Indicator Automatic Detection Recording Indicator Menu Button Play Button Receiver 4 Video Out Power ON Off SD C...
Страница 7: ...5 Installation 1 Locate the camera to a specific position and then adjust it to a suitableangle 2 Connect the adapter to the camera 3 Connect the antenna to the receiver...
Страница 8: ...V Cable 5 Connect the adapter for receiver to the receiver 4 Connect the receiver to a monitor TV with AV cable 6 Please insert SD Card to SD Card Slot of receiver Usable capacity 32M 2G 1G 2G recomme...
Страница 9: ...ke sure the protection switch on SD Card is turned on Never touch the metal part of the SD Card with bare hands for static electricity of human body may cause permanent damage to the SD Card Insert or...
Страница 10: ...annel Indicator flashes three times continu ously the channel is channel 3 If the Channel Indicator flashes four times continuously the channel is channel 4 Note The focus of the camera was set clearl...
Страница 11: ...nt Motion Detect ON OFF set up Press OK key to change the setting If you choose ON the receiver can automatically record or capture photos when motion detected If you choose OFF the receiver is only i...
Страница 12: ...s detection location modification windows D Motion Detect Count setup Press OK key to select 1 3 or 5 photos should be taken when motion detected For exa mple if count 3 is selected when motion detect...
Страница 13: ...elect it There are 4 iconsfor options Delete file Delete file Delete a single picture or video Delete all Delete all pictures and videos Format Format SD Card Exit Press to return Delete all Format Ex...
Страница 14: ...S 480MHz 1 1Vpp 0 1Vpp 75 ohm 2G 812BF 7m 45 78 83 mm 217 g Channel Frequency CH1 2 414MHz CH2 2 432MHz CH3 2 450MHz CH4 2 468MHz Actual transmission range may vary according to the weather location i...
Страница 15: ...ctrical products should not be disposed of with household waste Please recycle where facilities exist Check with your Local Authority or retailer for recycling advice The apparatus shall not be expose...