Dazzle Universal TV Photo Show Скачать руководство пользователя страница 42

3-13


 Deleting a photo


You can delete a photo from your memory card.  Once you have done so, it is 
permanently gone, so be sure.   


To delete a photo: 

1.  Select the photo to delete from 

either the thumbnails or when 
viewing it full size.   

2.  Press the 

Delete

 button. 

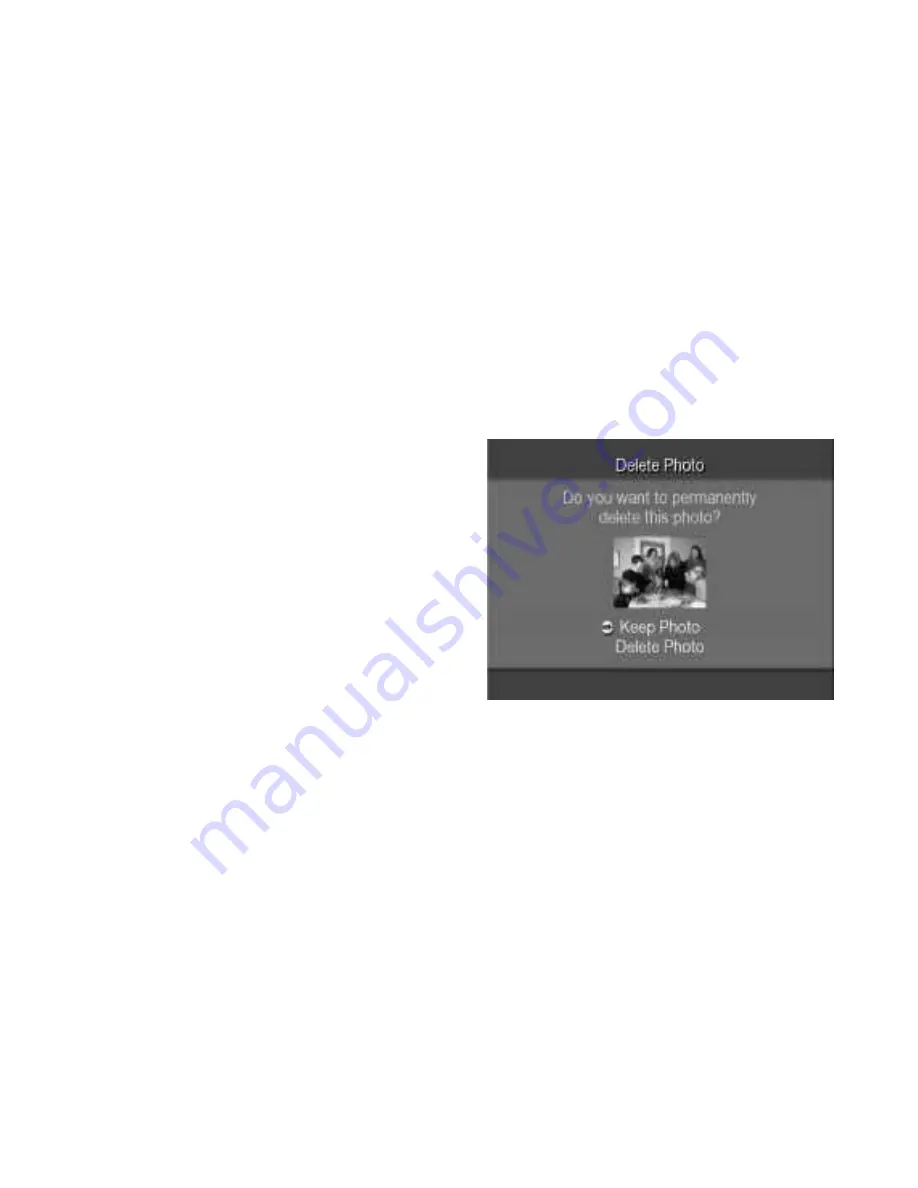
3.  You have one more chance to 

keep your photo.  This screen 
appears, showing the photo that 
you chose, to make sure it is the 
one you want to delete.   

4.  To keep your photo, press the 

Cancel 

button.   To delete it, press the arrow 

button to select “Delete Photo.”  Then press 

OK

Содержание Universal TV Photo Show

Страница 1: ...User sGuide Universal TVPhotoShow...

Страница 2: ...e without the prior written permission of SCM Microsystems Inc CompactFlash is a trademark of SanDisk Corporation Memory Stick is a trademark of Sony Corporation Microdrive is a trademark of Internati...

Страница 3: ...up Universal TV Photo Show 1 2 Turning off Universal TV Photo Show 1 14 Changing the language 1 15 Chapter 2 Viewing Your Photos 2 1 Viewing a slide show 2 2 Setting slide show transition times 2 3 Vi...

Страница 4: ...Deleting a photo 3 13 Viewing information about a photo 3 14 Chapter 4 Working with Your Memory Card 4 1 Changing Removing your card 4 2 Formatting your memory card 4 3 Reclaiming memory card space 4...

Страница 5: ...dable 6 3 Some of my photos didn t show up 6 3 Photos are loading very slowly 6 4 The slide show feature doesn t work 6 4 I know I have more than 12 photos on my card but I can t find them 6 4 I ve mi...

Страница 6: ...hare with family and friends In just minutes you can go from snapping a photo to viewing it full screen on your TV You can even rotate zoom and pan images or see them in an automatic slide show And fo...

Страница 7: ...Power supply Video cable Remote control 2 AA batteries for remote control Universal TV Photo Show User s Guide Setting up is quick and easy just plug in the connections and you re ready to go The rest...

Страница 8: ...1 3 Here is an illustration of the complete connections required We ll go through each step individually with more detailed instructions on the following pages...

Страница 9: ...nsert two new batteries making sure the electrodes are facing the proper direction see the diagram inside the battery compartment 3 Slide the battery compartment cover back clicking it shut Note When...

Страница 10: ...TV Photo Show to your TV Plug one end of the video cable into the yellow VIDEO IN connector on the front or back of your television then plug the other end into the yellow TV OUT connector on the bac...

Страница 11: ...included You can purchase an RF modulator and cable from your local electronics store Follow the instructions included with the RF modulator to connect it to your TV Then plug one end of the video ca...

Страница 12: ...1 7 Step 3 Connect the power supply Connect the power cable to the Universal TV Photo Show power connector labeled 6V and then plug the AC adapter into an electric outlet...

Страница 13: ...etting Check the NTSC PAL switch on the back of the Universal TV Photo Show unit to make sure it is correct In Japan the United States and Canada the switch should be set to NTSC In China and Europe i...

Страница 14: ...ory card according to your camera s instructions Universal TV Photo Show works with SmartMedia 3 3V only CompactFlash Microdrive Secure Digital Memory Stick and Multimedia MMC cards It s important tha...

Страница 15: ...are two memory card slots on the front of the unit Each type of memory card has a specific way that it needs to go into the slot so that the images can be read correctly Position the card in the corre...

Страница 16: ...n only use one memory card at a time Note The slot is designed to accept the card only if you insert it in the correct direction If the card does not slide in easily check that you are positioning it...

Страница 17: ...1 12 Step 6 Turn on the Universal TV Photo Show On the side of the unit Slide the POWER switch to ON Check that the green light on the front of the unit comes on ensuring that it is receiving power...

Страница 18: ...e with your TV for detailed information or Your TV or TV s remote control may have a TV VCR TV VIDEO SOURCE or INPUT button that changes the video input Press that button to switch between the availab...

Страница 19: ...Power button and it will start If you are finished using the unit for some time press the Power button on the remote to turn it off and then slide the switch on the side of the unit to OFF You can th...

Страница 20: ...Show are available in several languages You can change to a different language at any time To change the language 1 Press the Option button on the remote control 2 The following menu appears Press the...

Страница 21: ...ct Language screen appears showing your language options Use the arrows to move the arrow beside the language you prefer Then press OK 5 This returns you to the setup menu which will now be in your ch...

Страница 22: ...dentified buttons that let you get to a task quickly Note Remember to point the remote at the front of the unit not at the TV It s the unit itself that signals the commands When you start up the unit...

Страница 23: ...eginning with the first photo on your memory card or the one that you select Each slide dissolves with a special effect that occurs randomly Although each photo appears on your screen automatically yo...

Страница 24: ......

Страница 25: ...rs Select the Set Slide Time option and press OK 4 Choose the amount of time that you d like each photo to stay on the screen during the automatic slide show Press OK 5 Select the Close Menu option an...

Страница 26: ...n displays up to 12 of your photos at once This allows you to quickly scan the photos on your memory card to choose one to view full size manipulate move or delete To view thumbnail images 1 Press the...

Страница 27: ...oto you want to view or work with 3 The photo appears full screen on your TV You now have several options Continue to view your photos one by one in full size by pressing and This is an easy way to co...

Страница 28: ...show 1 Connect your VCR to your TV as usual 2 To add Universal TV Photo Show plug one end of the video cable to the yellow VIDEO IN connector on the front or back of your VCR then plug the other end t...

Страница 29: ...the yellow VIDEO IN connector on the RF modulator and plug the other end to the TV OUT connector on the back of the Universal TV Photo Show unit Set your TV to the channel that you set the RF modulat...

Страница 30: ...m in to see the action more closely Then pan across the photo to change the center of interest or leave out unnecessary details on the edges Rotate a photo if the world seems the wrong way round You c...

Страница 31: ...it in thumbnails or full size When you rotate the change does not affect your original photo The change will appear in your slide shows and when showing thumbnails but if you use the photo on your co...

Страница 32: ...h time that you press a portion of the photo becomes larger You can press it several times to get to the size that you want Of course you can likewise zoom out You can zoom from 0 5x to 16x Note Zoom...

Страница 33: ...showing thumbnails but if you use the photo on your computer you will have the original You can do this either when viewing the photo in thumbnail or full size on the screen To zoom and pan 1 Select t...

Страница 34: ...the flash in your photos Now you can correct that red eye reflection if it occurs The process is similar to adding a colored contact lens over the problem eye Note Universal TV Photo Show makes this...

Страница 35: ...s 2 Press the Red Eye button 3 Your photo appears with an arrow added in the center for you to use as a pointer To do the necessary detail work of correcting an eye image you need to focus in on that...

Страница 36: ...eye positioned over the eye that you pointed at You then need to fine tune that correction by resizing positioning and coloring that eye image so that it covers the red eye image This is easy to do to...

Страница 37: ...r of the iris the part of the eye that gives it its color with the one in your photo Press Option to see the following choices Use the arrows to select the iris color to use Press OK when you have sel...

Страница 38: ...he changes will look in the final photo continue working or finish Use the arrows to position the arrow by your choice and press OK 7 When you have finished with one eye go on to the other Universal T...

Страница 39: ...ain want them available for viewing When you hide a photo the slide show will skip over it To hide a photo 1 Select the photo that you want to hide either through the thumbnails or viewing full size o...

Страница 40: ...w slide show you can start fresh by unhiding all the photos and then choosing which to hide Alternatively you might find it easier to hide everything and then select which photos should be displayed w...

Страница 41: ...r through the thumbnails or viewing full size on the screen 2 Press the Move button 3 This screen then appears for you to select a new location for that photo 4 Use the arrows to position the Move Her...

Страница 42: ...to to delete from either the thumbnails or when viewing it full size 2 Press the Delete button 3 You have one more chance to keep your photo This screen appears showing the photo that you chose to mak...

Страница 43: ...g the file name creation date and time file size resolution and directory To view photo information 1 Select the photo you want information on either full screen or from the thumbnails 2 Press the Opt...

Страница 44: ...about the photo you selected 5 Press Cancel to leave the photo info screen File name of your photo Date and time the photo was taken Size of the photo file in kilobytes Resolution of the photo in pix...

Страница 45: ...3 16...

Страница 46: ...TV Photo Show works with six different types of memory cards This chapter explains the basics of changing and removing your card as well as more advanced topics such as formatting a memory card and re...

Страница 47: ...o remove your memory card Note If you unexpectedly pull out the memory card you risk damaging the card and losing some of your photos To change your card 1 Press the Change Card button 2 A message app...

Страница 48: ...card that is full by formatting it This erases all photos from the card Note This process will permanently delete all of the photos or files that are on the card including read only ones Make sure tha...

Страница 49: ...other chance to make sure that you really want to format this card A screen appears asking you to confirm that you want to format the card To format the card press OK 6 When the formatting is complete...

Страница 50: ...ause damage to the card Please go to the following web site for more details http ciscweb sel sony com When you are at the site Select Type a Question Then select Memory Stick Devices Media Enter the...

Страница 51: ...nt of space on your card If your card is very full with photos and you need to take more you may want to reclaim some of that space However the tradeoff is that doing so will cause the unit to run sli...

Страница 52: ...able to choose it 4 A screen appears telling you how much space you would free up and asking you to confirm that you want to reclaim the memory Position the arrow beside your selection and press OK 5...

Страница 53: ...4 8...

Страница 54: ...at you can store images send them via e mail print them or format your memory card Universal TV Photo Show works on a PC computer running Windows 98SE ME 2000 or XP or on a Macintosh computer running...

Страница 55: ...If you are running the 2000 ME or XP operating system it will work automatically without a driver 2 Connect the power supply to the unit s DC IN socket and then plug the AC adapter into an electric ou...

Страница 56: ...ry card To access your files 1 On a PC Go to the icon My Computer on your desktop and double click on it After a few seconds you will see a Removable Disk icon appear with a newly assigned drive lette...

Страница 57: ...o the original files and will not show up on your computer Red eye corrections that you made however are accessible You will see that some files have duplicates with an RE added to the file name for e...

Страница 58: ...rd Please go to the following web site for more details http ciscweb sel sony com When you are at the site Select Type a Question Then select Memory Stick Devices Media Enter the word format in the Ty...

Страница 59: ...losing the photos on it Before removing your card 1 Do not remove the card while your computer is asleep First wake up your computer and then remove the card 2 Close any memory card files that you ha...

Страница 60: ...ose all of the files on the card 2 Check that the light on the front of the unit is not blinking It blinks when it is accessing files 3 If you are using Windows 98SE ME 2000 or XP right click on the r...

Страница 61: ...e correct video input To do this turn on both your TV and Universal TV Photo Show and then press the button on your TV or TV remote control that changes the video input source This button could be cal...

Страница 62: ...an RF modulator and cable from your local electronics store The remote doesn t seem to be working The remote control requires two AA batteries Check that the batteries were inserted in the right dire...

Страница 63: ...photos first You may have inserted the memory card incorrectly See page 1 10 for specific instructions for your card Some of my photos didn t show up Universal TV Photo Show reads JPEG files the most...

Страница 64: ...e with the unit The slide show feature doesn t work In the lower right part of the TV there might be a symbol that looks like II which indicates that the slideshow is paused Press the button so that t...

Страница 65: ...If it is then any settings will not be saved Some photos may appear rotated while the unit is on but after a power cycle turn unit off and then on again the photos will not appear rotated The Windows...

Страница 66: ...you are using Windows 98SE you must install a separate driver that is available at www dazzle com I deleted the imageinfo db file what does this mean This file saves the rotation zoom and pan setting...

Страница 67: ...are ready to help We highly recommend that you use the Dazzle Interactive Knowledgebase at www Dazzle com as this is the fastest method of accessing support resources for your Dazzle product Begin by...

Страница 68: ...9 days following contact Dazzle in the US at 203 315 4230 If you have extended beyond your free 30 day technical support window contact Dazzle at 800 570 9548 charges apply We highly recommend having...

Страница 69: ...An Microsystems Brand www Dazzle com...

Отзывы: