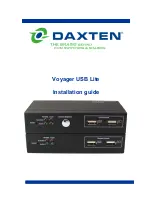
Voyager USB Lite
Introduction
Thank you for purchasing the Voyager USB Lite UTP Keyboard, Video and Mouse Extender. This
product will allow you to place your Monitor and USB Keyboard and Mouse up to 200 meters away
from your computer.
Product Features
Allows a user to control a PC from up to 200 meters away, using a single CAT5, 5e or CAT 6
cable.
No additional software is required for operation.
Adjustable Video Equalisation - Compensates for loss of image quality due to cable length.
Fully buffered signals to ensure consistent remote operation of your PC
Dual Access allows for an additional Monitor to be connected through the local unit.
Operation
The Voyager is simple to install, with no software is required. Just connect the units up as described in
quick setup system guide and you're ready to work. Switch the computer off before wiring up the units.
Hardware Installation
Before connecting your computer to the Voyager Local unit, please ensure that it is powered off.
Connect your console devices to the Voyager remote unit. Note: the Voyager Remote requires power.
The Voyager USB Lite is compatible with almost all standard PC
’s, SUN and Apple computers with
USB ports
The local unit is normally powered from the computer through the USB connector. Some computers
may not supply sufficient power through the USB port connector; this necessitates the use of a 5VDC
mains adapter on the local unit. The Voyager USB Lite Local Unit is equipped with a DC jack for the
use of an optional power supply. This jack is normally not used, since most computers supply enough
power through the USB port, if not please use a separate power supply (9014-00A) for the local unit.
Connecting Up
1.
Switch off your computer.
2.
Connect the Voyager Local Unit to the PC KVM Cable
3.
Connect the PC KVM cable to your computer’s monitor and USB ports
or
PS/2 ports
4.
Plug in your Monitor into the corresponding Monitor port on the Voyager Local Unit. (You
can use the Voyager without having a, Monitor connected).
5.
Connect your UTP cable to the Voyager Local Unit.
6.
Connect the other end of your UTP cable to the Voyager Remote Unit.
7.
Connect the power supply unit to the Voyager Remote unit.
8.
Plug in your Monitor and USB devices to the corresponding Monitor and USB ports on the
Voyager Remote Unit.
9.
Power on your computer.
10. Check that your USB devices operate correctly.
11. Adjust the Video quality if required by adjusting the Skew compensation (brightness & focus)
on the Voyager Remote Unit which contains video equalisation circuitry that will compensate
for the loss in image quality experienced when sending video over long cables.
Note:
Only USB Keyboard and Mice are supported by the Voyager.
Содержание Vojager USB Lite
Страница 1: ...Voyager USB Lite Installation guide...
Страница 7: ...Quick Setup System Guide...


