background image

4

Mounting Consoles in the 
Solar Power Kit (1.4 Ah battery, #6614) 

Note: You may mount the shelter before installing the console or Envoy. However, it may be 

easier to do this at a workbench rather than in the field. In the case of an Envoy, you will 
need a PC to set up the Envoy after you power it up.

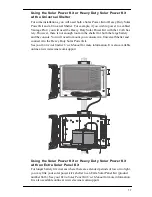
The shelter has been designed to fit Davis consoles and Envoys. Inside the shelter, 
outlines of the Vantage Pro2 console, Vantage Vue console, and Envoy will 
indicate where they will be mounted in the shelter.
Inside the Solar Power Kit you may install:

A wireless Vantage Pro2 console

A Vantage Vue console

A wireless Weather Envoy 

Note: Use the Heavy Duty Solar Power Kit (#6612) to power a cabled Vantage Pro2, a cabled 

Weather Envoy, or an Envoy8X. 

Mounting a Wireless Vantage Pro2 Console in the Solar 
Power Kit

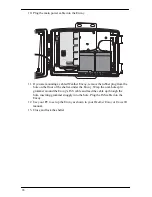
1. Remove all packaging material. 
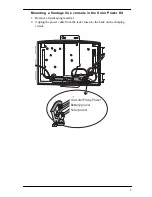
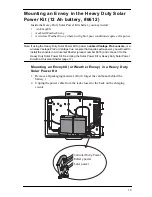
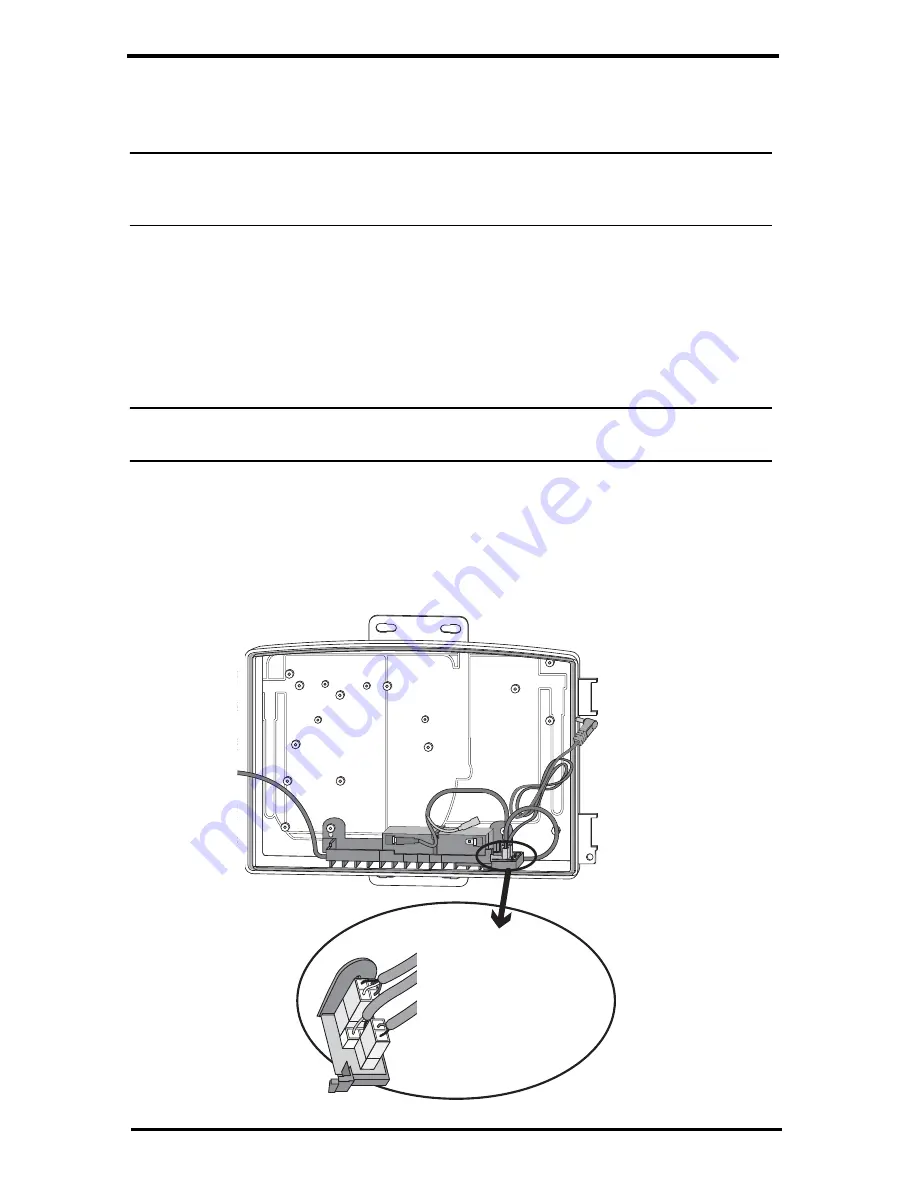
2. Unplug the power cable from the jack closest to the back on the charging 

circuit.

Console/Envoy Power

Battery power

Solar power

Содержание 6614

Страница 1: ...Solar Power Kits USER MANUAL Davis Instruments 3465 Diablo Avenue Hayward CA 94545 2778 U S A 510 732 9229 www davisnet com R Solar Power Kit 6614 Heavy Duty Solar Power Kit 6612...

Страница 2: ......
Страница 3: ...ar Power Kit product number 6612 comes with a 12Ah battery It is required to power cabled consoles cabled Weather Envoy and Envoy8X or wherever extra power is needed It includes a 5 watt solar panel I...

Страница 4: ...e Solar power cable front Charging Circuit 10 console or Envoy power cable back Battery power cable middle Solar power cable front To solar panel To solar panel 6 volt 1 40 amp hr battery Battery plat...

Страница 5: ...ware kit as shown Tools for Setup Phillips head screwdriver Adjustable wrench or 7 16 wrench Drill and 3 16 5 mm drill bit if mounting on a vertical surface Lock Washers Hex Nuts U Bolts Backing Plate...

Страница 6: ...lines of the Vantage Pro2 console Vantage Vue console and Envoy will indicate where they will be mounted in the shelter Inside the Solar Power Kit you may install A wireless Vantage Pro2 console A Van...

Страница 7: ...t to the left side as you face the shelter Making sure the tray is flush with the bottom reinsert and tighten the screws 5 Plug the console power cable back into the jack It fits only one way with the...

Страница 8: ...u may need to adjust the screw height for proper fit 9 Point the console s antenna down and push the kickstand back to its locked position Guide the two keyholes on the back of the console over the tw...

Страница 9: ...ng a Vantage Vue console in the Solar Power Kit 1 Remove all packaging material 2 Unplug the power cable from the jack closest to the back on the charging circuit Console Envoy Power Battery power Sol...

Страница 10: ...to the right side as you face the shelter Making sure the tray is flush with the bottom reinsert and tighten the screws 5 Plug the console power cable back into the jack It fits only one way with the...

Страница 11: ...ew height for proper fit 9 Remove the kickstand from the console Guide the two keyholes on the back of the console over the two screws and pull the console downward to lock in place 10 Plug the consol...

Страница 12: ...Solar Power Kit Note You will need your PC to setup the Envoy after you power it up 1 Remove all packaging material 2 Unplug the power cable from the jack closest to the back on the charging circuit C...

Страница 13: ...o the right side as you face the shelter Making sure the tray is flush with the bottom reinsert and tighten the screws 5 Plug the power cable back into the jack It fits only one way with the latch in...

Страница 14: ...en Note You may need to adjust the screw height for proper fit 9 Point the Envoy s antenna downward Guide the two keyholes on the back of the Envoy over the two screws and pull the console downward to...

Страница 15: ...e Pro2 or Vantage Vue console that requires extra power you will need to install the console in a Universal Shelter product number 6618 and connect it to the Heavy Duty Solar Power Kit See Using the S...

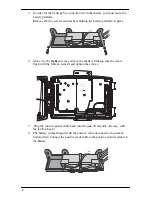
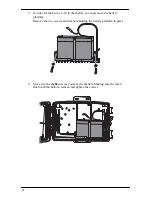
Страница 16: ...helter you must move the battery platform Remove the two screws and washers holding the battery platform in place 4 Move it to the right side as you face the shelter Making sure the tray is flush with...

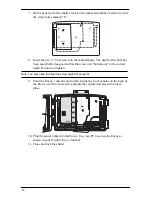
Страница 17: ...d E 8 Insert the two 6 screws into the marked holes The depth of the hole has been specifically designed so that the screw will bottom out at the correct depth Do not overtighten Note You may need to...

Страница 18: ...e floor of the shelter under the Envoy Wrap the oval hole split grommet around the Envoy s ISS cable and feed the cable up through the hole inserting grommet snuggly into the hole Plug the ISS cable i...

Страница 19: ...sole You will need to mount your console in a Universal Shelter and connect it to the Heavy Duty Solar Power Kit See your Universal Shelter User Manual for more information It is also available online...

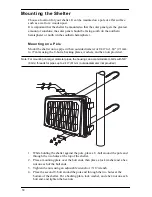
Страница 20: ...lates washers and hex nuts provided Note For mounting on larger diameter pipes the housing can accommodate U bolts with 5 6 8 mm threads for pipes up to 2 40 61 mm outside diameter not provided 1 Whil...

Страница 21: ...f the pilot hole 1 With a 3 16 5 mm drill bit drill two holes approximately 2 50 mm apart Use a carpenter s level to ensure the holes will be level 2 Drill two more holes 7 1 32 below the upper holes...

Страница 22: ...wo batteries You may add even more power to your devices by mounting two batteries in your Heavy Duty Solar Power Kit and running that power to a console installed in a Universal Shelter Please contac...

Страница 23: ...We ll be glad to help Note Please do not return your unit for repair without prior authorization Online www davisnet com See the Weather Support section for copies of user manuals product specificatio...

Страница 24: ...ument subject to change without notice Davis Instruments Quality Management System is ISO 9001 certified 3465 Diablo Avenue Hayward CA 94545 2778 U S A 510 732 9229 Fax 510 732 9188 E mail info davisn...

Отзывы: