


30
7.
Network Configuration
The DVIP Configuration Tool allows the user to configure network settings of
the PTC series cameras on the PC.
The DVIP Configuration Tool can be
downloaded from the product page.
The PTC series cameras usually have a static IP address of 192.168.100.XXX.
The unit can be directly connected to a Windows-based computer using an RJ-
45 Ethernet cable. The following setup procedure outlined below should allow
you to initially configure the unit before moving it to an existing DHCP / LAN
network.
Note: All devices should be connected to the same network domain.
1.
First connect the
DVIP port
of the
PTC-200T PTZ camera
or the
HBT-11
receiver box
(if used) to a Windows computer using an RJ-45 Ethernet
cable.
Note: You do not need to manually assign an IP address to the PC but
make sure the right interface card is selected at Step 11.
2.
Install the DVIP Configuration Tool by double clicking the
executable file already downloaded to your computer.
3.
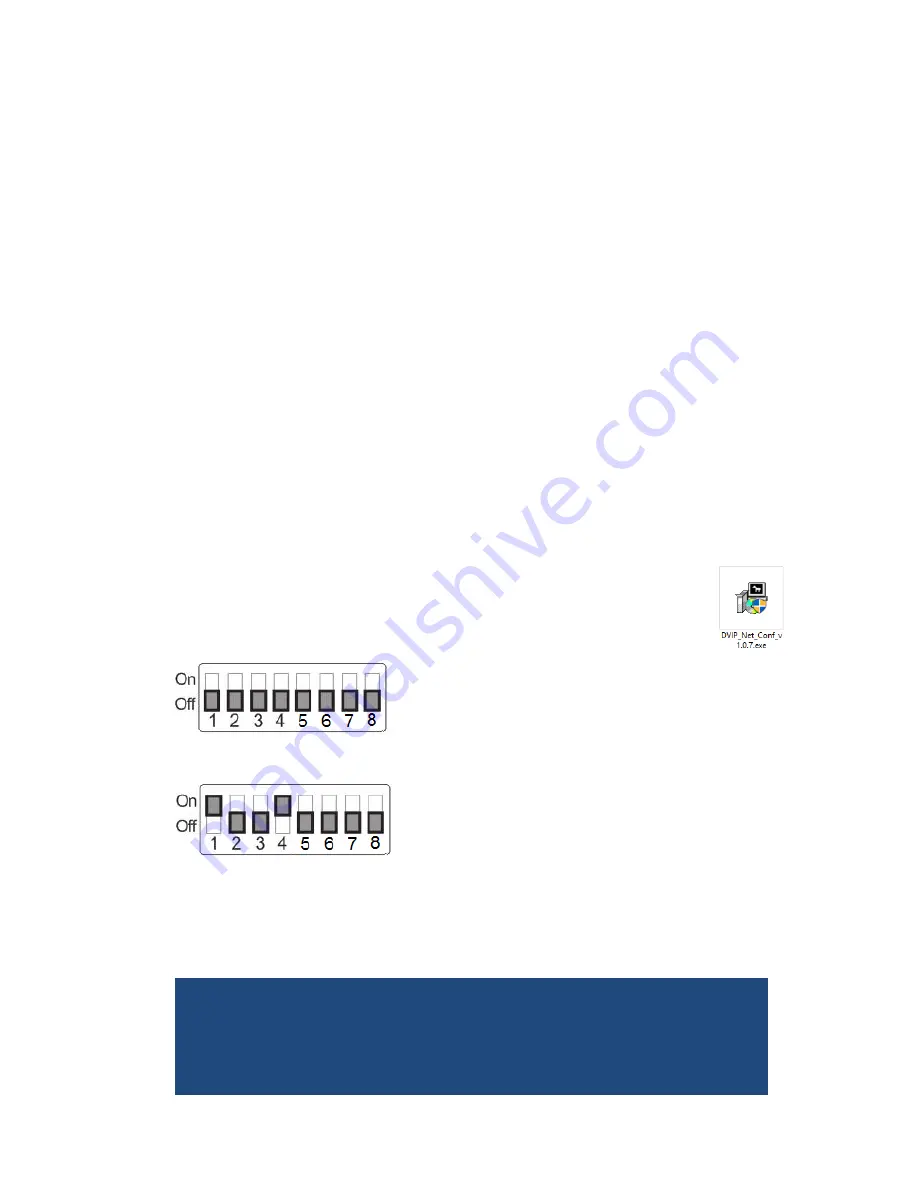
Locate the DIP switch at the bottom of the PTC series camera.
4.
Set DIP Switch positions 1 and 4 to ON.
5.
Plug in the power cord into the PTC series camera and connect it to a
monitor via the HDMI interface.
6.
Open the main menu by pressing the menu button on the IR remote
control and select option 4 “
Remote Control
.
”
[MAIN MENU]
1: CAMERA SET (NORMAL)
2: MEMORY
3: VIDEO OUTPUT
Содержание PTC-200T
Страница 1: ...PTC 200T 4K HDBaseT PTZ CAMERA Instruction Manual...
Страница 28: ...28 Step 5 Mount Camera to Ceiling...
Страница 38: ...38 10 Dimensions PTZ Camera...
Страница 39: ...39 Receiver Box All measurements in millimetres mm...
Страница 43: ...43 NOTE...


