


18
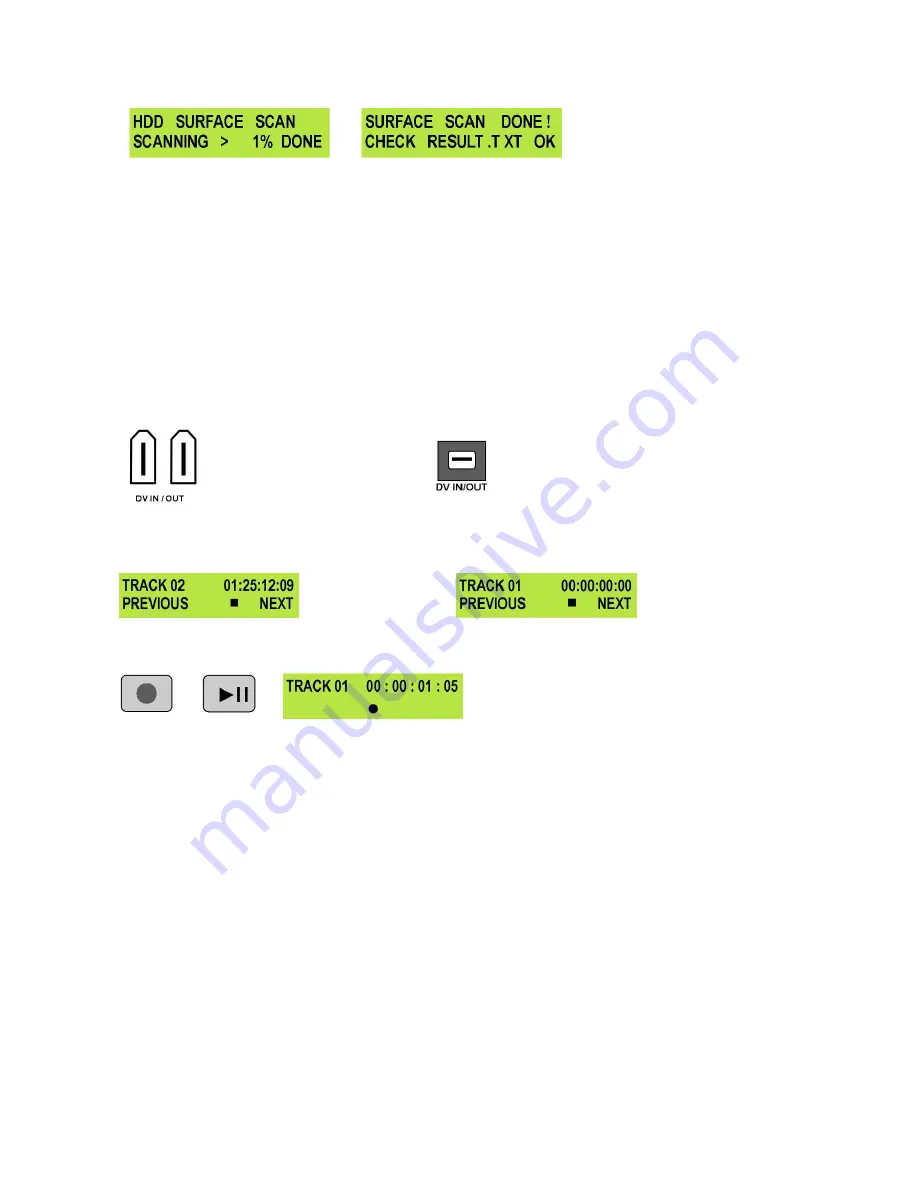
The progress of the scan will appear in the LCD display. Once complete the Surface Scan Done message
will appear. Press the Next (
▲
) Button to exit the surface scan.
A txt file called Result will have been created in the root directory of the DN-300 HDD, this can be accessed
via a PC, by connecting the DN-300 as a HDD.
Operation with a DV Camcorder / Deck / Vision Mixer
Recording a DV track
To record from a DV Camcorder / Deck / Vision Mixer connect the DV device to the DN-300 via an IEEE-
1394 (iLink, FireWire) cable. You can connect to either of the rear 6 Pin ports, or to the front mounted 4 Pin
port, but only connect one DV device to the DN-300 at a time.
N.B. To avoid any possible static damage please ensure your camcorder is switched off when
connecting / disconnecting the IEEE-1394 cable.
Rear Mounted DV 6 Pin Ports
Front mounted DV 4 Pin Port
Use the Next / Previous Buttons to select an empty track from the DN-300 track list, one that shows a
duration of 00:00:00:00 in the LCD display.
Not suitable - Track
has been recorded
Suitable - Track is
empty
Press both the Record and Play/Pause Buttons simultaneously and the DN-300 should start recording.
+
The counter should start counting and the REC
symbol should appear
If it does not start recording check the following:
There is a DV signal coming from the DV device.
The Analogue Input Button on the DN-300 is not illuminated
The DN-300 Record Format is set to RAW DV (DV), and not set to M2T (HDV)
see Record Formats Menu.
The track you have selected on the DN-300 is empty. The counter next to the Track Number on the LCD
display should be showing 00:00:00:00.
Go to the FREE SPACE Menu and check that the DN-300 drive is not full.
The IEEE-1394 cable is not too long, disconnected or damaged.


