


DI–720/DI–722/DI–730 Series User Manual
Getting Started
11
3.
The addition of this new hardware will be “sensed” by Windows and the “Add New Hardware Wizard” will auto-
matically be launched, anticipating the installation of a device driver for the new hardware. Insert the W
IN
D
AQ
Resource CD-ROM into your CD-ROM drive. The root directory of the CD contains all USB drivers.
4.
From the initial “Add New Hardware Wizard” screen click Next to get started, then choose the “search for best
driver option (recommended)” and click Next.
5.
Specify the CD-ROM drive that contains the W
IN
D
AQ
Resource CD-ROM as the search location and click
Next
.
6.
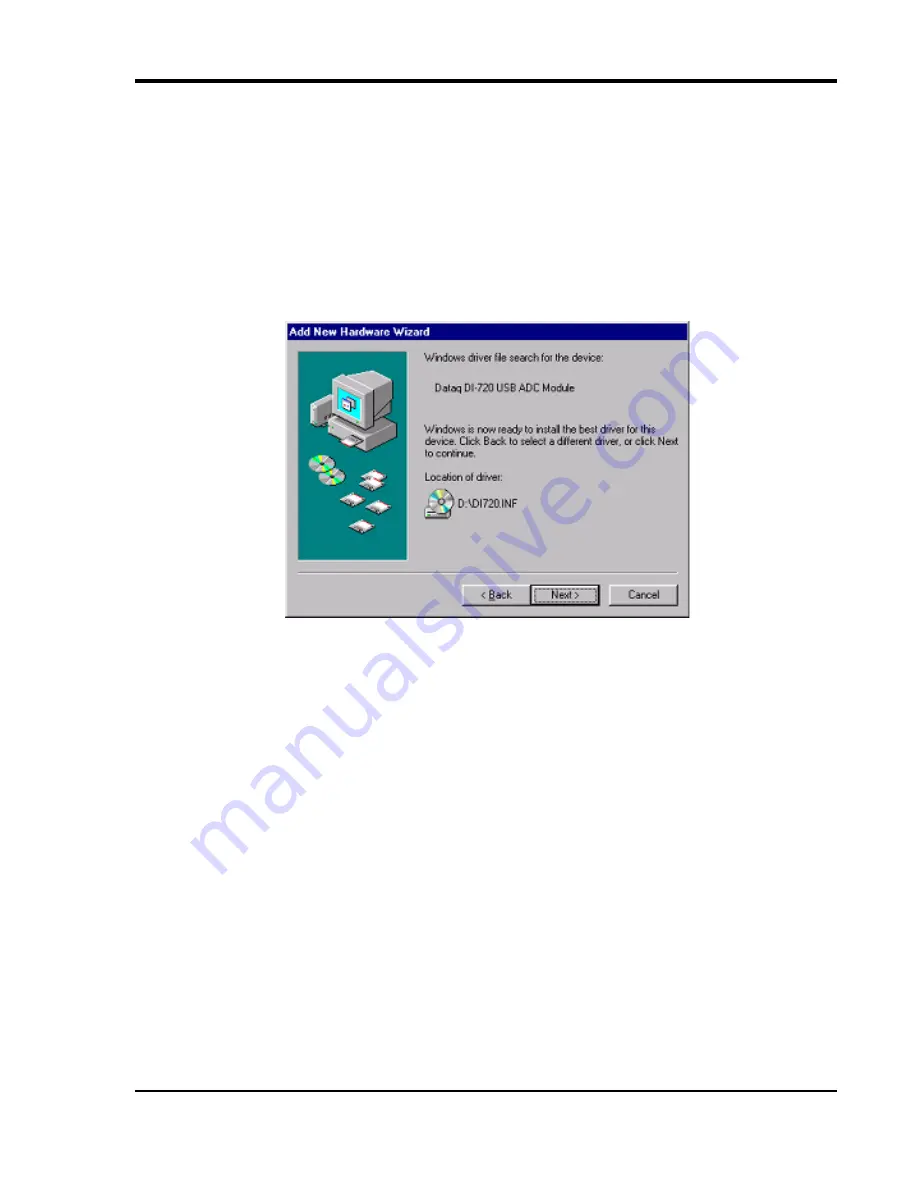
Follow the on-screen prompts. Depending on how Windows was originally installed on your computer, you may
need additional files from your Windows distribution CD-ROM to complete the driver installation. When you
see the following dialog box, Windows has located the necessary device driver and is ready to install the required
files. Click
Next
to continue.
7.
Install W
IN
D
AQ
Software. All software is included in
The W
IN
D
AQ
Resource CD
.
a.
Insert the
The W
IN
D
AQ
Resource CD
into your CD-ROM drive. The Windows auto run feature should start
the installation program. If the Windows auto run feature is not enabled on your PC, run the setup.exe pro-
gram located on the root of the CD directory.
b.
In the “What do you want to do?” dialog box select the
Install Software
radio button and click
OK
.
c.
In the “Installing Software” dialog box select the
Install Software for all other products
radio button and
click
OK
.
d.
In the “Specify the product” dialog box you must choose the version of W
IN
D
AQ
you would like to install. If
you purchased W
IN
D
AQ
/Pro or Pro+ software, select the appropriate option and click OK. If you did not
purchase software, choose the W
IN
D
AQ
/Lite option and click
OK
.
e.
In the “Specify the Instrument” dialog box select the
DI-720/740/730HV Portable Instruments
radio but-
ton and click
OK
.
f.
In the “Specify the Instrument” dialog box select the
Universal Serial Bus (USB)
radio button and click
OK
.
g.
The “Welcome!” dialog box allows you to cancel the installation. Click
OK
to continue installation or
Can-
cel
to abort.
h.
Read through the Software License agreement carefully and either
Accept and Continue
or
Cancel
to exit
the installation.
Содержание DI-720-EN
Страница 2: ......
Страница 4: ......
Страница 6: ......
Страница 10: ......
Страница 32: ......
Страница 40: ......
Страница 45: ...DI 720 DI 722 DI 730 Series User Manual Block Diagram 35 6 Block Diagram DI 720 Series 1 32 ...
Страница 46: ...DI 720 DI 722 DI 730 Series User Manual Block Diagram 36 DI 722 Series ...
Страница 47: ...DI 720 DI 722 DI 730 Series User Manual Block Diagram 37 DI 730 Series Analog Input I S O L A T I O N ...
Страница 106: ......
Страница 107: ......


