iBootPDU Quick Start
© 2017 Dataprobe Inc.
v170731e
Changing the IP Address
1. Device Management Utility
Obtain the Device
M
anagement Utility (DMU) from Dataprobe’s website
at
dataprobe.com/support-documents/iboot-pdu/
a. Open the DMU on a PC on the same physical network as
the iBoot-PDU and select
Device > Discover
to display
the current IP Address of the iBoot-PDU.
b. Select
Set > Network Settings
to change the network
settings. The IP settings can only be set within the first
two minutes of powering up the iBoot-PDU. The DMU
will only work with iBoots on the same physical subnets
as the PC
Complete instructions for the DMU are provided with the
download, and in the full iBoot-PDU Manual.
2.
Web Page Setup
From the home page (Dashboard),
click on
Device
->
IP Address
. Set the IP Mode to
Static
.
Enter the new IP Address, Subnet Mask, Gateway and DNS,
then click Save. Click Save to store the settings as entered.
Once saved, they are held as Pending. To complete the
process, reboot the iBoot-PDU. When the iBoot-PDU is ready
for reboot, a notification will appear at the top left of the
dashboard. Click on notifications, then reboot.
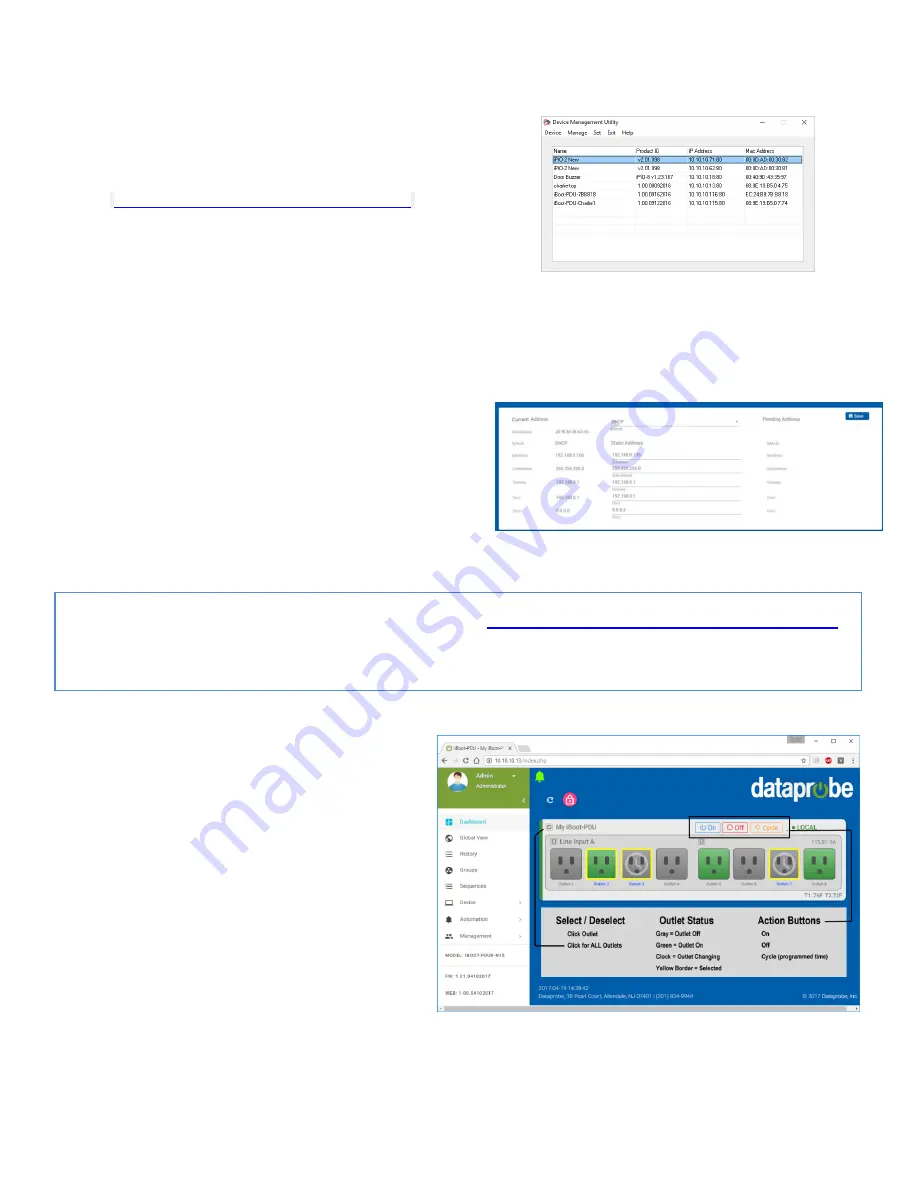
Web Browser Control
The iBoot-PDU web interface provides the easiest means
of operating the outlets and monitoring the current status of
the units. One or more outlets can be simultaneously
controlled with a few mouse clicks.
To Control any of the outlets, From the Dashboard screen,
highlight the outlet(s) to be controlled with a mouse click,
then click on the desired Action Buttons ON
– OFF -
CYCLE
When Cycle is selected, the outlet(s) will cycle for the
amount of time set (default 10 Seconds). When more than
one outlet is controlled to turn on, there will be a delay
between outlets turning on, as set by the delay setting
(default 1 Second).
To get all the benefits of your iBoot, register it
dataprobe.com/product-registration-form
Notification of Updates
Exclusive Offers
Expedited Warranty Service
Advanced End-of-Life Notification


