16
4
4
4
.
.
.
3
3
3
P
P
P
r
r
r
i
i
i
n
n
n
t
t
t
h
h
h
e
e
e
a
a
a
d
d
d
R
R
R
e
e
e
p
p
p
l
l
l
a
a
a
c
c
c
e
e
e
m
m
m
e
e
e
n
n
n
t
t
t
To replace a damaged or worn printhead, follow the procedure below.
Printheads are fragile; use extreme care when handling and never use a sharp object on the surface.
If you have questions, contact a qualified technician or Datamax-O’Neil
Technical Support before
proceeding.
To Remove:
1. Turn ‘Off’ and unplug the printer. Unlock the printhead latch and remove any media installed in the printer.
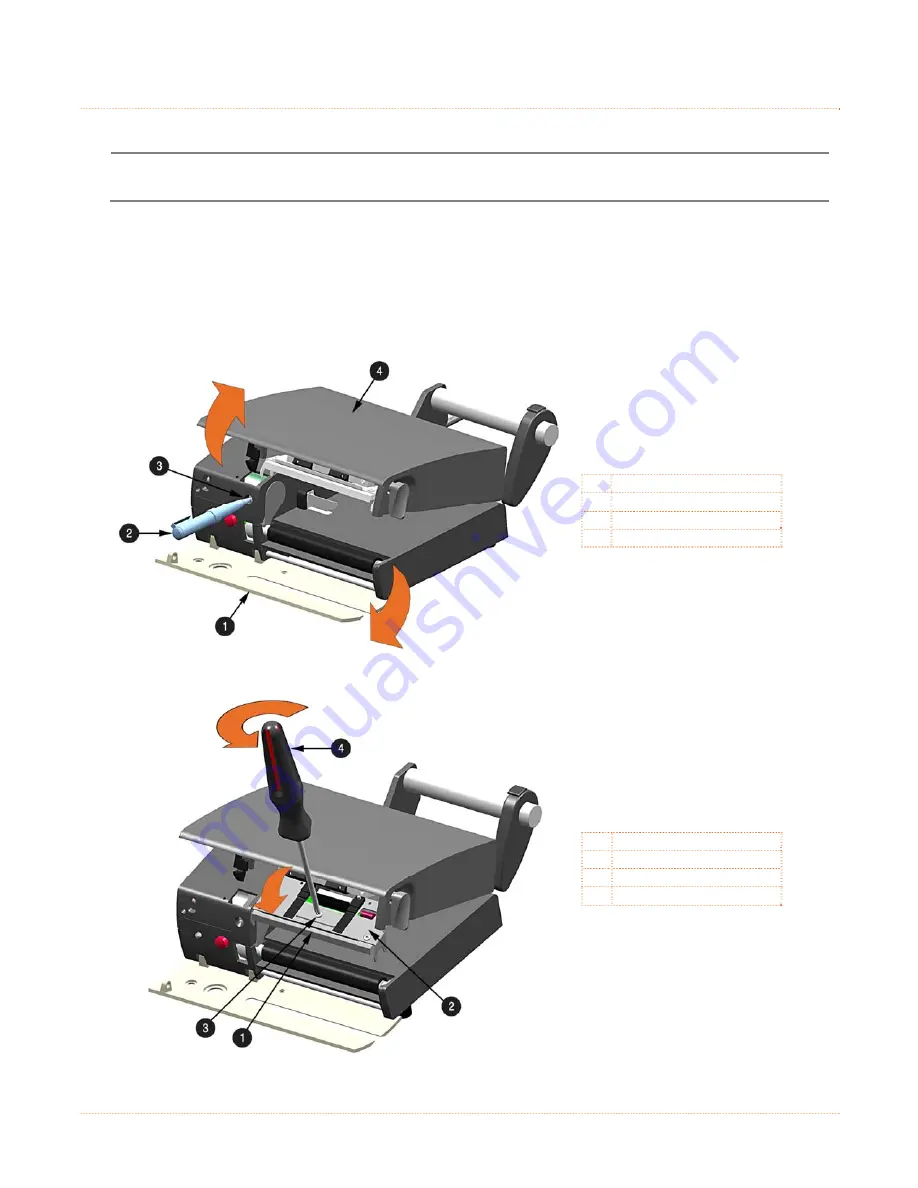
2. Lower the Front Panel.
Allow the printhead to cool before proceeding.
3. Using a Pen or similar tool press in on the Top Cover Release and raise the Top Cover.
Front Panel
Pen or similar tool
Top Cover Release
Top Cover
4. While pressing down on the Printhead Carrier, loosen and remove the Printhead Screw using a Phillips Screwdriver.
Printhead
Printhead Carrier
Printhead Screw
Phillips Screwdriver
Содержание MP Compact4 Mark II
Страница 1: ...Operators Manual ...
Страница 2: ......
Страница 6: ...ii ...
Страница 8: ...2 ...
Страница 18: ...12 ...


