


E-GENIUS
158
AV500 2D CAMERA
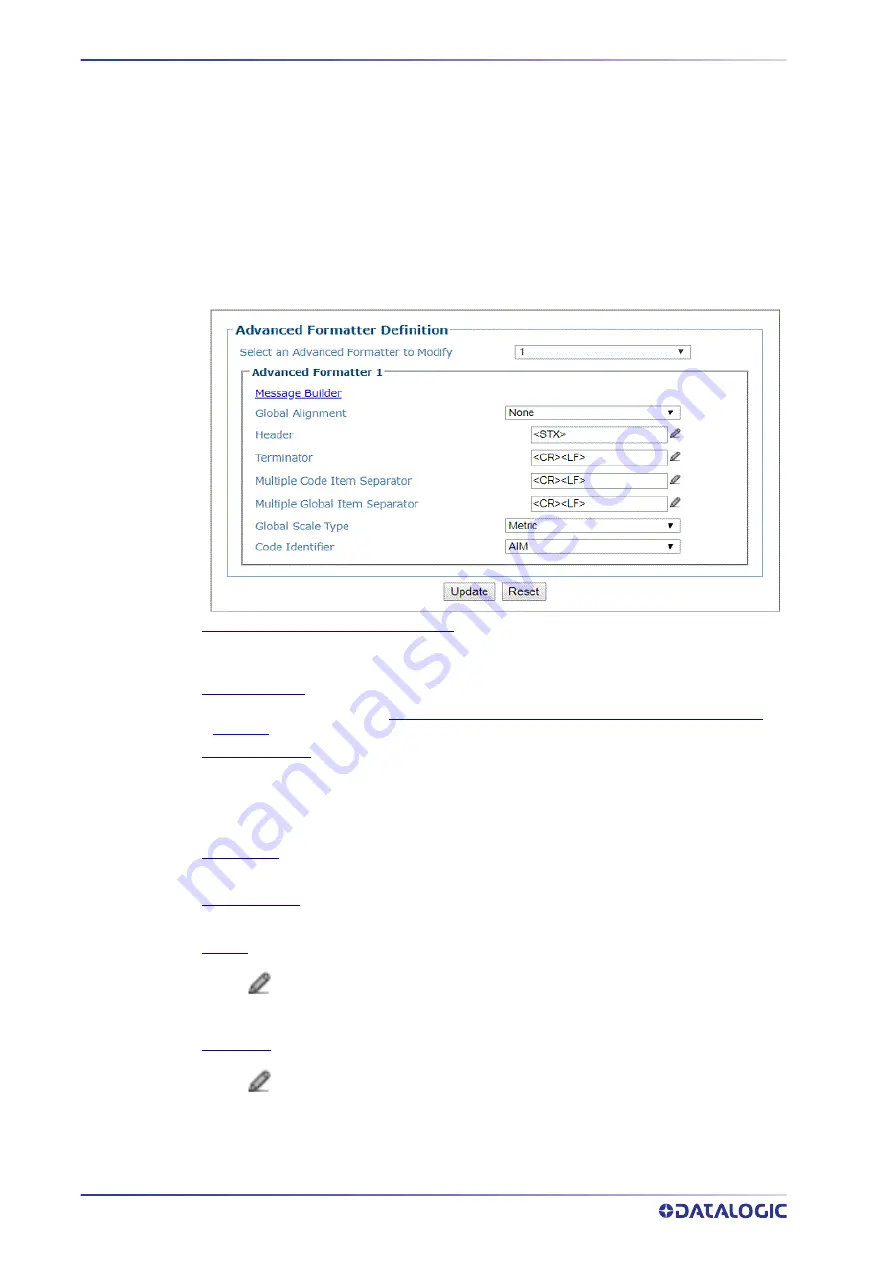
Output Format | Advanced Formatter
Use the
Advanced Formatter
to set up a selection of advanced code parameters for out
‐
put messages. This is useful when you need to create more complex messages to the
Host. There are five unique message formats that can be constructed. Once the format
is defined the format is assigned to a port in the
Communication>Transports
menu
option by selecting the Advanced option in the Data Output Protocol drop down. Then
select the Advanced Formatter item in the Advanced Formatter Index number.
To edit the Advanced Formatter settings:
1. In the menu tree under
Modify Settings,
navigate to
Global Settings | Output
Format | Advanced Formatter.
The Advanced Formatter window opens.
Select an Advanced Formatter to Modify
Select a numeric Advanced Formatter item to modify from the drop
‐
down list. There are five
host messages that can be constructed.
Message Builder
Click on this link to open the
Message Builder“Advanced Formatter | Message Builder” on
window.
Global Alignment
Select None, Left, or Right from the drop
‐
down list.
When you activate Global Alignment you are choosing to add characters (padding) to the
leading and/or trailing edge of the transmitted message. Left refers to the leading part of the
message, and Right refers to the trailing part of the message.
Align Length
Enter the number of characters to align by.
Align Filler Char
Enter the character to fill the align length with.
Header
Click
to activate the “The Text Entry Tool” on page 59 and create a header string. Headers
(up to 128 bytes) can be defined and transmitted as a block preceding the barcode(s).
Characters from NUL (00H) to ~ (7EH) can be used.
Terminator
Click
to activate the “The Text Entry Tool” on page 59 and create a terminator string.
Terminators (up to 128 bytes) can be defined and transmitted as a block following the
barcode(s). Characters from NUL (00H) to ~ (7EH) can be used.
Содержание AV500
Страница 1: ...AV500 PRODUCT REFERENCE GUIDE 2D CAMERA...
Страница 53: ...MOUNTING PRODUCT REFERENCE GUIDE 33...
Страница 73: ...CBX510 CONNECTION BOX PRODUCT REFERENCE GUIDE 53 Photoelectric Sensor to CBX510 NPN...
Страница 74: ...ELECTRICAL INSTALLATION 54 AV500 2D CAMERA Photoelectric Sensor to CBX510 PNP...
Страница 84: ...ELECTRICAL INSTALLATION 64 AV500 2D CAMERA Photoelectric Sensor to CBX100 and CBX800 NPN...
Страница 86: ...ELECTRICAL INSTALLATION 66 AV500 2D CAMERA...
Страница 91: ...FOCUSING DEVICE WIRING PRODUCT REFERENCE GUIDE 71 Unpowered Outputs...
Страница 113: ...OPERATING MODE PRODUCT REFERENCE GUIDE 93...
Страница 203: ...PRODUCT REFERENCE GUIDE 183 12 Click Next Step and the following screen appears...
Страница 205: ...PRODUCT REFERENCE GUIDE 185...
Страница 218: ...E GENIUS 198 AV500 2D CAMERA...
Страница 230: ...E GENIUS 210 AV500 2D CAMERA...
Страница 231: ...PRODUCT REFERENCE GUIDE 211...
Страница 234: ...E GENIUS 214 AV500 2D CAMERA...
Страница 241: ...PRODUCT REFERENCE GUIDE 221 Click on Diagnostic Messages and a Diagnostic Messages window opens...
Страница 249: ...PRODUCT REFERENCE GUIDE 229...
Страница 253: ...PRODUCT REFERENCE GUIDE 233...
Страница 260: ...E GENIUS 240 AV500 2D CAMERA...
Страница 263: ...PRODUCT REFERENCE GUIDE 243 4 Select Auto Learn from the drop down and the following auto learn options appear...
Страница 266: ...E GENIUS 246 AV500 2D CAMERA...
Страница 299: ...AV500 CALIBRATION PRODUCT REFERENCE GUIDE 279...
Страница 321: ...NOTES...
Страница 322: ...NOTES...
Страница 323: ...NOTES...


