background image

4.8 Connecting security devices

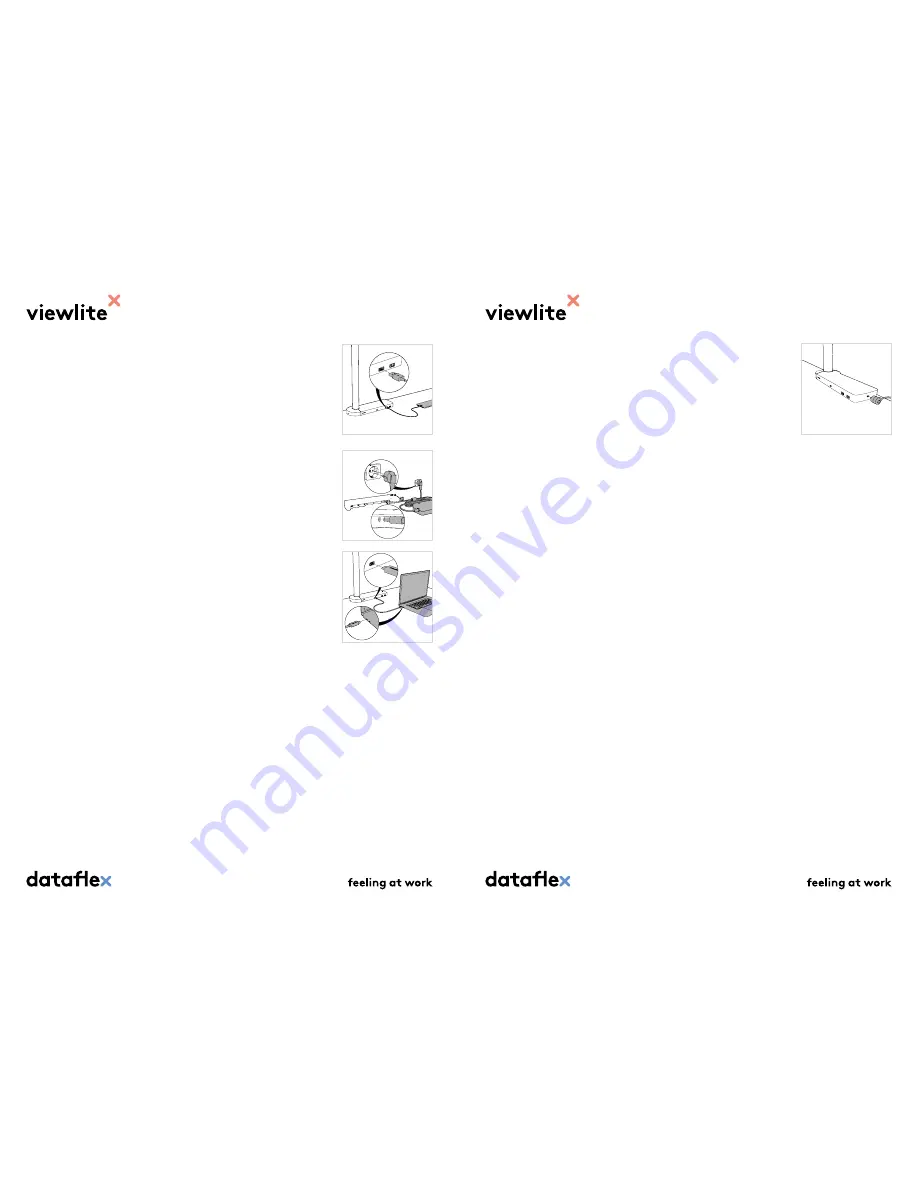
It is possible to attach 

Link

 to your desk using a Kensington lock (not 

included) (see table 2.3). See the lock manual for more information.

4.9 Configuring your display device

You can configure the 

display device

 you have connected in your 

device

’s 

operating system.  This manual contains general instructions for the two 
most common operating systems. 

4.9.1 Windows

Use Windows to configure the display on one or two 

display devices


connected to 

Link

Right-click on the desktop and select screen resolution.

In this window, select the desired resolutions.

You have three options for configuring your screens:


1) Setting an external 

display device

 as the main screen.


2)   Setting  external 

display devices

 as an extension of the main 

screen (expand main screens). 


3)   Setting  external 

display device

 as a duplicate of the main 

screen (duplicate main screens).

Tip: You can also open the screen settings by holding down P.

4.5 Connecting USB 3.1 peripheral equipment

You can connect 

peripheral equipment

 to 

Link

 via the two USB 3.1 

ports

 (see table 2.1) on the front of 

Link

. The USB 3.1 

ports

 support 

SuperSpeed

 rates and a power output of 10 watts.

Take note: Make sure the 

peripheral equipment

 is compatible with the 

performance specifications of 

Link

4.6 Connecting to the power supply

Use the adapter and cable provided to connect 

Link

 to the power supply 

(see table 2.2). When connected to the power supply, 

Link

 will automa-

tically switch on (to stand-by). You can switch off 

Link

 completely by 

disconnecting it from the power supply.

4.7 Connecting your device

You can connect your 

device

 to 

Link

 via the USB-C 

port

 (see table 2.1) 

on the front of 

Link

. Your 

device

 can now take advantage of all the 

possibilities offered by 

Link

.

Connecting and disconnecting: The 

device

 can be connected to 

Link

 or 

disconnected from 

Link

, regardless of whether 

Link

 and the 

device

 are 

switched on or off. 

Take note: Not all USB-C cables support the USB 3.1 Gen 1 standard. It 
is possible that these cables do not support data, visual information 

and power transfer. Dataflex therefore recommends using the included 
Dataflex USB-C cable to connect your 

device

 to 

Link

. This ensures the 

best possible use of all the possibilities offered by 

Link

 in combination 

with your 

device

Содержание Viewlite link

Страница 1: ...User manual Viewlite link v1 0 User manual Copyright 2018 Dataflex International BV T 31 180 515444 F 31 180 518540 info dataflex int com www dataflex int com ...

Страница 2: ...ng USB 2 0 peripheral equipment 13 4 5 Connecting USB 3 1 peripheral equipment 14 4 6 Connecting to the power supply 14 4 7 Connecting your device 14 4 8 Connecting security devices 15 4 9 Configuring your display device 15 4 9 1 Windows 15 4 9 2 macOS 16 5 Technical support and guarantee 17 5 1 Troubleshoot 17 5 1 1 Common usage and connection problems 17 5 1 2 Video audio problems 18 5 2 Specifi...

Страница 3: ...ake sure other users of the product also have access to this manual in order to guarantee the safe use of the product If the product is reinstalled after being previously used the instructi ons should always be consulted again You are urgently advised to have the product installed by experienced technicians If the product is intended for mounting on another product such as a monitor computer or ta...

Страница 4: ...n out of use and care must be taken that it can no longer be operated even inadvertently or unwittingly by others With moveable adjustable products take care that the installed pro duct can move unimpeded around its axis Cleaning instructions do not use corrosive or abrasive substances use only a damp cloth 1 3 Laptop check Go to the Link product page on our website to read about the Link laptop c...

Страница 5: ...0 Connects your peripheral equipment to Link This port enables the transfer of data and power Offers HighSpeed support 2 5W 5V x 0 5A 4 Network con nector RJ 45 Connects Link to a network or the Internet via an Ethernet cable 5 Dual 4K Super Speed switch Makes it possible to switch between different modes This switch affects the maximum screen resolution screen refresh rate USB and Ethernet speed ...

Страница 6: ...evice for this information 4 Using Link Link is highly intuitive To ensure that you make the most of the pos sibilities offered by Link we recommend reading through this chapter carefully before first use 4 1 Selecting the desired mode The dual 4K SuperSpeed switch see table 2 2 allows Link to offer the possibility of two different modes You decide whether you want to use the highest USB and Ether...

Страница 7: ...ble with the performance specifications of Link Number of external display devices Mode Max resolu tion Max refresh rate Max USB speed Max Ether net speed 1 SuperSpeed 1920 x 1200 60 Hz 5 Gbit s 1 Gbit s 2048 x 1536 60 Hz 4096 x 2160 30 Hz 1 Dual 4K 1920 x 1200 60 Hz 480 Mbit s 100 Mbit s 2048 x 1536 60 Hz 4096 x 2160 60 Hz 2 SuperSpeed 1920 x 1200 60 Hz 5 Gbit s 1 Gbit s 2048 x 1536 30 Hz 2 Dual ...

Страница 8: ... the two USB 3 1 ports see table 2 1 on the front of Link The USB 3 1 ports support SuperSpeed rates and a power output of 10 watts Take note Make sure the peripheral equipment is compatible with the performance specifications of Link 4 6 Connecting to the power supply Use the adapter and cable provided to connect Link to the power supply see table 2 2 When connected to the power supply Link will ...

Страница 9: ...ompatible with Link or se lect a different Port one that is compatible with the performance specifications for your device see tables 2 1 and 2 2 The USB C input has a slow connection The dual 4K SuperSpeed switch is not in the right position Check whether the switch on the back of Link see table 2 2 is set to dual 4K or SuperSpeed If necessary switch to SuperSpeed for 5Gbit s speed See 4 1 Select...

Страница 10: ... the same or lower than the maximum limit see 4 9 Configuring your display device The letters on the external display device are too small The settings for the operating system s screen resolution are set to 100 by default Change the font size on your device Windows Go to the Configuration screen Display settings to change the font size macOS Go to the System preferences Display screen to change t...

Страница 11: ...tioning within a two year period after purchase the guarantee The guarantee is void if i the defect appears to be due to gross negligence or to the product not being used for its intended purpose ii no proof of purchase can be provided by request of DFX or iii it appears that the Guarantee Safety Installation and Operating Instructions have not been followed The guarantee is limited exclusively to...

Отзывы: