Datacom Datacom TDT-HD140 Скачать руководство пользователя страница 23

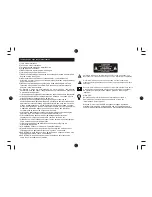
1) Read these instructions.
2) Keep these instructions.
3) Heed all warnings.
4) Follow all instructions.
5) Do not use this apparatus near water.
6) Clean only with dry cloth.
7) Do not block any ventilation openings, install in accordance with the 
instructions.
8) Do not install near any heat sources such as radiations, heat registers, 
stoves, or other apparatus (including amplifiers) that produce heat.
9) Do not defeat the safety purpose of the polarized plug. If the provided 
plug does not fit into your outlet, consult an electrician for replacement of 
the obsolete outlet.
10) Protected the power cord from being walked on or pinched particularly 
at plugs, convenience receptacles, and the point where they exit from the 
apparatus.
11) Only use attachments/accessories specified by the manufacturer.
12) Unplug this apparatus during lighting storms or when unused for long 
periods of time.
13) Refer all servicing to qualified service personnel. Servicing is required 
when the apparatus has been damaged in any way, such as power- supply 
cord or plug is damaged, liquid has been spilled or objects have fallen into 
the apparatus, the apparatus has been exposed to rain or moisture, does 
not operate normally, or has been dropped.
14) Mains plug is used as the disconnect device, the disconnect device 
shall remain readily operable.
15) The ventilation should not be impeded by covering the ventilation 
openings with items, such as newspapers, table-cloth, curtains, etc.
16) No naked flame sources, such as lighted candles, should be placed on 
the apparatus.
17) Attention should be drawn to the environmental aspects of battery 
disposal.
18) The use of apparatus in moderate climate.
19) The apparatus shall not be exposed to dripping or splashing and that no 
objects filled with liquids, such as vases, shall be placed on the apparatus.
WARNING: To reduce the risk of fire or electric shock, do not expose this 
apparatus to rain or moisture.
WARNING: The batteries shall not be exposed to excessive heat such as 
sunshine, fire or the like.

Important Safety Instructions

The symbol indicates that dangerous voltages constituting a risk of 
electric shock are present within this unit.

The symbol indicates that there are important operating and 
maintenance instructions in the literature accompanying this unit.

This symbol indicates that this product incorporates double 
insulation between hazardous mains voltage and user accessible 
parts.when servicing use only identical replacement parts.

CAUTION:

When the apparatus was in electrostatic circumstance, it may be 
malfunction and need to reset by user.

Warning

The USB memory stick should be plug in the unit directly. 

USB extension cable should not be used to avoid failing of data 
transferring and interference caused.

Содержание Datacom TDT-HD140

Страница 1: ...TDT HD140 Manual de Usuario Por favor lea este manual de usuario con atenci n con el fin de asegurar el uso apropiado de este producto Guarde este manual para el futuro...

Страница 2: ...do momento para su uso previsto 15 No se debe impedir la ventilaci n cubriendo los orificios de ventilaci n con objetos como peri dicos manteles cortinas etc 16 No se debencolocar fuentes de llamadesn...

Страница 3: ...r loscanales cuando no se useel mando a distancia 3 VENTANA LEDDE INDICACI N DE CANAL Utilizada para indicar elcanal en pantalla Entrada de datos desdedispositivos de almacenamiento USB 1 RF IN ENTRAD...

Страница 4: ...acia la parte delantera del Descodificador Digital El mando a distancia tiene un alcance de hasta 7 metros desde el DescodificadorDigital a un ngulode hasta 60 grados El mando a distancia no funcionar...

Страница 5: ...el receptor Si est utilizando el receptor por primera vez o lo est restableciendo a la configuraci n predeterminada de f brica aparecer el Men Principal en la pantalla 1 Seleccione OSD Language Idiom...

Страница 6: ...salir del Men pulse la tecla EXIT SALIR Inhabilitar un salto de programa de TVo Radio Pulse el bot n VERDE sobre programa con el s mbolo de salto Mover un programa deTV o de Radio 1 Seleccione el prog...

Страница 7: ...stema PAL CVBS Salida de CVBS RGB Salida de RGB 7 B squeda de canales Para acceder al men pulse MENU y seleccione Search Channel Buscar canal El Men ofrece opciones para ajustar los par metros de B sq...

Страница 8: ...auto o manual para ajustes de compensaci n horaria GMT 3 Zona horaria Seleccione la Compensaci n de la zona horaria Time Offset est en Manual 9 Opci n 1 OSD Language Idioma de presentaci n en pantalla...

Страница 9: ...lse el bot n REC en el mando para iniciar la grabaci n puede pulsar repetidas veces el bot n REC para establecer la duraci n determinada de lagrabaci n en intervalos de30 minutos para detenerla presio...

Страница 10: ...no asumimos ninguna responsabilidad por cualquier p rdida de datos que pueda producirse cuando stos se conecten a esta unidad Con grandes cantidades de datos puede que el sistema tarde m s tiempo en...

Страница 11: ...tecla TV RADIO para cambiar al modode TV C mbielas por otras nuevas Ajuste la forma deorientar el mando a distancia yla cercan a al panel Ponga la se al m sfuerte La alimentaci n no est conectada Esp...

Страница 12: ...TDT HD140 Manual do Utilizador Antes de utilizar este produto leia cuidadosamente a documenta ao fornecida...

Страница 13: ...alimenta o constitui o principal elemento para desligar o aparelho logo deve manter se prontamente acess vel 15 Aventila o n o deve ser obstru da ao tapar as aberturas de ventila o com objectos comojo...

Страница 14: ...ndo dist ncia 5 USB 6 CANAL SEGUINTE ANTERIOR Utilizado para mudar decanal sem utilizar o comando dist ncia JANELA DE INFORMA ES Utilizada para indicar on mero do canal Entrada de dados apartir de dis...

Страница 15: ...a de canais 8 RIGHT LEFT Navega entre menus Aumenta diminui o som 9 TV RADIO Alterna entre asfun es de TVe R dio 10 RECALL Usada para alternar entreos dois ltimos canais vistos 11 GO TO Selecciona o t...

Страница 16: ...a ligar o receptor Se estiver a utilizar o receptor pela primeira vez ou tiver reposto as predefini es de f brica o menu principal ir aparecer no ecr do seu televisor 1 Escolha OSD Language idioma do...

Страница 17: ...a saltar 2 Repita o passoanterior para escolher maisprogramas 3 Para confirmar e sair do menu prima a tecla EXIT Desactivar o salto de Mover um programa deTV ou r dio 1 Escolha o programapretendido e...

Страница 18: ...defini omais comum para televisoresno seu pa s NTSC para o sistema de televis o NTSC PAL parao sistema de televis o PAL CVBS sa da CVBS RGB sa da RGB 7 Procura de canais e m de de defini es para sair...

Страница 19: ...soGMT 3 Time Zone fuso hor rio Escolha a diferen a do fuso hor rio quando Time Offset estiver definido para Manual 9 Op es m e idioma do texto no ecr o idioma das legendas e o idioma de udio DIREITA E...

Страница 20: ...m a grava o at aofinal do programa Suspendecom tecla Stop Premindo a tecla EXITa fun o TimeShiftestar desactivada B Configurag o de fotograf as Tempo devisualizag o regule o tempode transig o entre 1e...

Страница 21: ...sinal A alimenta o n o est ligada Especifica es t cnicas Elemento Elemento subordinado Par metro Sintonizador V deo udio Energia Frequ ncia de entrada N vel de entrada de RF Largura de banda deIF Modu...

Страница 22: ...TDT HD140...

Страница 23: ...isconnect device shall remain readily operable 15 The ventilation should not be impeded by covering the ventilation openings with items suchas newspapers table cloth curtains etc 16 No naked flame sou...

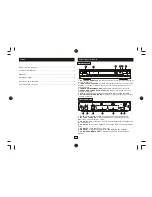
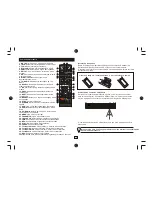
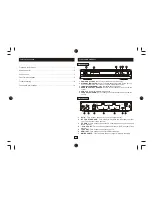
Страница 24: ...USB 6 CHANNEL UP DOWN Used to change channelswithout using the remote control LED DISPLAYWINDOW Used to display channelnumber Data input from USBstorage devices 2 Rear panel 1 RF IN This socket conne...

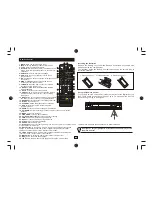
Страница 25: ...correct way to install the batteries 1 Open the cover 2 Install batteries 3 Close the cover Using the Remote Control To use the Remote Control point it towards the front of the Digital Set Top Box The...

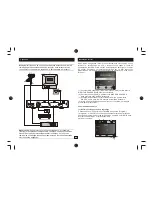
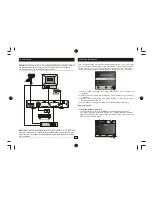
Страница 26: ...onnected to the Main Power Press Power button to switch receiver on If you are using the receiver for the first time or restored to Factory Default the Main Menu will appear on your TV screen 1 Select...

Страница 27: ...ograms 3 To confirm and exit the menu press EXIT key Disable a skip TV or Radio program Press the GREEN button on the skip program with the skip symbol Move a TV or Radio Program 1 Select the preferre...

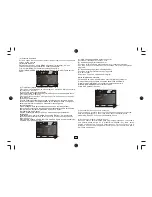
Страница 28: ...NTSC orPAL systemTV If the video doesnot appear correctly you need tochange the settings This should match themost common setting for TVs inyour country NTSC for NTSC systemTV PAL forPAL systemTV CVBS...

Страница 29: ...is 3 hours Press STANDBYbutton to exit sleep auto offmode 9 Option To access the Menu press MENU and select Option Themenu provides options to adjust the OSD Language Subtitle Language and Audio Lang...

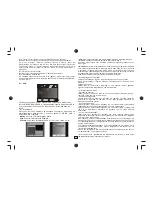
Страница 30: ...programs press LIST in the remote control and select the file with up down buttons then press OKto play it Time Shift If a USBdevice is connected youcan pause live broadcasts Press the PAUSE key durin...

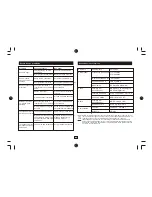
Страница 31: ...ADIO key to shift into TVmode Change new battery Adjust the way of holding remote control unit and near from the panel Strengthen the signal Technical Specifications Item Sub Item Parameter Tuner Vide...

Отзывы: