


Datacolor 45 Quick Start Guide – 003-400063
Rev B
10
When you select the
Batch Mode
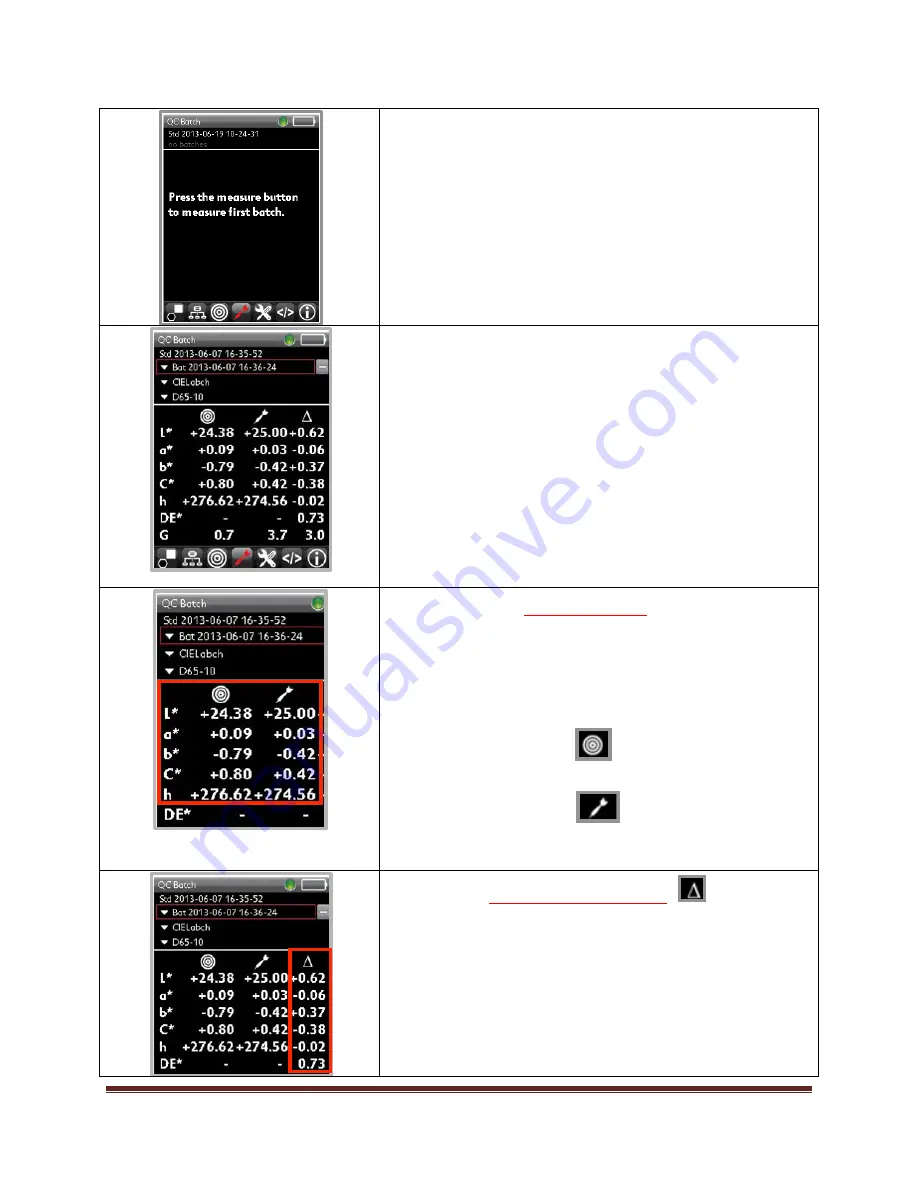
icon, the batch
measurement screen will display. If this is the first time you
have used the instrument, you will see “no batches”.
To compare a new batch to the current standard, place the
instrument on the batch sample and press the measurement
button.
After the batch has been measured, the output screen will be
displayed.
This display screen includes the absolute colorimetric data for
the standard and batch, and the color difference data for the
samples. When the gloss feature is enabled, the gloss
information is also displayed.
The batch name defaults to an auto name based on the
current date and time. The batch naming method can be
edited in the
Options
screen.
To measure a second batch, place the instrument on the batch
sample and press the measurement button. As long as you
remain in
Batch
Mode
, each measurement you make will
create a new batch.
Color Coordinates
•
Each color coordinate is identified by a letter—e.g., L*,
a*, b*, etc.
•
In this example, the color difference calculation being
displayed is CIEL*a*b*C*h.
•
.
STD.
The values in the
column are the
coordinate values for the standard.
•
BATCH.
The values in the
column are the
coordinates for the batch.
Color Differences (deltas)
•
The color difference data will indicate if the
difference is positive (+) or negative (-).
•
The exception is DE, which is always a positive
number.


