EN
EN
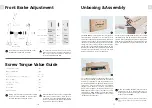
TAKE OUT THE MAIN BODY OF THE BIKE
Remove another corrugated paper fixture on top
of the rear wheel, then take the seatpost out (and
put it to one side.)
Take out the tool box and the corrugated paper
fixture below, open the toolbox and remove the
tools.
Position the forks on the ezbox and balance
the bicycle so as not to topple. If available, use
a bike holder to secure the rear wheel. If not,
you can use the corrugated paper fixture as a
temporary alternative. (But please be aware that
this is not as stable as bike holder. )
Lift the top tube and carefully take out the main
body of the bicycle.
When lifting the bike, do not loosen the
Velcro but keep the wheels and handlebar
fixed on the bike to prevent anything falling
and becoming damaged.
!
Do not use any equipment fixed on the main
body (frameset) to stabilize the bike. Use an
alternative method to fix the seatpost and
frameset. For example, corrugated paper
seat or ideally another person.
!
After you assembly your bike, please wrap the
high-density foam with the Velcro strap. Place
the user manual, 5Nm torque wrench set and
other gadgets used to protect the bike inside
the tool kit.
ASSEMBLE THE RISER KIT
Insert the bolts F1 through the C3 its dented side
facing downwards) and handlebar. Note: The
C3 is irregular. Ensure that the big side faces
forward and small side faces backwards.
Take out risers and washers. Please look up
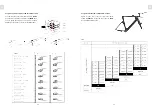
CHART
D
on p.14 for bolts and screws' lengths.
Place suitable risers base on your fitting data.
Please do not forget to insert 3mm washers [G2]
between risers.
Install the arm pads [D5, D6].
Place 1.5mm washers [G1].
When reaching the sufficient height, place 1.5
mm spacers [G1], then place the extension bar
clamps [D9, D10] and the arm pad mounts [D7,
D8]. Use the No. 5 hex wrench on top and the
No. 4 torque wrench on the bottom to tighten the
screws and bolts.
18
19
Содержание TSRf
Страница 1: ......
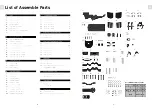
Страница 4: ...EN EN List of Assemble Parts Assemble Parts Box Layout 4 5...


