20
Order code: D1475B/D1476B
EDGE EHS-1/EDGE EBS-1
4. Scan
In this menu you can automatically scan the entire frequency range, in order to find and choose the
unused frequency. By doing so, you can avoid signal distortion.
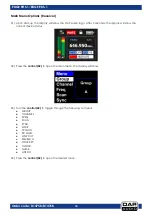
01)
Turn the control (02) until the display shows:
02)
Press the control (02) to enter. The display will show:
03)
The device will now automatically scan the entire frequency range (606–668 MHz). This process may
take up to 2 minutes.
04)
Once the scanning is finished, turn the control (02) to select the desired frequency. Choose the least
used frequency in order to avoid signal distortion.
05)
Press the control (02) to confirm.
5. Sync
In this menu you can pair the receiver with the transmitter.
01)
Turn the control (02) until the display shows:
02)
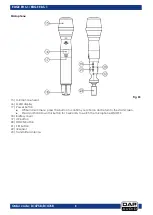
Turn the battery cover (18) of the microphone counter-clockwise to loosen it.
03)
Remove the battery cover.
04)
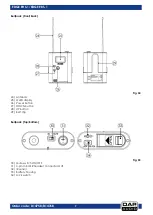
Press and hold down the power button (17) on the microphone for 3 seconds to switch it ON and/or
press and hold down the power button (26) on the beltpack for 2 seconds to switch it ON.
05)
Place the microphone or the beltpack close to the receiver’s display.
06)
Press the control (02) to pair the devices. The IR sensor (04) on the receiver will blink several times. The
devices are now paired and ready for use.
07)
Replace the battery cover (18) and turn it clockwise to fasten it. Do not overtighten to prevent cross-
threading.
Содержание EDGE EHS-1
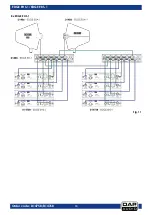
Страница 13: ...12 Order code D1475B D1476B EDGE EHS 1 EDGE EBS 1 Setup Examples 4 x EDGE EHS 1 Fig 10...
Страница 14: ...13 Order code D1475B D1476B EDGE EHS 1 EDGE EBS 1 8 x EDGE EHS 1 Fig 11...
Страница 34: ...33 Order code D1475B D1476B EDGE EHS 1 EDGE EBS 1 Dimensions...
Страница 35: ...34 Order code D1475B D1476B EDGE EHS 1 EDGE EBS 1...
Страница 36: ...2019 DAP Audio...


