background image

LOCATION

•  Two people should be used when moving the 

appliance.

•  Remove interior and exterior packaging prior to 

installation. Wipe the outside of the appliance 

with a soft, dry cloth and the inside with a 

lukewarm wet cloth.

•  Place the appliance on a fl oor that is strong 

enough to support it when it is fully loaded. 

•  Do not place the appliance in direct sunlight or 

near sources of heat, such as a stove or heater, 

as this can increase electrical consumption. 

Extreme cold ambient temperatures may also 

cause the appliance to perform improperly.

•  Do not use the appliance near water, for 

example in a wet basement or near a sink.

•  This appliance is intended for household use 

only. It is not designed for outside installation, 

including anywhere that is not temperature 

controlled (garages, porches, vehicles, etc.).

•  Before connecting the appliance to a power 

source, let it stand upright for approximately 

6 hours. This will reduce the possibility of a 

malfunction in the cooling system from handling 

during transportation.

•  This appliance is 47 cm (18.5 inches) wide by 

82.2 cm (32.4 inches) high by 40 cm (15.7 

inches) deep. 

•  Allow 12.7 cm (5 inches) of space between the 

back, sides and top of the appliance and all 

adjacent walls.

•  This appliance is intended for free-standing 

installation only and is not intended to be 

built into a cabinet or counter. Building in this 

appliance can cause it to malfunction.

3

INSTALLATION INSTRUCTIONS

OPERATING INSTRUCTIONS

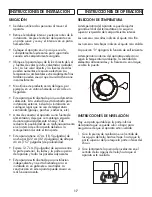
TEMPERATURE SELECTION

The temperature of the appliance can be adjusted 

by turning the thermostat dial in the upper left hand 

corner of the interior compartment. 

Higher numbers indicate the coldest setting.

Lower numbers indicate the warmest setting.

The “0” position will turn off the cooling function.

Internal temperature of the appliance can vary 

based on ambient temperature, the quantity of items 

stored and how frequently the door is opened.

LEVELING INSTRUCTIONS

There is an adjustable leg on the bottom of the 

appliance that can be turned up or down to ensure 

that the appliance is level.

1.  Turn the leveling leg counter-clockwise as far as 

it will go, until the top of the foot is touching the 

bottom of the cabinet.

2.  Slowly turn the leveling leg clockwise until the 

appliance is level.

Содержание DAR032B1WM

Страница 1: ...ph Ontario Canada N1H 6Z9 Danby Products Inc Findlay Ohio US A 45840 www Danby com 2019 07 23 COMPACT REFRIGERATOR Owner s Manual 1 7 R FRIG RATEUR COMPACT Manuel du propri taire 8 14 REFRIGERADOR COM...

Страница 2: ...ovide the original purchase receipt to validate your warranty and receive service Model Number _________________________________________________ Serial Number _________________________________________...

Страница 3: ...IREMENTS This appliance is not intended for use by persons including children whose physical sensory or mental capabilities may be different or reduced or who lack experience or knowledge unless such...

Страница 4: ...pliance is 47 cm 18 5 inches wide by 82 2 cm 32 4 inches high by 40 cm 15 7 inches deep Allow 12 7 cm 5 inches of space between the back sides and top of the appliance and all adjacent walls This appl...

Страница 5: ...net 3 Remove the adjustable foot from the bottom left side of the cabinet Remove the lower hinge from the bottom right side of the cabinet 4 Unscrew the hinge pin and remove it from the hinge 5 Flip o...

Страница 6: ...equipped with an automatic defrost function and does not require manual defrosting Defrost water from the appliance is channeled into a drip tray located above the compressor Heat transfer from the c...

Страница 7: ...nlight Ambient temperature or humidity is very high Appliance runs continuously Temperature setting is too cold Door not shut properly or opened excessively Recently added a large quantity of warm foo...

Страница 8: ...ce depot Any appliance requiring service outside the limited boundaries of In Home Service will be the consumer s responsibility to transport at their own expense to the original point of purchase or...

Страница 9: ...u d achat original pour valider votre garantie et recevoir le service Num ro de mod le _____________________________________________ Num ro de serie _______________________________________________ Da...

Страница 10: ...peuvent tre diff rentes ou r duites ou qui n ont pas d exp rience ou de connaissances moins que ces personnes ne re oivent de supervision ou de formation pour faire fonctionner l appareil par une pers...

Страница 11: ...7 cm 18 5 pouces de largeur sur 82 2 cm 32 4 pouces de hauteur sur 40 cm de profondeur 15 7 pouces Laisser 12 7 cm 5 pouces d espace entre le dos les c t s et le dessus de l appareil et les parois adj...

Страница 12: ...le pied r glable du c t inf rieur gauche du meuble Retirez la charni re inf rieure du c t inf rieur droit de l armoire 4 D vissez l axe de charni re et retirez le de la charni re 5 Retournez la charn...

Страница 13: ...areil est quip d une fonction de d givrage automatique et ne n cessite pas de d givrage manuel Le d givrage de l eau de l appareil est canalis dans un tiroir situ au dessus du compresseur Le transfert...

Страница 14: ...lumi re directe du soleil La temp rature ambiante ou l humidit est tr s lev e L appareil fonctionne en continu Le r glage de la temp rature est trop froid Le porte n est pas ferm es correctement ou o...

Страница 15: ...premiers douze 12 mois toutes les pi ces fonctionnelles de ce produit qui s av rent d fectueuses seront r par es ou remplac es selon le choix du garant sans frais l acheteur initial Danby se r serve l...

Страница 16: ...ci n para obtener un servicio bajo garant a Debe proporcionar el recibo de compra original para validar su garant a y recibir servicio N mero de modelo _____________________________________________ N...

Страница 17: ...xperiencia o conocimiento a menos que dichas personas reciban supervisi n o entrenamiento para operar el aparato por una persona responsable de su la seguridad Este dispositivo est destinado a ser uti...

Страница 18: ...ste aparato tiene 47 cm 18 5 pulgadas de ancho por 82 2 cm 32 4 pulgadas de alto por 40 cm 15 7 pulgadas de profundidad Espere 12 7 cm 5 pulgadas de espacio entre la parte posterior los lados y la par...

Страница 19: ...armario 3 Retire el pie ajustable de la parte inferior izquierda del gabinete Retire la bisagra inferior de la parte inferior derecha del gabinete 4 Destornille el pasador de la bisagra y s quelo de l...

Страница 20: ...da con una funci n de descongelaci n autom tica y no requiere descongelaci n manual El agua de descongelaci n del aparato se canaliza en una bandeja de goteo situada por encima del compresor La transf...

Страница 21: ...e la luz solar directa La temperatura ambiente o la humedad es muy alta El aparato funciona continuamente La temperatura est demasiado fr a La puerta no se cierra correctamente o se abre demasiado Rec...

Страница 22: ...rea limitada de Servicio en Domicilio el cliente ser responsable por transportar dicho artefacto hasta el Taller de Servicio Autorizado mas cercano Si el electrodom stico est instalado en un lugar que...

Страница 23: ...___________________ __________________________________________________________________________________________ _________________________________________________________________________________________...

Страница 24: ...NUAL MANUEL DU PROPRI TAIRE MANUAL DEL PROPIETARIO Danby Products Limited Guelph Ontario Canada N1H 6Z9 Danby Products Inc Findlay Ohio USA 45840 Printed in China Imprim en Chine Impreso en China www...

Отзывы: