DMP-8121 Installation Quick Guide
DD4945518
Rev 02
22 June 2022
201 Daktronics Drive Brookings, SD 57006
www.daktronics.com/support
800.325.8766
Page 3 of 6
7.
Connect the power cable to the power supply and plug the power
supply into a power outlet. Use the power button to power on the
DMP-8121.
8.
Connect Ethernet cable to the Ethernet port(2) if performing a
hardwire installation.
Connect DMP-8121 to Wi-Fi
Note:
These steps are
NOT
required if the player is connected with
an Ethernet cable.
1.
Complete the steps in the
Standard Installation
section.
2.
Boot up - observe the boot screen.
3.
Observe the black screen.
4.
Press the Esc Key on the keyboard.
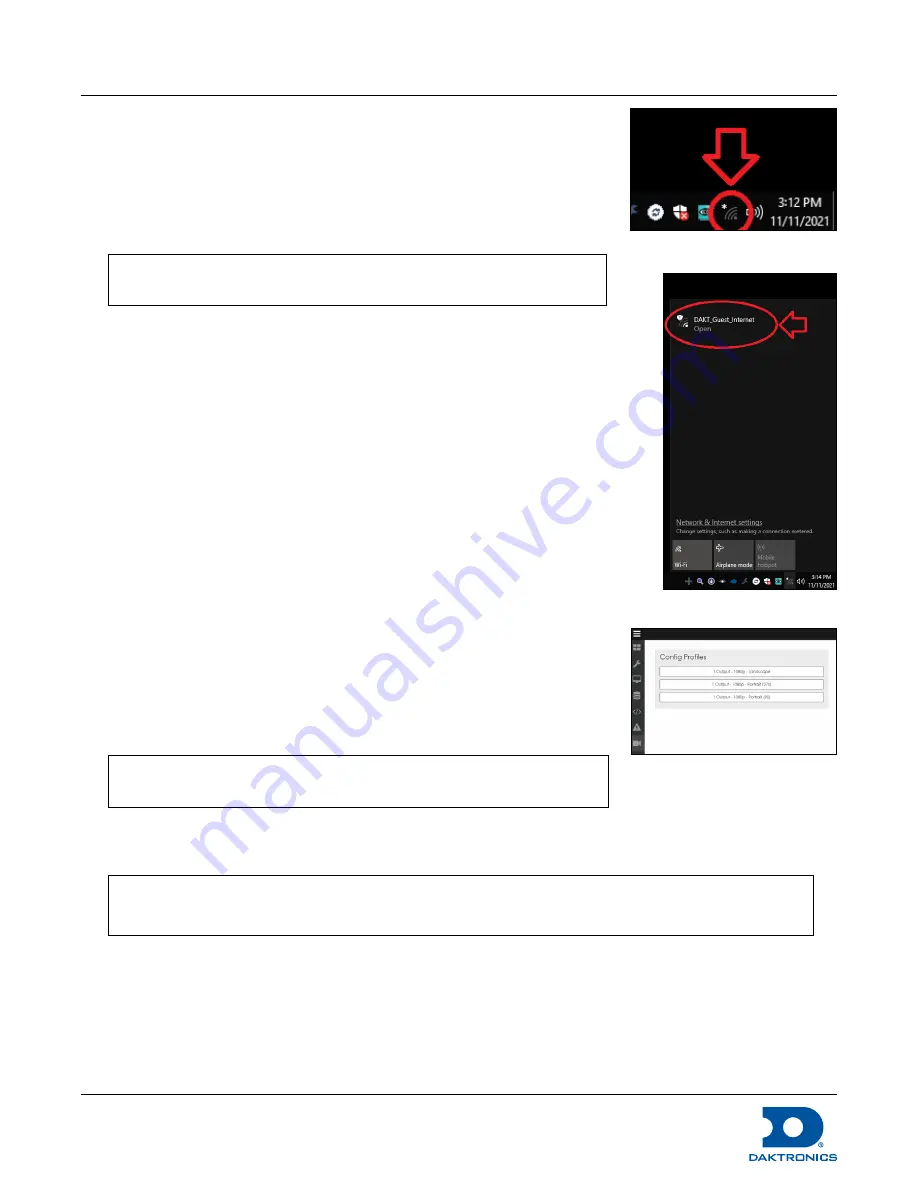
5.
Click the Network icon. Refer to
Figure 6
.
6.
Click Wi-Fi.
7.
Select the desired network. Refer to
Figure 7
.
8.
Select the auto-reconnect option.
9.
Click
Connect
.
Set the Display Profile
1.
Record the IP address and access code from the boot screen.
2.
Open DMP 8000 by going to the IP address in a web browser.
3.
Login using the default username and password.
• Username
= Dak
• Password
= DakPassword!
Note:
After first time login, update the login credentials with a new
personalized username and password.
4.
Navigate to
Config Profiles
. Refer to
Figure 8
.
5.
Select the desired configuration from the available options.
Note:
The available options should include Landscape, Portrait (270), and Portrait (90). Refer to
Figure 8
.
Figure 6:
Network Icon
Figure 7:
Select a Network
Figure 8:
Config Profiles


