6
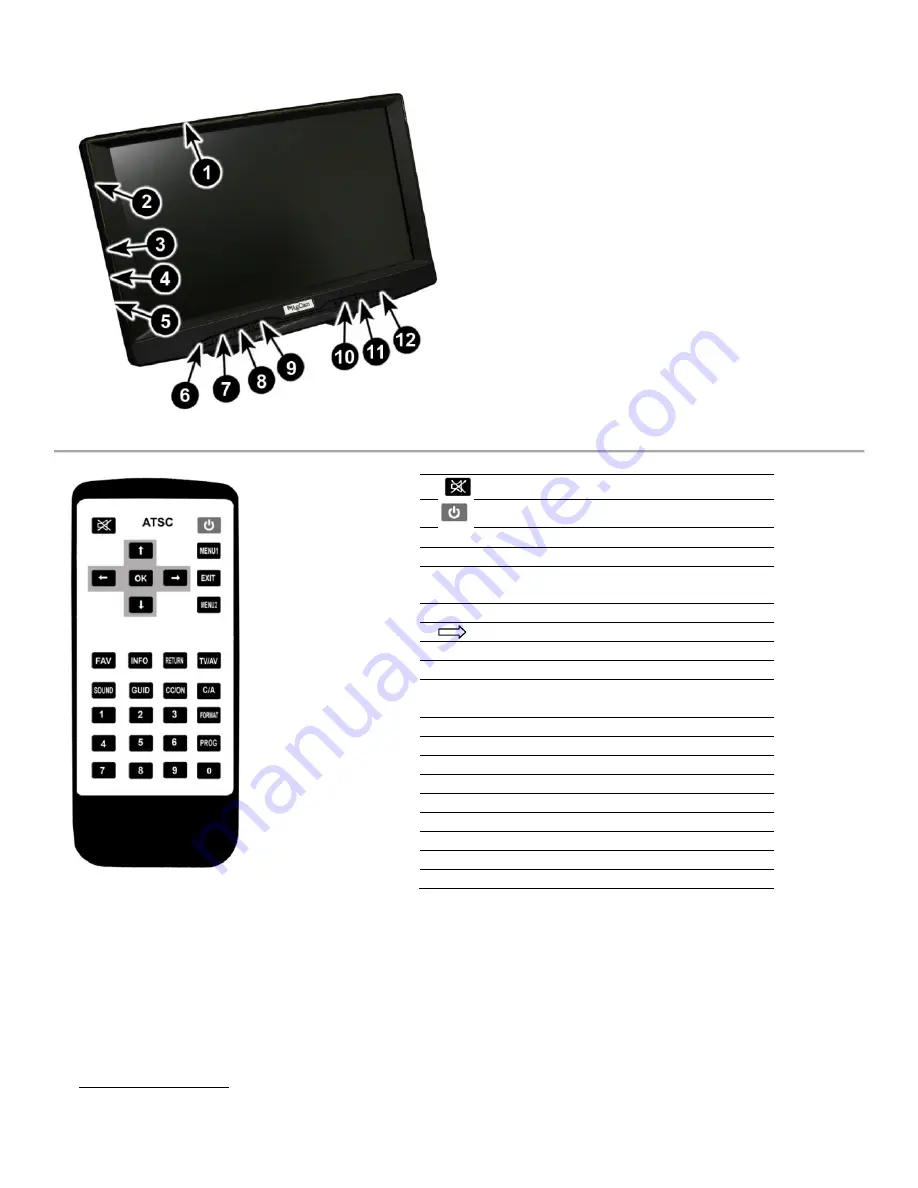
1.
Antenna
2.
Earphones
In
3.
A/V1
In.
For
use
with
AV
In
‐
Out
cable.
NOTE:
This
input
override
external
AV1
port
4.
A/V2
In.
For
use
with
AV
In
‐
Out
cable.
NOTE:
This
input
override
external
AV2
port
5.
A/V
Out.
Allows
for
output
of
video
signal
to
external
device.
6.
–
=
volume
down
&
menu
options
7.
+
=
volume
up
&
menu
options
8.
CH
‐
=
Channel
down
&
menu
options
9.
CH+=Channel
up
&
menu
options
10.
MENU
=
enables
monitor
menu
access
11.
A/V
=
allows
for
Audio/Video
channel
selection
12.
POWER
=
Power
ON/OFF
13.
Only
the
cable
marked
with
white
band
is
audio
enabled.
Mute
Power
ON/OFF
MENU1
Allows
access
to
Standard
menu
settings
EXIT
Exits
user
from
menu
screens
MENU2
Allows
access
to
Digital
Tuner
menu
(if
enabled)
OK
Allows
entry
selection
Switches
between
AV1/AV2/Tuner
FAV
Up/Down/Left/Right
(all
arrows)
INFO
ONLY
RETURN
Switches
to
the
last
channel
you
were
viewing
TV/AV
Provides
basic
setting
info
SOUND
Non
‐
Functional
GUID
Volume
Adjust
CC/ON
Channel
Info
C/A
CC
ON/OFF
FORMAT
Channel/Antenna
input
selection
PROG
Displays
aspect
ratio
setting
1
‐
0
Allows
channel
Programming
Channel
Selection
keys
Getting
Started:
1.
Power
on
monitor
by
pushing
“POWER”
button
on
the
face
of
monitor
or
remote.
2.
If
you
do
not
see
video
from
your
camera,
push
the
AV
button
on
monitor
or
TV/AV
button
on
remote.
Repeatedly
pushing
the
AV
button
will
cycle
through
the
two
video
channels
(and
the
two
TV
tuner
channels
if
enabled).
3.
Your
monitor
comes
from
the
factory
with
the
digital
TV
tuner
disabled.
To
enable
this
feature
see
“Hidden
Menu”
pages
11
‐
12
of
this
manual.
5.
Standard
Menu
Settings
Press
the
MENU
key
on
the
monitor
or
MENU1
on
the
remote.
Pressing
MENU
multiple
times
will
scroll
through
the
different
categories
shown
at
the
top
of
the
screen.


