Dakota Micro, Inc.
AC
-
9MQ(‐C2) User Manual
Rev: 06/26/17 Page 9 of 12
Author: CNR
XIII. QUAD MENU SETTINGS
1.
Press and hold the
MENU
button on
REAR
of monitor (Refer to “Quad
Monitor Operations – Back” pg. 7) for 3 seconds
2.
Use
REAR
arrow buttons (Refer to pg. 7) to select desired menu to adjust.
3.
Use
ENTER
button on REA (Refer to pg. 7) to select desired option on any
menu screen.
4.
Use
REAR MENU
button to exit out of any menu option.
5.
Use
and
to move up and down through individual menu options.
6.
Use
and
to change information on individual line items.
7.
Press and hold
REAR MENU
button for 3 seconds to exit menu setup.
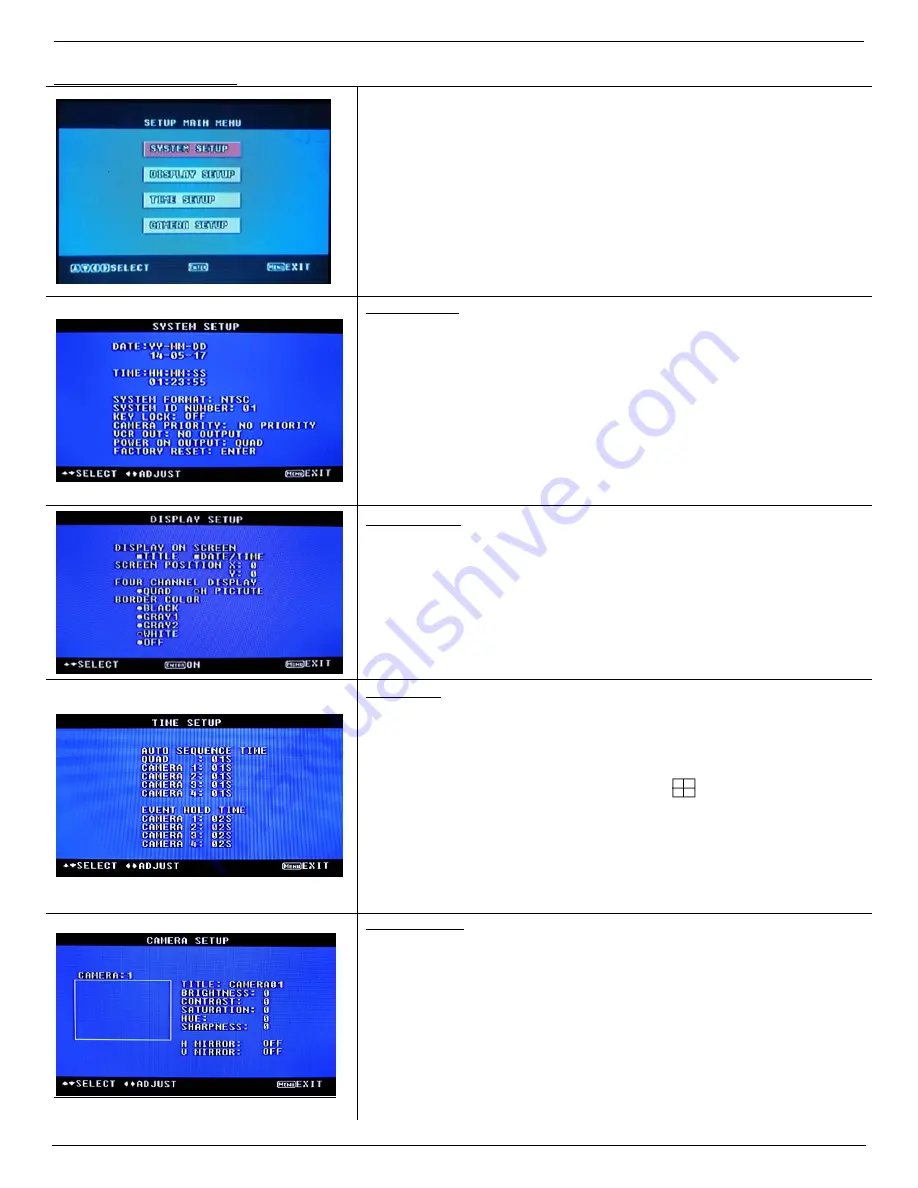
SYSTEM SETUP
DATE:
Set your current date. MONTH:DAY: YEAR
TIME:
Set your current time. HOUR:MINUTE:SECOND
SYSTEM FORMAT:
Video system. NTSC/PAL selectable.
SYSTEM ID NUMBER:
Select unique ID # for quad.
KEY LOCK:
When set to ON position, only individual camera views available.
When set to OFF position, all functions available
CAMERA PRIORITY:
Function not available on this model.
VCR OUT:
Function not available on this model.
POWER ON OUTPUT:
Selects the type of display image shown on power on.
FACTORY RESET:
Restores unit to factory preset options.
DISPLAY SETUP
DISPLAY ON SCREEN:
Press ENTER to select what information is displayed on
screen.
SCREEN POSITION: X ‐
Use the
(right arrow) and the
(left arrow), to move the
screen from side to side
.
Y ‐
Use the
(right arrow) to move the screen up and the
(left
arrow) to move the screen down.
FOUR CHANNEL:
Default is QUAD mode
BORDER COLOR:
Press ENTER to select which border color is displayed.
TIME SETUP
AUTO SEQUENCE TIME:
Allows for the automatic rotation of the images,
including all full screen images and the Quad view. You
can adjust the delay time for each camera from 1 to 99
seconds.
To enable auto sequence, press and hold the
button on the front of
your monitor (#3 in the diagram on page 6). Press and hold to disable auto
sequence.
EVENT HOLD TIME:
Only for the use with event triggers. Allows for the
programming of how long the event trigger camera image
continues after event has been discontinued.
CAMERA SETUP
CAMERA:
Select cameras 1‐4 to adjust.
TITLE:
&
change parameter.
BRIGHTNESS:
Increases brightness,
decreases brightness
CONTRAST:
Increases contrast,
decreases contrast
SATURATION:
Increases saturation,
decreases saturation
HUE:
Increases hue,
decreases hue
SHARPNESS:
Increases sharpness,
decreases sharpness
H MIRROR:
When ON, mirrors image horizontally.
V MIRROR:
When ON, mirrors image vertically.


