3
|
Components
Service manual
304
REYQ8~20+REMQ5U7Y1B
VRV IV+ Heat Recovery
ESIE18-15B – 2020.05
For the Y11S and Y12S valves
3
Connect the service monitoring tool to the unit and check the pressure
difference between the high and low pressure. Once the pressure difference
between the high and low pressure exceeds 0,3 MPa and the compressor is
running, Y11S and Y12S are energized.
4
Check with a contact thermometer if the flow through the oil return valve
corresponds with the flow shown in the flow diagram. (See
401]).
Is the flow correct?
Action
Yes
Oil return valve is OK. Return to the
troubleshooting of the specific error
and continue with the next procedure.
No
Replace the body of the oil return valve,
see
Problem solved?
After all checking procedures listed above have been performed:
Is the problem solved?
Action
Yes
No further actions required.
No
Return to the troubleshooting of the
specific error and continue with the
next procedure.
3.13.2 Repair procedures
To remove the oil return valve coil
Prerequisite:
Stop the unit operation via the central controller.
Prerequisite:
Turn OFF the respective circuit breaker.
Prerequisite:
Remove the required plate work, see
315].
Prerequisite:
If needed, remove any parts to create more space for the removal of
the oil return valve coil.
1
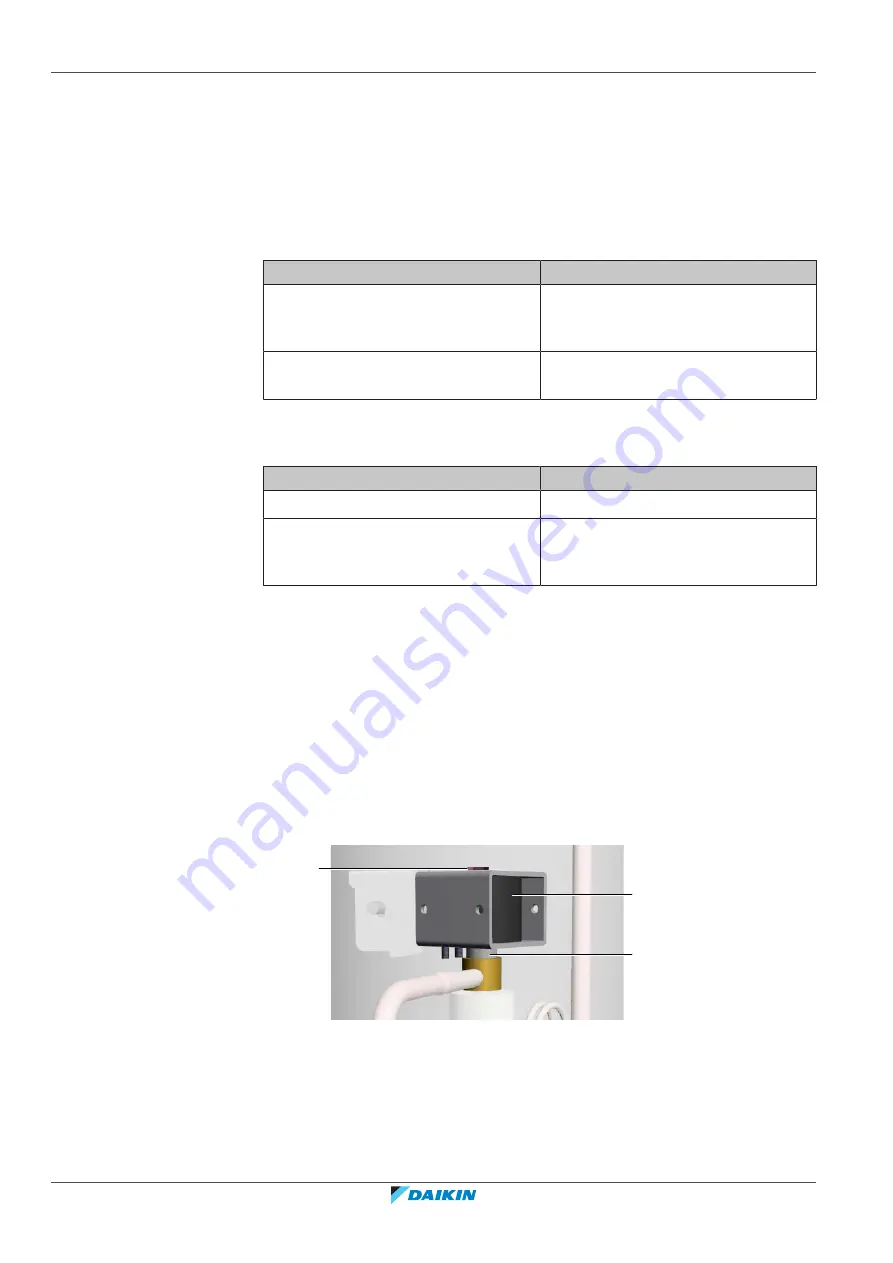
Remove the screw and remove the oil return valve coil from the oil return
valve body.
b
c
a
a
Screw
b
Valve coil
c
Valve body
2
Cut all tie straps that fix the oil return valve coil harness.
3
Disconnect the oil return valve coil connector from the appropriate PCB.
4
To install the oil return valve coil, see
Содержание VRV IV+
Страница 473: ......
Страница 474: ......
Страница 475: ......
Страница 476: ...ESIE18 15B 2020 05 Copyright 2020 Daikin Verantwortung für Energie und Umwelt ...


