Daikin ONE Скачать руководство пользователя страница 2

2

www.daikincomfort.com
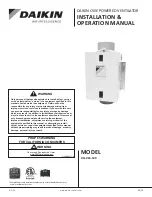
IO-DPV

14⅞"

10⅛"

11½" 6"

6"

Installation

Only  a  heating/air  conditioning  installer  or  qualified  service  

person  should  install  your  ventilator,  unless  you 

are  completely  familiar  with  the  necessary  tools,  

equipment  and  potential  hazards  involved.  If  you  plan  to  

install  this  ventilator  yourself,  please  be  aware  that  the  

improper  use  of  any  tool  can  be  dangerous.  Daikin  will 

not assume any responsibility for failures due to incorrect  

installation procedures.

•  Homeowners can perform the basic maintenance 


function of replacing filters.

•  When  working  on  the  ventilator,  observe  precautions 

in  this  manual,  labels  attached  to  the  furnace  or  air  

handler, and other safety precautions that may apply.

•  Follow  all  safety  codes.  Wear  safety  glasses  and  

work gloves.

Description 

The Daikin One Powered Ventilator is a cost-effective mechanical 

ventilation solution that helps manage the humidity and tempera-

ture  in  a  home.  Contractors  and  builders  now  have  a  practical 

offering  for  supplying  constant  outdoor  air  into  the  residence, 

meeting  the  ventilation  requirements  per  ASHRAE  guidelines.  

Proprietary Notice

This document and the information disclosed herein are proprietary 

data of Daikin North America LLC. Neither this document nor 

the  information  contained  herein  shall  be  reproduced,  used,  or 

disclosed  to  others  without  the  written  authorization  of  Daikin 

North America LLC, except to the extent required for installation or 

maintenance of recipient’s equipment.

Copyright Notice

Copyright 2020, Daikin North America LLC All rights reserved.

Liability Notice

Daikin North America LLC does not accept any liability for 

installations  of  ventilation  equipment  installed  by  unqualified 

personnel or the use of parts/components/filters/equipment that 

are not authorized or approved by Daikin. 

Specifications

WARNING!

This symbol indicates important instructions. Failure to heed 

them can result in serious injury or death.

i

WARNING! 

Before  beginning  any  installation  or  modification,  be  certain 

that the main line electrical disconnect switch is in the OFF  

position.  Unexpected  start-up  of  system  blower  may  cause  

serious  injury.  Tag  disconnect  switch  with  suitable  

warning labels.

WARNING! 

This  product  can  expose  you  to  a  chemical  (or  chemicals) 

known to the State of California to cause cancer.

WARNING! 

This  product  can  expose  you  to  a  chemical  (or  chemicals) 

known to the State of California to cause reproductive toxicity.

i

i

i

CAUTION!

This symbol indicates important instructions. Failure to heed 

them can result in injury or material property damage.

CAUTION!

i

i

Read and save these instructions 

Important: Read and save these instructions. This guide to be left with equipment owner. 

i

Replacement Media Filters

Replacement Filter Part 

MERV 16      

 DQ-P-F-16

MERV 13      

 DQ-P-F-13

Table 1 - Power consumption of Ventilator at various flowrates

Flow Rate @ 0.2" w.c.

(CFM)

Power (W)

100

26.3

90

21.8

80

19.5

70

17.1

60

15.1

50

13

40

11.3

12"

9½"

Содержание ONE

Страница 1: ... procedures If you service this unit you assume responsibility for any injury or property damage which may result In addition in jurisdictions that require one or more licenses to service the equipment specified in this manual only licensed personnel should service the equipment Improper installation adjustment servicing or repair of the equipment specified in this manual or attempting to install ...

Страница 2: ... North America LLC except to the extent required for installation or maintenance of recipient s equipment Copyright Notice Copyright 2020 Daikin North America LLC All rights reserved Liability Notice Daikin North America LLC does not accept any liability for installations of ventilation equipment installed by unqualified personnel or the use of parts components filters equipment that are not autho...

Страница 3: ...tilator Mounting the Ventilator 1 Confirmthattheventilatorispositionedsotheairflowisin the correct direction 2 Mounting a Surface Mounting Place the ventilator in a position so thatatleastoneofthemountingbracketsiscenteredon astudorjoistandmarkthelocationforthefour 4 holes in the mounting brackets for securing the ventilator Remove the ventilator and install properly rated wall ceiling anchors for...

Страница 4: ...e for the installation For bathroom and general ventilation applications at least 8 feet of insulated flexible duct shall be installed between the exhaust or supply grille s and the ventilator 1 Connect ducting to the ventilator s intake and outlet duct collars Figure 4 sealing the joints with appropriately rated tape Use screws or suitable clamps to secure in place Make sure the outdoor air intak...

Страница 5: ...s from the supply to their corresponding wires within the wire compartment Figure 6 Use approved methods for all connections 3 Carefully tuck wires back inside the wire compartment and replace wire compartment cover securing it with the screw that was removed earlier Setting the Ventilation Flowrate 1 Determine the CFM desired for ventilating the home This unit can be set to deliver between 40 CFM...

Страница 6: ... the ventilator turned on the initial screen will show OFF Press the ON button to show the current temperature and relative humidity By pressing the ON button the ventilator will initially turn on for continuous airflow of 30 CFM which is the factory default setting Energy Saving Mode NOTE This ventilator is equipped with an Energy Saving Mode that allows upper and lower limits to be set for both ...

Страница 7: ...tall the heater unit follow the instructions provided with that unit Once installed and power is supplied to the heater unit the ventilator controller LCD screen will now also display a thermometer icon When the temperature of the intake air is between 39 F and 54 F 4 and 12 C the heater unit will operate on Stage 1 heating and the number 1 will be displayed on the ventilator LCD screen when the t...

Страница 8: ...ions in the ducting The most common are bird or insect nests in the Air Intake Hood 2b Filter is clogged 2b Change air filter 2b Change clear wire mesh insect screen 3 Fan is operating louder than normal 3a Motor is loose 3a Turn off power to unit and check that all screws are fully tightened Restore power to unit 3b Fan blade is hitting housing of unit 3b Call your HVAC dealer for service Daikin ...

Отзывы: