■
English
12
Setting the Humidifying Hose Length
1.
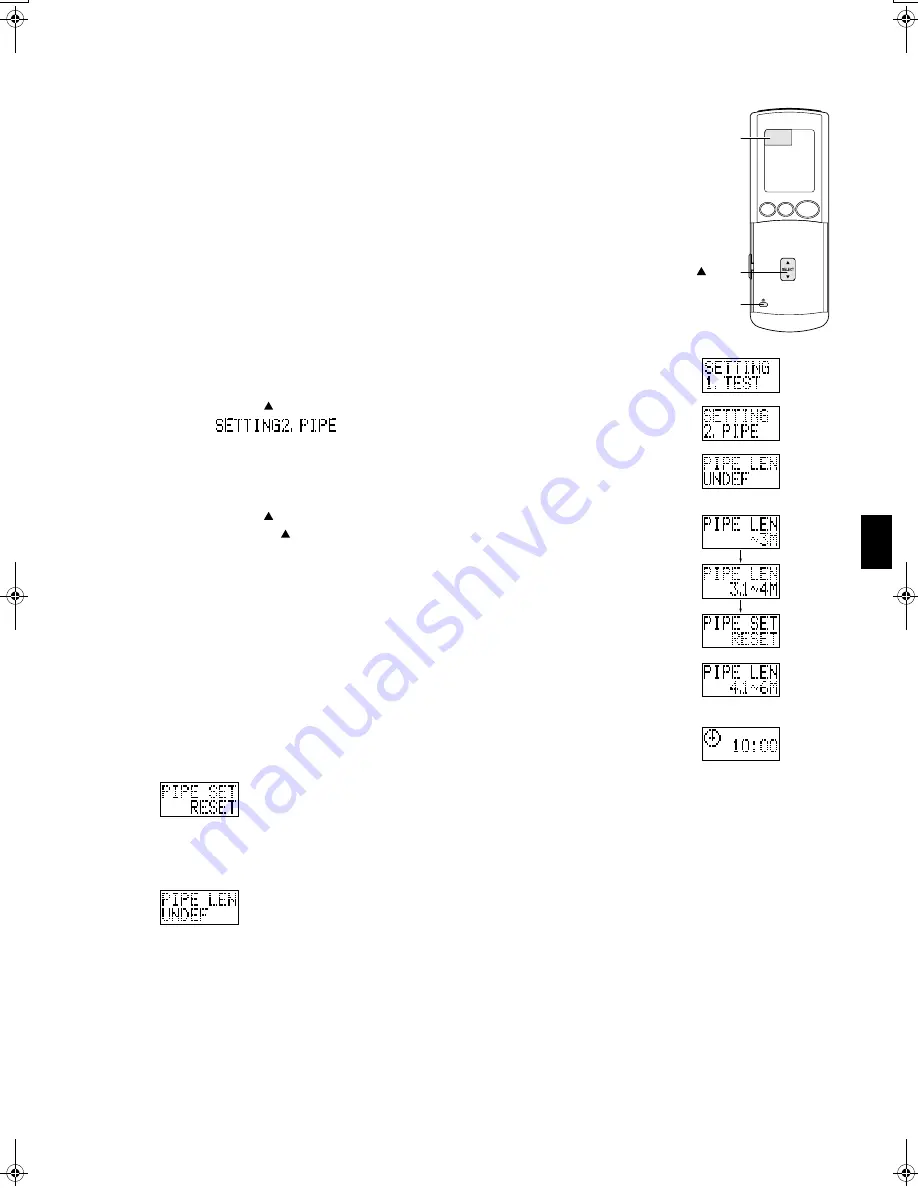
Setting the humidifying hose length.
• Set the humidifying hose length to ensure humidifying capacity.
Use the remote controller to set the humidifying hose length.
When doing this, power on the unit as communication is established between the unit
and the remote controller.
(The humidifying hose length includes the rear of the indoor unit.)
1) Hold “CLOCK button” for more than 5 seconds.
(To cancel, do not operate the button for 10 seconds. The display will return to
normal.)
2) Press “SELECT button”.
Select “
”.
3) Press “CLOCK button” to activate the hose length setting mode.
(Be sure to direct the remote controller toward the main unit while operating it.)
The display will show the currently set hose length.
(Default is no setting.)
4) Press “SELECT button” to set the humidifying hose length.
Pressing “SELECT button” changes the hose length.
You may set the hose length to 5 levels, ~3M, 3.1~4M, 4.1~6M, 6.1~8M, 8.1~10M.
5) Press “CLOCK button” after selecting the hose length.
(Direct the remote controller toward the main unit while operating it.)
6) Hold “CLOCK button” for more than 5 seconds.
The humidifying hose length setting is complete.
If you set the wrong humidifying hose length, cancel the setting displaying
“
” with the step 4) operation and reset it.
2.
When the unit cannot be powered on.
• When setting the humidifying hose length without powering on the unit, the display shows
“
” with the step 5) operation shown above but the remote controller remembers the set hose length.
(When the customer uses the unit, the humidifying hose length information is sent to the indoor unit to be set.)
“CLOCK button”
Matrix display
“SELECT button”
Matrix display
(Setting 4.1 to 6m)
(10:00 a.m.)
01_EN_3P177302-1.fm Page 12 Tuesday, May 30, 2006 9:36 AM
Содержание FTXR28EV1B
Страница 17: ... 0605 HT 3P177302 1 M05B200 ...


