


3
4.
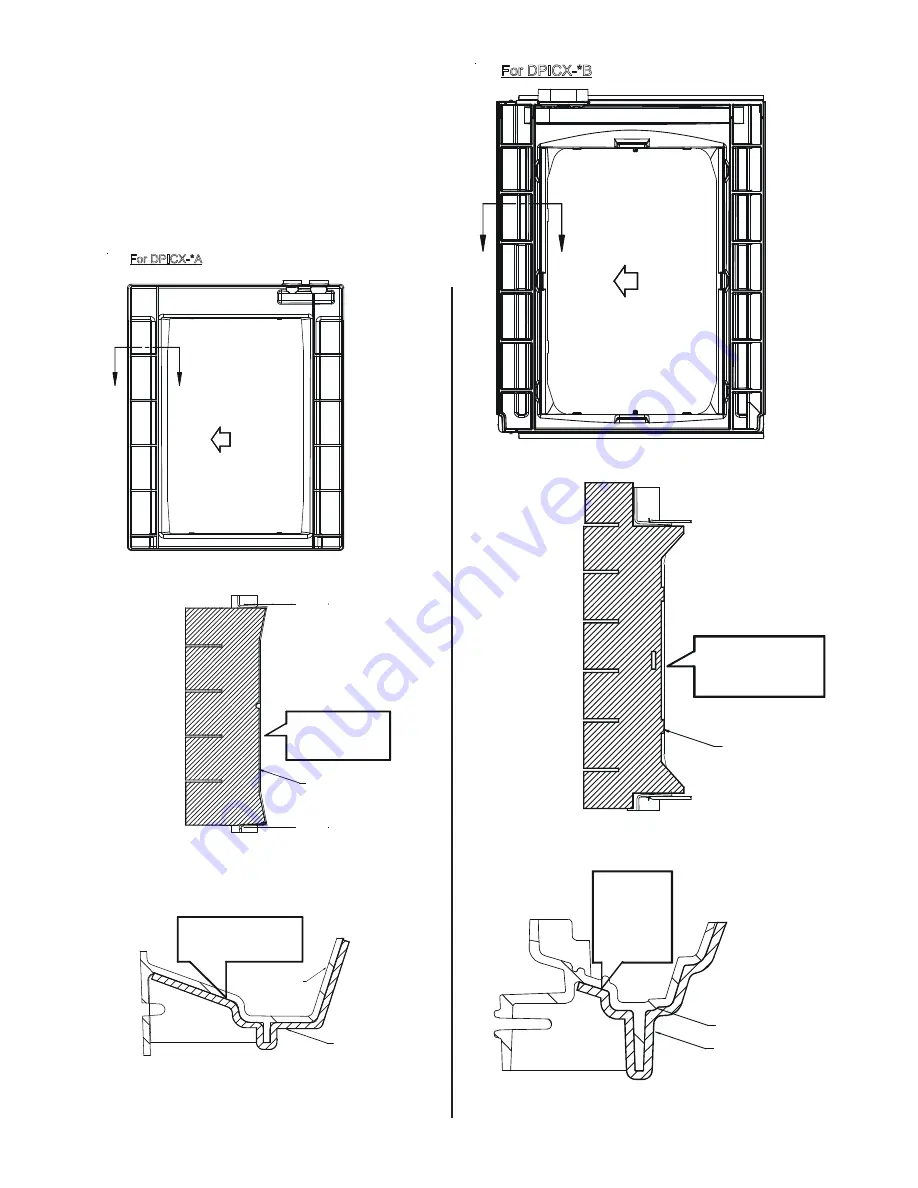
Remove the paper backing from the insulation adhesive
and install insluation A and C. Line up edge of the
insulation with inside of the drain pan (see view E of figure
5). Firmly press the insulation along the surface of drain
pan.
NOTE:
Ensure there are no air gaps/bubbles in between insula-
tion and drain pan. (See Section F-F of Figure 5). Condensation
may be generated in that area.
Insulation C
Attach the
insulation
along the
surface of
drain pan
E
F
F
Section F-F
For DPICX-*B
View E
Flush edge of
insulation with
edge of drain pan
Insulation C
Drain pan
Figure 5
Bottom View of Drain Pan
F
F
E
Insulation C
Flush edge of
insulation with
edge of drain pan
Attach the insulation
along the surface of
drain pan
Section F-F
For DPICX-*A
View E
Insulation C
Drain pan
Bottom View of Drain Pan
Содержание DPICX A Series
Страница 7: ...7 THIS PAGE LEFT INTENTIONALLY BLANK...


