11
Taking out of operation
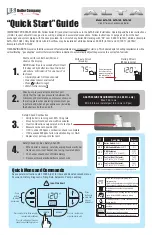
Installation and operating instructions
54
Daikin/ROTEX A2 F
Oil condensing boiler A2 F
008.1546499_01 – 03/2018 – EN
11
Taking out of operation
DANGER: RISK OF BURNING
When the heating and hot water connections are opened,
there is a risk of
scalding and flooding
due to escaping
hot water.
▪ Only empty the heating system when it has cooled down
sufficiently long and is provided with a suitable device for
safely draining off or collecting the escaping water.
▪ Wear suitable protective clothing.
11.1
Temporary shutdown
CAUTION
A heating system which is shut down can freeze in the
event of frost and may suffer damage.
▪ Drain the heating system that is shut down if there is
danger of frost.
▪ If the heating system is not drained, the oil and power
supplies must be secured and the main switch must re-
main switched on.
If a heating or hot water supply is not required for a longer period of
time, it is possible to temporarily shut down the A2 F.
However, we recommend putting the system into standby mode (see
accompanying control system instructions). The heating system is
then protected from frost. The pumps and valve protection functions
are active.
If it is not possible to guarantee the oil and power supply when there
is danger of frost, then
▪ the A2 F must be drained,
▪ the condensate box must be drained,
▪ suitable antifreeze measures must be applied to the connected
heating system and optional hot water storage tank (e.g. draining).
Draining the heating circuit and hot water circuit
1
Switch off the main switch and secure against restarting.
2
Close the check valve on the oil filter.
3
Connect the drain hose to the KFE cock of the A2 F.
4
Open the KFE cock on the A2 F.
5
Drain the heating and hot water circuits.
11.2
Final decommissioning and
disposal
For the final shutdown, the A2 F must be:
1
Taking out of service (see
2
disconnected from all electrical, oil and water connections
3
properly disposed of
Recommendations for disposal
The A2 F has an environmentally friendly design. During the dis-
posal process, the only waste created is that which can be used for
material or thermal recycling. The materials used that are suitable for
recycling can be sorted into individual types.
Thanks to the environmentally friendly design of the A2 F,
we have established requirements to ensure environmentally
friendly disposal. Proper disposal in compliance with the respective
national regulations of the country of use is the responsibility of the
user/owner.