


100
section size. The dragged zone supports 4X to 16X speeds. It can realize PTZ automatically. The smaller
zone you dragged, the higher the speed.
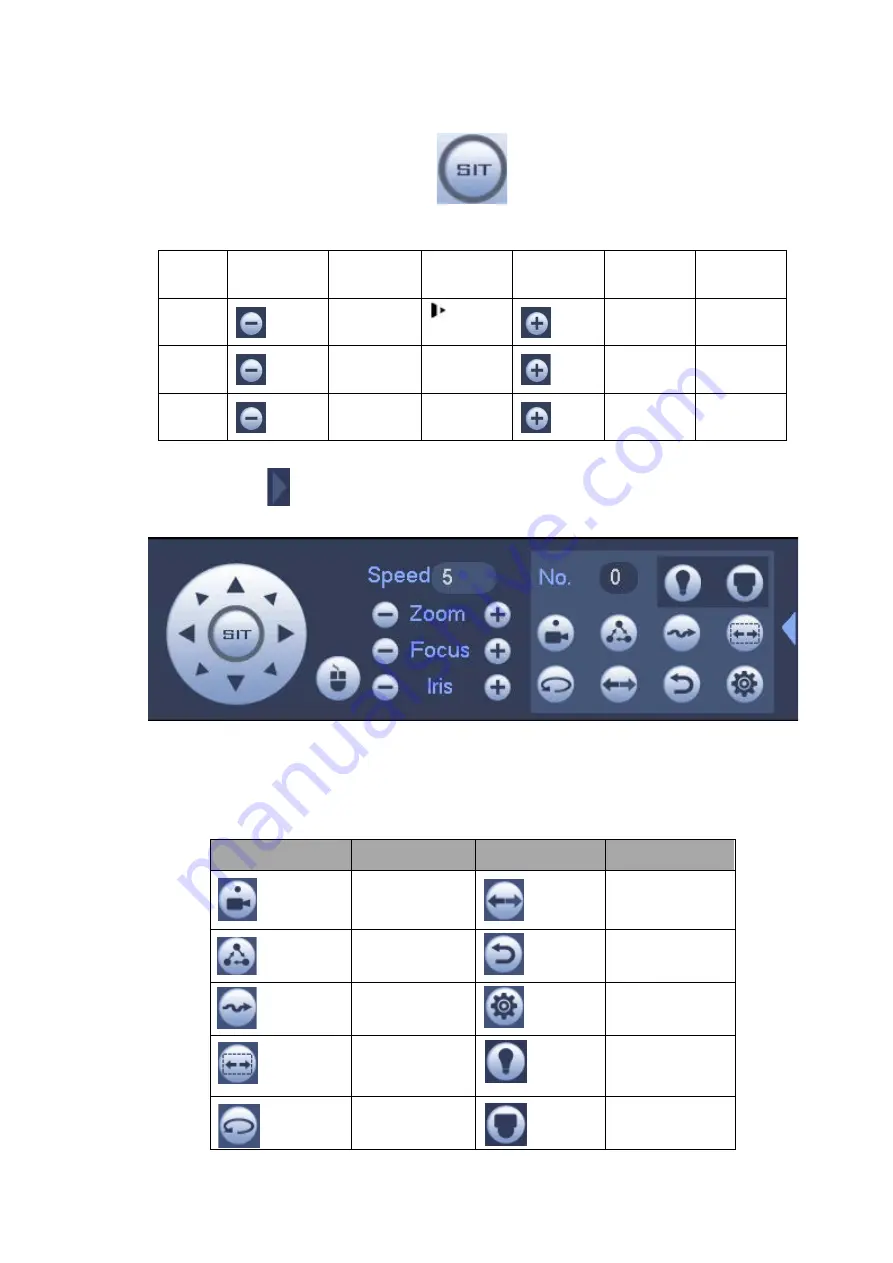
Figure 3-84
Name
Function
key
function
Shortcut
key
Function
key
function
Shortcut
key
Zoom
Near
Far
Focus
Near
│
Far
►
│
Iris
close
Open
In Figure 3-83, click
to open the menu, you can set preset, tour, pattern, scan and etc. See
Figure 3-85
Please refer to the following sheet for detailed information.
Please note the above interface may vary due to different protocols. The button is grey and can not
be selected once the current function is null.
Right click mouse or click the ESC button at the front panel to go back to the Figure 3-83.
Icon
Function
Icon
Function
Preset
Flip
Tour
Reset
Pattern
Aux
Scan
Aux on-off
button
Rotate
Go to menu
Содержание NVR608-32-4KS2
Страница 1: ...I Network Video Recorder User s Manual V6 0 0 ZHEJIANG DAHUA VISION TECHNOLOGY CO LTD...
Страница 56: ...40 Figure 3 14 Step 2 Click Add new holiday button and device displays the following interface See Figure 3 15...
Страница 121: ...105 Figure 3 92 Figure 3 93...
Страница 144: ...128 Figure 3 111 Figure 3 112 Figure 3 113...
Страница 157: ...141 Figure 3 126 Figure 3 127...
Страница 159: ...143 Figure 3 129 Click draw button to draw the zone See Figure 3 130 Figure 3 130...
Страница 162: ...146 Figure 3 133 Click Draw button to draw a zone See Figure 3 134 Figure 3 134...
Страница 167: ...151 Figure 3 139 Click draw button to draw the zone See Figure 3 140...
Страница 178: ...162 Figure 3 151 Step 2 Add surveillance scene 1 Click Add The Add interface is displayed See Figure 3 152...
Страница 185: ...169 Figure 3 157 Figure 3 158...
Страница 186: ...170 Figure 3 159 Figure 3 160...
Страница 189: ...173 Figure 3 164 Figure 3 165...
Страница 224: ...208 Figure 3 199...
Страница 231: ...215 Figure 3 206 Step 2 Click Add user button in Figure 3 206 The interface is shown as in Figure 3 207 Figure 3 207...
Страница 247: ...231 Figure 3 227 Step 2 Click Add group Enter add group interface See Figure 3 228 Figure 3 228...
Страница 311: ...295 Figure 4 56 Figure 4 57...
Страница 317: ...301 Figure 4 62 Figure 4 63...
Страница 318: ...302 Figure 4 64 Figure 4 65...
Страница 343: ...327 Figure 4 101 Figure 4 102...
Страница 352: ...336 Figure 4 115 Figure 4 116...
Страница 372: ...356 Figure 4 144 Note For admin you can change the email information See Figure 4 145...


