Dahua HD IR Bullet Network Camera Quick Start Guide
9
2.2
Fix Device
Note
The following figures are for reference only; please refer to the product for more
details.
Make sure the bracket installation surface can sustain at least 3X weight of the total
weight of bracket and camera.
Some devices do not support manual focusing lever, please refer to the real
product for more details.
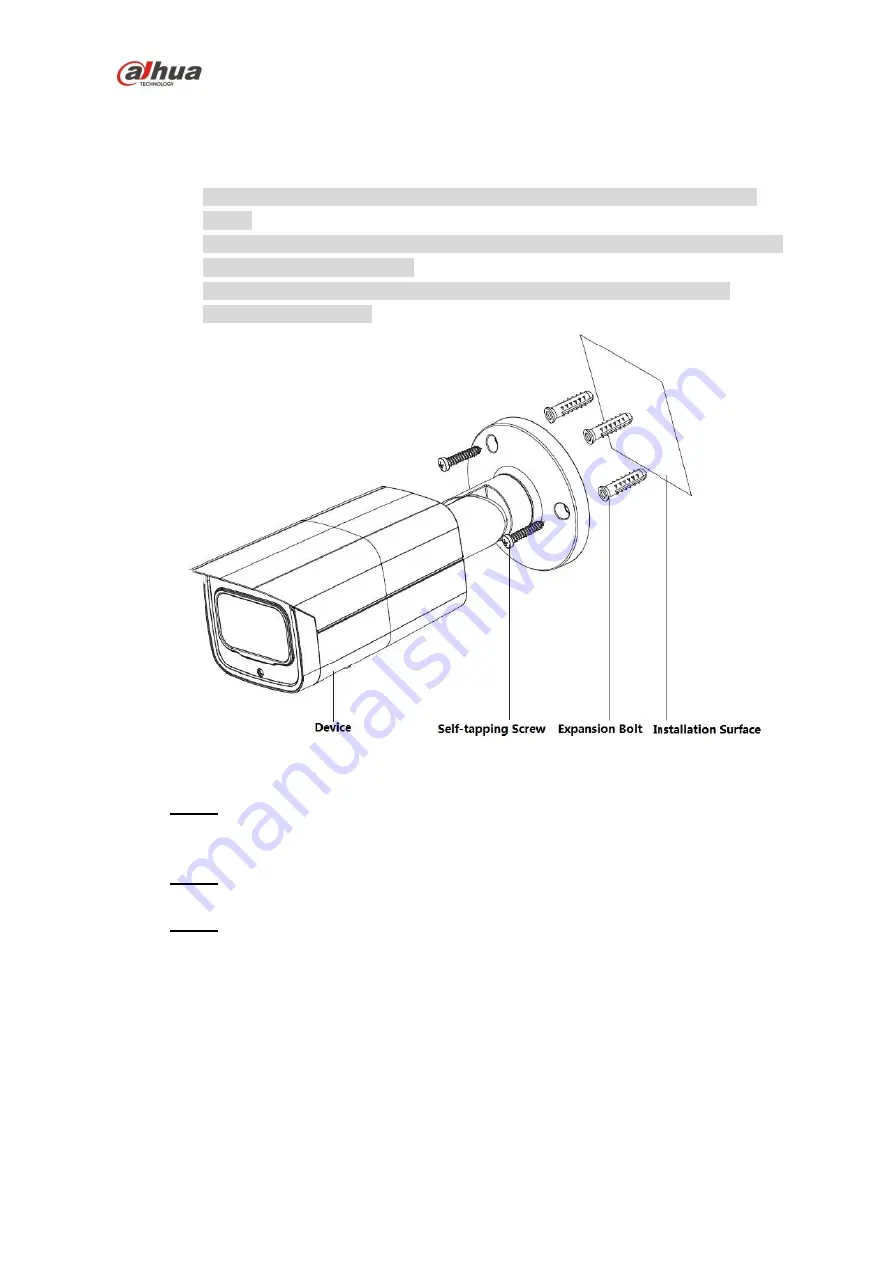
Figure 2-2
Step 1
Take out the installation position map from the accessory bag, paste it on the
installation surface (wall or ceiling) and dig holes according to the hole sites
marked on the installation position map.
Step 2
Take out the expansion bolts from the accessory bag and nail them into the
holes you just dug.
Step 3
Take out the self-tapping screws from the accessory bag; align the mounting
holes on the device bracket bottom with the expansion bolts which have been
well dug, and then use self-tapping screws to fix the device on the mounting
surface (wall or ceiling).
2.3
Connect Device Cable
Connect device corresponding power, video output, audio cable and RS485 control
cable well according to requirement, and then use insulated tape to twine the
connection respectively to make it waterproof.


