


User's Manual
76
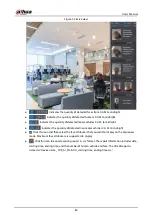
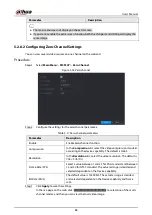
5.2.2.4 Manual Snapshot
You can take one to five snapshots of the video and save into a USB storage device.
By clicking
, you can take snapshots. The snapshots are automatically saved into the connected
USB storage device. You can view the snapshots on your PC.
To change the quantity of snapshots, select
Main Menu
>
CAMERA
>
ENCODE
>
Snapshot
, in the
Manual Snap
list, select the snapshot quantity.
5.2.2.5 Mute (Analog channel only)
You can mute the video sound by clicking
. This function is supported in single-channel view.
5.2.2.6 Warning Light (Supported on Camera with Warning Light Function)
Click to manually control the camera to turn on the warning light function.
5.2.2.7 Siren (Supported on Camera with Siren Function)
Click to manually control the camera to generate alarm sound.
5.2.2.8 Two-way Talk (Digital channel Only)
You can perform the voice interaction between the Device and the remote device to improve
efficiency of emergency. This function is supported only when the remotely connected IPC device
supports bidirectional talk.
●
Click
, the icon switches to
, the bidirectional talk of the remote device is turned on. The
bidirectional talk of other digital channels is disabled.
●
Click
to cancel the bidirectional talk. The bidirectional talk of other digital channels is
resumed.
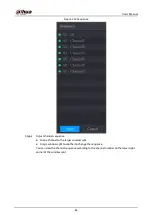
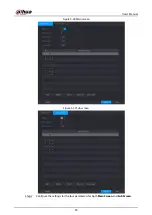
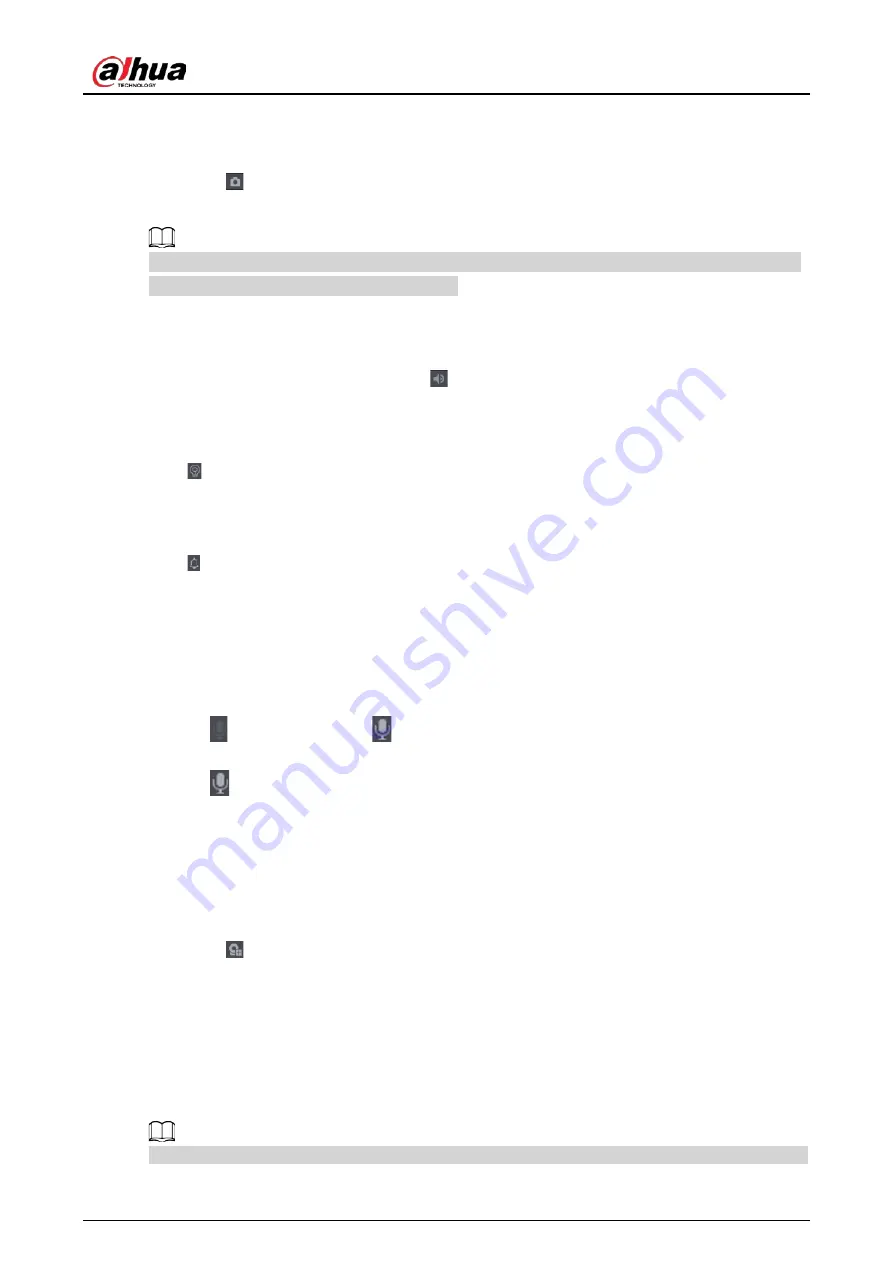
5.2.2.9 Adding Camera (Digital channel Only)
You can view the information of remote devices and add new remote devices to replace the current
connected devices.
By clicking
, the
Camera List
page is displayed. For details about adding the remote devices,
see ."5.6 Configuring Remote Devices".
5.2.3 Navigation Bar
You can access the functions to perform operations through the function icons on the navigation
bar. For example, you can access Main Menu and switch window split mode.
The navigation bar is disabled by default. It does not appear in the live view screen until it is enabled.
Содержание DH-XVR Series
Страница 1: ...AI Digital Video Recorder User s Manual ZHEJIANG DAHUA VISION TECHNOLOGY CO LTD V2 3 1...
Страница 31: ...User s Manual 15 Figure 2 32 Install HDD Step 4 Use the HDD cable and power cable to connect HDD and mainboard...
Страница 33: ...User s Manual 17 Figure 2 35 Fasten screws...
Страница 110: ...User s Manual 94 Figure 5 50 Main menu...
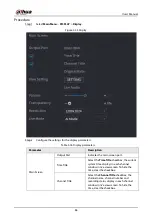
Страница 122: ...User s Manual 106 connected camera Procedure Step 1 Select Main Menu CAMERA Image Figure 5 63 Analog channel...
Страница 203: ...User s Manual 187 2 Click of the database that you want to configure Figure 5 140 Details 3 Click Register ID...
Страница 213: ...User s Manual 197 Figure 5 154 Smart search 4 Click the picture that you want to play back...
Страница 218: ...User s Manual 202 Figure 5 160 Search results...
Страница 307: ...User s Manual 291 Figure 5 263 Version 1 Figure 5 264 Version 2 Step 3 Click Apply...
Страница 350: ...User s Manual 334 Figure 6 3 Legal information...
Страница 378: ...User s Manual 362 Appendix Figure 7 7 Check neutral cable connection...
Страница 384: ...User s Manual...


