English - 17
English - 16
TROBLESHOOTING
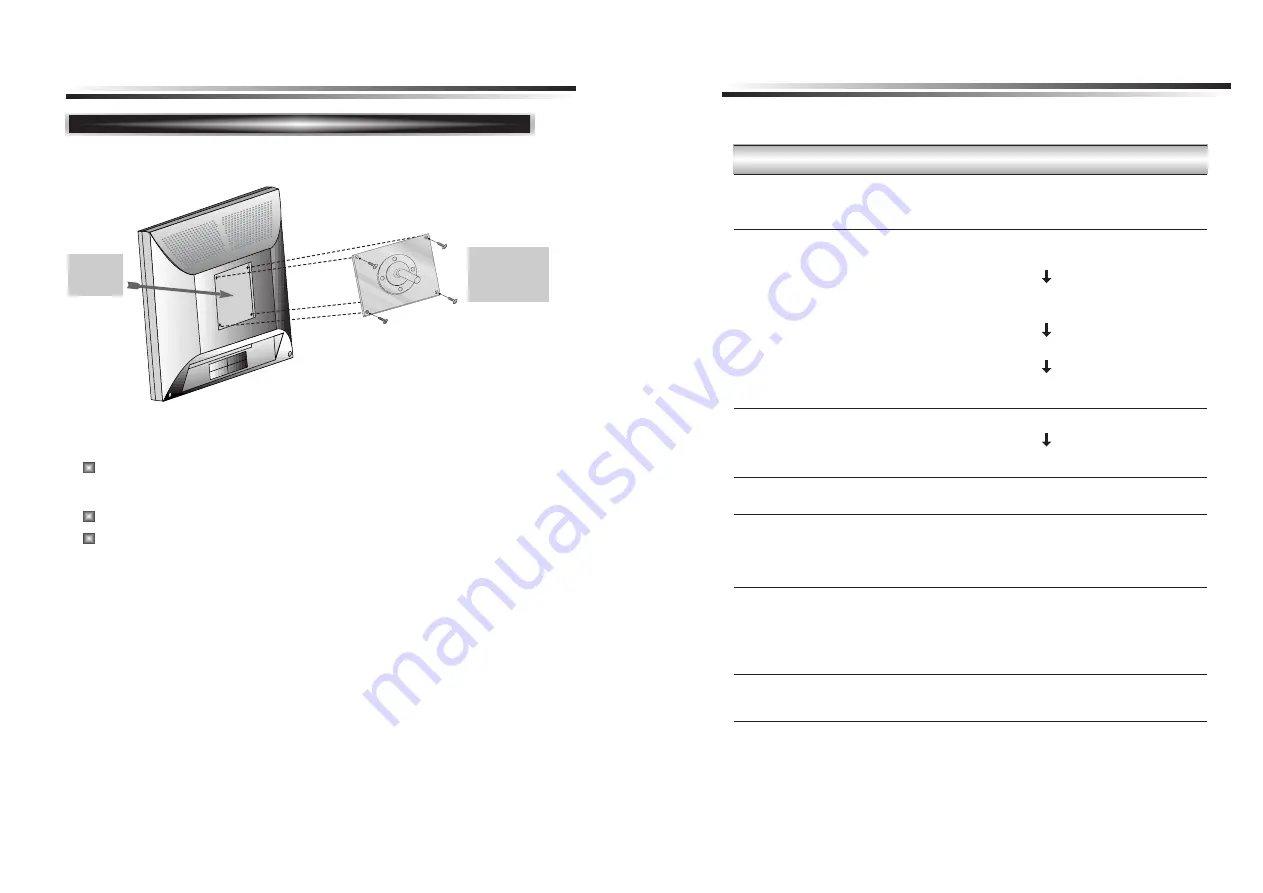
Attaching the monitor with the arm-stand(option)
Tighten up screws at the
locations indicated by
arrows.
Support
stand
This monitor’s installation surface is compatible with various kinds
of VESA standard stands.
Hole spacing : 100x100 mm
Screw Length : 8~12 mm
Adjust Clock to set the screen position and adjust
Clock fine until a noise isn’t displayed.
Check if power switch and computer power switch
are in the on position.
Check if the signal cable is correctly connected to
the video card.
Check if the pins of D subconnector are not bent.
Check if the computer is in the power- saving mode.
Check if power switch is in the on position.
Check if the power cord is correctly connected.
Check if the signal cable is suitable to the video card.
Adjust Clock or H&V Center to get the proper
image.
Keep the devices that may cause electrical
interference away from the monitor.
Adjust Contrast and Brightness.
Symptom
Picture is jitterd.
No picture.
POWER LED is not
lit.
Image is unstable.
Image is not
centered, too small
or too large.
Picture bounces or a
wave pattern is
present in the
picture.
Picture is blurred.
Check
Surface for
stand
installation
Содержание LXL-940
Страница 1: ......
Страница 13: ...S N XL78600906...


