background image

1

2

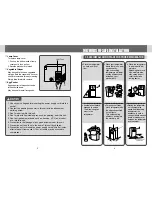
Ice tray

Fill tray 3/4 full to allow expansion of water during freezing. Place tray in freezer
chest. To release cubes, twist lid slightly.

Removable shelf

Shelves can be removed by pulling forward. The shelf can be placed at your
desirable position.

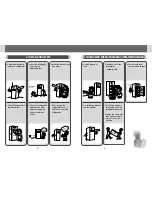
Freezer Shelf

To remove the freezer shelf!

1. Remove the screw on the left of inside freezer shelf with screw driver.
2. Push the shelf hooks to the back slightly and remove it by lifting off the slots of

bottom side.

3. Reverse procedure to install.

Defrost Drain Vessel

To remove defrost drain vessel.

1. Lift the defrost drain vessel slightly, then rotate bottom out and pull it down.
2. Reverse procedure to install.

Take a moment to know all the features and convenience it was designed to provide.
Numbers match those in the illustration on page 1.

Here are the features of your new refrigerator.

!

@

&

)

*

(

%

#

$

^

2

1

3

4

5

6

!

FREEZER DOOR GASKET

@

FREEZER POCKET

#

FREEZER REMOVABLE SHELF

$

FREEZER TEMPERATURE

CONTROL KNOB

%

ICE TRAY

^

ICE BOX

&

REFRIGING-ROOM DOOR GASKET

*

EGG POCKET

(

REFRIGING-ROOM POCKET(SMALL)

)

REFRIGING-ROOM POCKET(LARGE)

1

LAMP COVER

2

REFRIGERATOR TEMPERATURE

CONTROL KNOB

3

REMOVABLE SHELF (LARGE)

4

GLASS SHELF

5

VEGETABLE BOX

6

CHILLED TRAY

FEATURE CHART

Содержание FR-251

Страница 1: ...as the door been open frequently or for a long period Is refrigerator overcrowded preventing good air circulation Is the clearance between side and rear plate of the refrigerator and the wall allowed sufficiently If there are unusual sounds Is refrigerator placed on the level Are foreign objects behind the refrigerator Are dishes on refrigerator shelves vibrating If so re arrange the dishes When y...

Страница 2: ... Defrost Drain Vessel To remove defrost drain vessel 1 Lift the defrost drain vessel slightly then rotate bottom out and pull it down 2 Reverse procedure to install Take a moment to know all the features and convenience it was designed to provide Numbers match those in the illustration on page 1 Here are the features of your new refrigerator 2 1 3 4 5 6 FREEZER DOOR GASKET FREEZER POCKET FREEZER R...

Страница 3: ...t 7 Precaution not to hold on to the door of this unit by children 8 Precaution not to reinsert the power supply cord within 5 minutes after release it from socket If not a trouble may be occured to compressor NO NO Place your refrigerator where there is no heat source nearby High surrounding temperature will lower cooling efficiency and increases your electricity bill Place the refrigerator in an...

Страница 4: ...moving to prevent them from opening Safe installation place Maintain Level Components to their original places Check Plug in after about hour Put food after 2 3 hours Level the refrigerator by using the adjustable foot Install the parts to their own place Select a safe place to install your refrigerator After running the refrigerator for 2 3 Hours put food in the refrigerator Check the voltage and...

Страница 5: ... If you want the refrigerator door to remain motionless when open adjust the leveling glides so that all four corners are level with each other Select a place with strong level floor Allow 6cm of space between the refrigerator s side and the wall Make sure all packing material is removed If the shipping tape has left a residue on the door touch the residue lightly with the adhesive side of tape or...

Страница 6: ...polish or wax periodically to keep the exterior looking like new Door gasket Clean at least twice a year with mild soap and water Rinse and dry Apply a light film of petroleum jelly to the gaskets to keep them soft Interior Wash the liner with warm soapy water rinse and dry To turn off refrigerator DEFROSTING THE REFRIGERATOR Temperature is controlled automatically The TEMPERATURE CONTROL at the i...

Отзывы: