background image

29

Wall/Arm
Mounting

Attaching a Wall or Arm mounting device

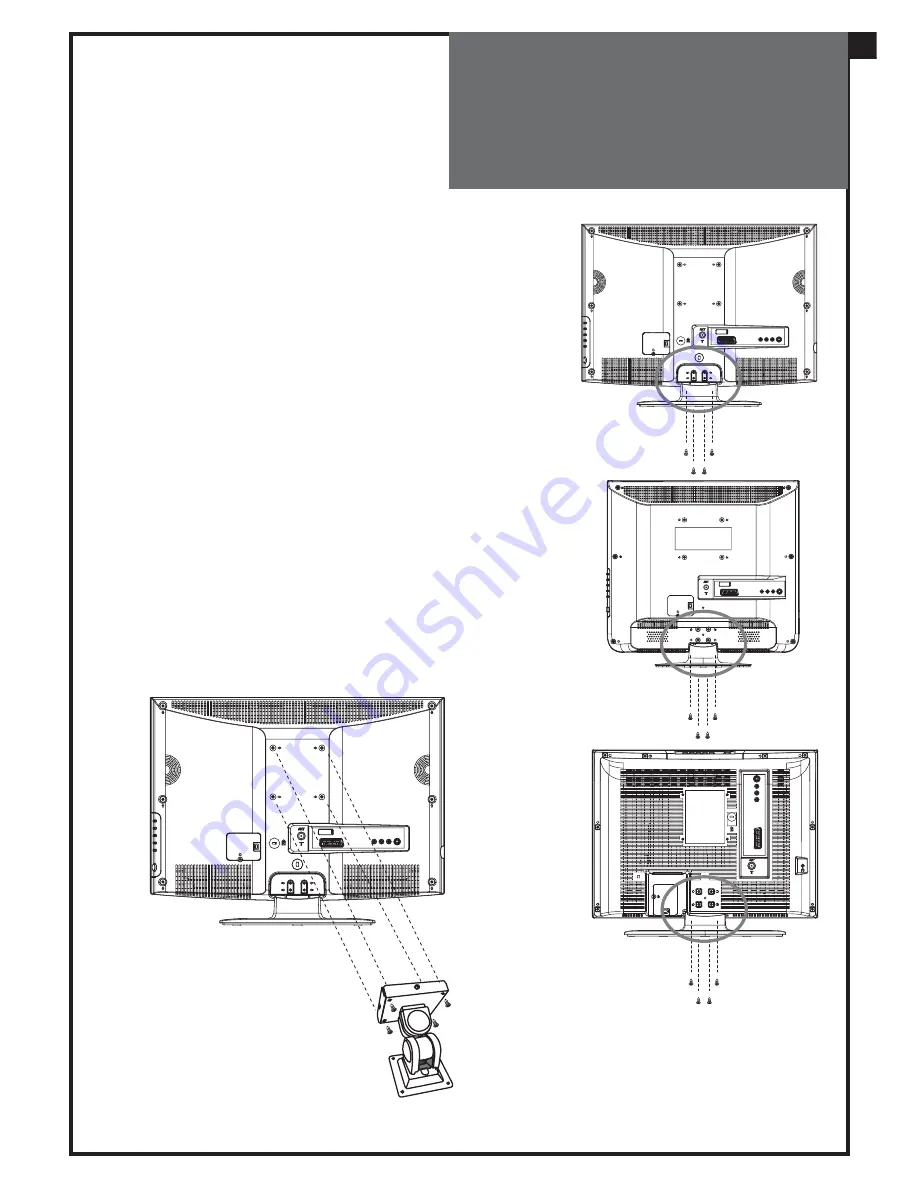
This TV supports the VESA mounting standard and will ac-
commodate various VESA mounting devices.
To install any VESA mounting device, please follow the man-
ufacturer’s instructions.
1. Remove all cables connected to the TV.
2.  Lay the LCD TV face-down on a flat surface with a blanket 

or other soft materials to protect the screen.

3.  Remove the four screws attaching the stand.

Remove stand from LCD TV.

4.  Remove the four screws attaching the rear cover.
5.  Now you are ready to install the VESA mounting device 

suited to your applications (see instructions below).

6.  Connect all cables removed at step 1.

Installing VESA compliant mounting devices

1.  Align the mounting interface pad (100mm x 100mm 

hole spacing) with the holes in the televisions rear cover 
mounting pad.

2.  Secure bracket with the four screws (4mmØ) that came 

with the VESA mounting device.

GB

Содержание DLP-20J1

Страница 1: ...LCD TELEVISION INSTRUCTION MANUAL DLP 20J1 DLP 20D7 DLP 20W2 PAL B G D K I I SECAM B G D K L L NTSC AV TELETEXT SCART VIDEO S VIDEO MULTI LANGUAGE OSD GB Helpline Number 0870 100 2525...

Страница 2: ...ECTRICAL ELECTRONIC EQUIPMENT The meaning of the symbol on the product its accessory or packaging indicates that this product shall not be treated as household waste Please dispose of this equipment a...

Страница 3: ...d by the manufacturer or salesperson 6 WALL OR CEILING MOUNTING When mounting the product on a wall or ceiling be sure to install the product using the designated mounting tool according to the method...

Страница 4: ...TV Set 16 Switching Off TV Set 16 Program Selection From 0 to 99 17 Sound Control 17 Picture Control 18 Sleep Function 18 Menus Language Selection Child Lock Clock Setting Wake Up Noise Reduction 19...

Страница 5: ...set using the wall mounting bracket fix it carefully so it is secure Object Entry Do not insert foreign objects such as needles and coins into the ventilation openings Lightning striking You should d...

Страница 6: ...6 Supplied Accessories Make sure that the following accessories are provided with the product Remote controller Instruction manual Batteries Option 2 x 1 5V AAA...

Страница 7: ...18 INDEX A19 VOL BRIGHT MENU SELEC TION A20 VOL BRIGHT UP A21 PAGE DOWN A22 TELETEXT TAT PAT TV A23 HEIGHT A24 REVEAL A25 CYAN A26 YELLOW TV mode A1 POWER A2 SOUND MUTE A3 NUMBER 0 9 A4 SLEEP A5 TV AV...

Страница 8: ...ume Up Down B3 AV B4 Remote Sensor B5 LED Indicator B6 Remote Sensor B5 LED Indicator B6 Remote Sensor B5 LED Indicator B6 DLP 20D7 DLP 20J1 DLP 20W2 Power On Off B1 PR Up Down B2 Volume Up Down B3 AV...

Страница 9: ...socket C4 Video Input Socket C3 Audio Input L R Socket C5 S Video jack C6 Headphone jack DLP 20D7 DLP 20J1 DLP 20W2 C1 Aerial jack C2 SCART socket C3 Audio Input L R Socket C4 Video Input Socket C5 S...

Страница 10: ...type R03 or AAA Make sure that the polarity matches with the and marks inside of the battery compartment Note To avoid damage from possible battery leakage remove the batteries if you do not plan to u...

Страница 11: ...erial Connection CONNECTING THE TV DIRECTLY TO AN AERIAL Connect an aerial cable 75 ohm coaxial cable to the Aerial terminal on the back of the TV set Aerial Aerial cable Aerial terminal DLP 20D7 DLP...

Страница 12: ...o the Aerial terminal on the TV set with RF cable NOTE If you wish to use only the Aerial RF connection then you should store the VCR channel on programme number ZERO using the Manual tuning function...

Страница 13: ...13 Preparation Connecting external equipment Scart cable RCA cable Headphone Set Top Box VCR DVD Camcorder Video Game S video cable DVD Set Top Box VCR DVD DLP 20D7 DLP 20J1 DLP 20W2 GB...

Страница 14: ...t is used to connect a VCR Camcorder DVD STB Video game S VIDEO INPUT JACK It has Y C inputs This jack is used to connect S Video equipment SCART JACK AV1 This jack has video audio inputs and outputs...

Страница 15: ...button A18 to confirm your choice The choice will briefly highlight in red after which the menu will disappear Note The languages shown are subject to modification without prior notice Automatic Tuni...

Страница 16: ...flashing red and green then the TV set is in child lock mode It is necessary to use the remote control POWER button A1 NUMBER 0 9 buttons A3 or PROGRAM UP A6 DOWN A21 buttons The front panel PROGRAM U...

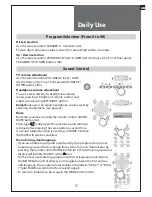
Страница 17: ...page 21 Mute Mute the sound by pressing the remote control SOUND MUTE button A2 Then logo is displayed The previous sound setting is returned after pressing the same button a second time If a sound re...

Страница 18: ...NORMAL button A17 Normal I standard hard picture Normal II standard soft picture Favourite For other adjustments BRIGHTNESS CONTRAST COLOUR SHARPNESS NOISE REDUCTION use the PICTURE menu If an NTSC s...

Страница 19: ...r automatically in order to be able to use this function If the clock is not set is shown then the WAKE TIME and WAKE PROG will not be selectable The default setting for WAKE TIME is in the OFF positi...

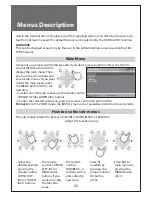
Страница 20: ...ress the MENU button A19 a sec ond time To select one of the sub menus use the remote control CURSOR UP A6 DOWN A21 buttons To enter the selected sub menu press the remote control OK button A18 Remark...

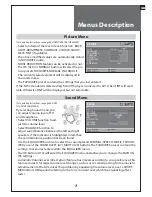
Страница 21: ...e displayed but not selectable Sound Menu For operating instructions see page 20 HOW TO USE THE SUB MENUS By selecting Sound menu you can adjust volume level of TV and Headphone Select VOLUME function...

Страница 22: ...S Automatic tuning system Program list edition TV system modification Channel number Channel Frequency Channel name Program number Program storage number Country TV system Channel number Channel Frequ...

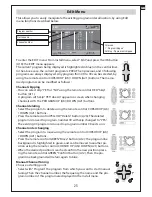
Страница 23: ...p YES doesn t appear on screen when changing channels with the PROGRAM UP A6 DOWN A21 buttons Channel deleting Select the program to delete using the remote control CURSOR UP A6 DOWN A21 buttons Press...

Страница 24: ...e name has been entered press the OK button A18 to store it The name will be memorised to the program number currently shown on the Store To line The Store To program number will highlight in red brie...

Страница 25: ...e clock again at power on 5 This function is only selectable when the default picture format is currently active see also FORMAT SELECTION AUTO setting page 19 This selects the default format to be us...

Страница 26: ...nction OPTION If you want to watch the TV program and use teletext at the same time press the TELETEXT button A22 again Teletext will be displayed on the right hand part of the screen and the whole TV...

Страница 27: ...e 0 3 and the third figure 0 7 PAGE HOLD button A9 Any teletext page or subpage can be held on the screen by pressing the PAGE HOLD button The page number shown in the extreme top left corner instead...

Страница 28: ...the teletext page number or the cancel icon remains at the top and left corner of the screen You can enter a new page number in this mode only by using the remote control NUMBER 0 9 buttons A3 or with...

Страница 29: ...oft materials to protect the screen 3 Remove the four screws attaching the stand Remove stand from LCD TV 4 Remove the four screws attaching the rear cover 5 Now you are ready to install the VESA moun...

Страница 30: ...ust the Brightness Contrast 21 Thepictureisimproperly tinted Check the Tint adjustment NTSC signal 21 No sound Check that the volume is not set to minimum Check sound is not muted 17 17 Aerial The pic...

Страница 31: ...2 0W APPEARANCE mm 514 W x 498 H x 257 3 D 608 W x 456 H x 215 D 509 W x 420 5 H x 239 D WEIGHT 7 9Kg 8 35Kg 7 5Kg RESOLUTION 640 x 480 1366 x 768 TERMINALS AV IN SCART COMPOSITE VIDEO S VIDEO AUDIO...

Отзывы: