background image

SETUP

31

30

Initial Setup

8

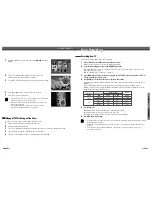
Press [ENTER] to confirm your rating selection, then press [SETUP] to exit
the menu.

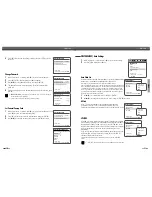
Parental Control

Set Parental Level

ADULT

Change Password
Set Parental Country Code

Instructions

Enter-Confirm  Setup-Exit  Move

…†

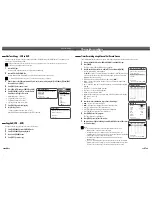
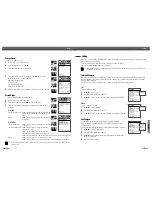
Change Password
1

While ‘Preferences‘ is selected, press [

] to select ‘Parental Controls‘.

2

Press [ENTER]. The ‘Parental Controls‘ submenu appears. 

3

Use [

/

] to select ‘Change Password‘ then press [ENTER].

4

The ‘Change Password’ submenu appears. Enter your current 4-digit
password.

5

Enter a new 4-digit password. Re-enter the new password to confirm, press
[ENTER].

Parental Control

Set Parental Level

ADULT

Change Password
Set Parental Country Code

Instructions

Enter-Confirm  Setup-Exit  Move

…†

Set Parental Country Code
1

While ‘Preferences‘ is selected, press [

] to select ‘Parental Controls‘. Then

press [

] to select ‘Set Parental Country Code‘.

2

Press [ENTER]. Enter your current 4-digit password then press [ENTER].

3

Use [

/

] to select the desired country and press [ENTER] to confirm.

Parental Control

Set Parental Level

ADULT

Change Password
Set Parental Country Code

Instructions

Enter-Confirm  Setup-Exit  Move

…†

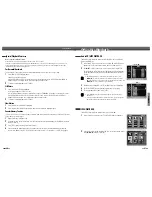
Change Password

Current Code

* * * *  

Enter New Code

* * * *  

Confirm Code

* * _ _ 

Instructions

Setup-Exit

Master Password : 

If you forget your password, press 3,3,0,8 on the remote

control and then press [ENTER].

• Set the new password to something other than '0000'.

Parental Country Code

Please select Country for Parental Setup

Australia
Belgium
Denmark
Finland
France

Instructions

Enter-Confirm  Setup-Exit  Move

…†

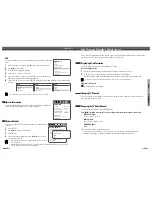
Initial Setup

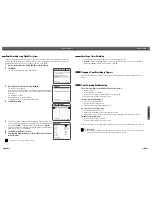
1

While ‘Preferences‘ is selected, press [

] to select ‘Auto Settings‘. 

2

Press [ENTER] to display the submenu.

Auto Clock Set

Auto Clock enables the DVD RVCR to set the clock automatically
whenever it is in Standby mode (plugged in but powered off).

Auto Clock is only available for models with the VPS/PDC function.
Some broadcasting stations may send the time and date along with the VPS/PDC
data. The video will automatically use this time and date during the initial setting
up procedure during normal use, and every time you switch the video off at the
mains. If you find that this time and date is incorrect you can remove this feature
by following the steps below changing it to the OFF mode, you will then have to
manually set the time and date, see above.

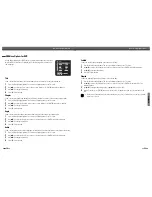
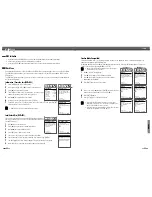
1

Use [

/

] to select 'Auto Clock Set' and press [ENTER].

2

Use [

/

] to change the 'Auto Clock Set' status, and press [ENTER] to confirm.

AV Link

If your TV is AV Link available, you can download the channels
information from your TV set, connecting the SCART1 jack to TV.
Follow the same procedure as ‘Auto Clock Set’ to set the ‘AV Link’ status.

VPS/PDC

VPS/PDC is a service provided by some stations to enable you to perform
timer recordings precisely even if the broadcaster delays the start time of
the programme slightly. The time you enter is the VPS/PDC time so this
must be correct. Not all stations offer VPS/PDC, in which case the player
will start at the time you enter and not the actual start time of the
programme.
If you wish to start recording at a specific time without it being adjusted
by the VPS/PDC system in the event of a delay, switch VPS/PDC off
otherwise the player will not record.
Follow the same procedure as ‘Auto Clock Set’ to set the ‘VPS/PDC’
status.

Preferences

Video
Audio
Parental Controls
Auto Settings
VCR

Instructions

Enter-Confirm   Setup-Exit
Move

…†

PREFERENCES / Auto Settings

Auto Settings

Auto Clock Set

Off

AV Link

Off

VPS/PDC

Off

Instructions

Enter-Confirm  Setup-Exit  Move

…†

Auto Settings

Auto Clock Set

On

AV Link

Off

VPS/PDC

Off

Instructions

Enter-Confirm  Setup-Exit  Move

…†

Auto Settings

Auto Clock Set

On

AV Link

On

VPS/PDC

Off

Instructions

Enter-Confirm  Setup-Exit  Move

…†

Select Auto
Clock Status

Off

On

Select AV
LInk Status

Off

On

Select VPS/
PDC Status

Off

On

"VPS/PDC"  and "Auto Clock Set" are not provided for some countries.

Содержание DF-8100

Страница 1: ...DVD Recorder VCR DVD Recorder VCR DF 8100 User Manual P N 97P95600D0 1V HELP LINE 0870 100 2525 With queries please quote the page number reference number and model number...

Страница 2: ...x 2 hrs for it to reach room temperature Make sure the DVD Recorder VCR is placed at least 10 cm apart from other home appliances or obstacles to ensure sufficient ventilation The apparatus should not...

Страница 3: ...s on the unit and in the operating instructions should be adhered to 4 FOLLOW INSTRUCTIONS All operating and use instructions should be followed 5 CLEANING Unplug this unit from the wall outlet before...

Страница 4: ...n result in a risk of fire or electric shock 16 OBJECT AND LIQUID ENTRY Never push objects of any kind into this unit through openings as they may touch dangerous voltage points or short out parts tha...

Страница 5: ...ot finalized after a recording further recordings can be added to it Old recordings can be deleted but they can no longer be overwritten The deleted recordings titles are marked deleted title Before a...

Страница 6: ...t types of batteries standard alkaline etc Precautions Overview Video discs and some satellite broadcasts If copy protected material is encountered during a recording recording will pause or stop auto...

Страница 7: ...R is recording 6 AVF VIDEO L AUDIO R Connects to the audio video output of an external source VCR Camcorder etc 7 DV IN Connects to the DV output of a digital camcorder video deck or DVD R RW recorder...

Страница 8: ...Recorder VCR input to Tuner AV1 AV2 AVF or DV DV DF 8100P 8150P only Displays a disc s Title menu if available Selects Recording mode DVD HQ 1hr SP 2hrs EP 4hrs or SLP 6hrs VCR SP or LP Copies from D...

Страница 9: ...the wire from your TV and attach it to the RF IN FROM ANT jack on the rear panel of the DVD Recorder VCR Use the supplied RF cable to connect between the DVD Recorder VCR s OUT TO TV jack and the ant...

Страница 10: ...ight audio in jacks on your TV using the audio cables Be sure to set the DVD Recorder VCR to Progressive Scan mode by pressing and holding P SCAN for 3 seconds or changing the Video Output in the Setu...

Страница 11: ...red language for the on screen menu using Press ENTER to confirm 3 Select the desired country using Press ENTER to confirm 4 Select the desired disc menu language using Press ENTER to confirm 5 Select...

Страница 12: ...n Aerial Cable The DVD Recorder VCR Setup menu includes six categories including Installation Recording Options Languages Preferences System Info and Restore Defaults Press SETUP and on the remote con...

Страница 13: ...Auto Search 10 Search the real channel number by pressing 11 Select Fine Tune You can adjust the fine tuning 12 Use to select Decoder Press ENTER to move to the second level 13 When the program is en...

Страница 14: ...lect Auto Chapter Off 5min 10min 15min Initial Setup Adjust Channels 1 Follow steps 1 2 as shown under Manual Set 2 Use to select Adjust Channels 3 Press ENTER The Adjust Channels menu appears 4 Use t...

Страница 15: ...ss and hold P SCAN for 3 seconds to return to Interlace Scan mode Video TV Aspect Auto Video Output Interlace Instructions Enter Confirm Setup Exit Move Select Picture Format 4 3 LB 4 3 PS 16 9 Auto V...

Страница 16: ...nter Confirm Setup Exit Move Select Dynamic Range Off Low High Set Parental Level The Parental Controls feature allows you to prevent DVDs from being played based on their ratings or to have certain d...

Страница 17: ...S PDC function Some broadcasting stations may send the time and date along with the VPS PDC data The video will automatically use this time and date during the initial setting up procedure during norm...

Страница 18: ...ected press to move to the second level 2 Use to select VCR 3 Press ENTER to display the submenu 4 Select Index Index or Go to Zero 5 If you select Index or Index and press ENTER your DVD Recorder VCR...

Страница 19: ...the on screen display Press ENTER to display a submenu 3 Use to change the numbers 4 Press ENTER to confirm Chapter Shows the current chapter number and total number of chapters and skips to the desir...

Страница 20: ...nel display and playback starts automatically If playback does not start press PLAY In some cases the Disc menu might appear instead Playing a DVD R RW When a DVD RW or unfinalized DVD R is inserted n...

Страница 21: ...s automatically reset to normal when the tape is ejected or the power cord is unplugged for more than 3 seconds Tracking Control VCR Playback VCR Playback If the DVD Recorder VCR is powered on by inse...

Страница 22: ...e is no sound during search slow motion etc During high speed picture search a short time is needed to stabilize tape speed when re entering Play mode Slight interference may be observed during this t...

Страница 23: ...recording the recording will not be saved If a DVD RW or unfinalized DVD R disc is inserted in the tray no title is played automatically after loading is finished If you are recording to a blank DVD...

Страница 24: ...of 10 hours The recording time is displayed on the front panel display One Touch Record OTR 1 Insert a Disc Insert the disc you wish to copy in the DVD deck and close the disc tray 2 Insert a VHS Tap...

Страница 25: ...program may not be recorded Timer Recording Timer Recording Timer Recording PR No Date Start End Mode Instructions Enter Edit Setup Exit Move Edit Timer Media PR No PR 03 Date Jan 02 Sun Start 13 30 E...

Страница 26: ...usly enter the date programme number start and end time All the information needed by the DVD recorder for programming is contained in the VideoPlus programming number This VideoPlus number is found i...

Страница 27: ...ding continues until you press STOP or the disc is full To record for a fixed length of time see One Touch Record on page 44 6 Press STOP to stop recording Recording from External Components Note If y...

Страница 28: ...a program immediately DISC Initialize Disc Menu Information Type DVD RW Recordings 5 Total Title 00 57 57 Free Space 01 48 48 Finalized Locked No Compatible Yes Instructions Setup Exit Erase the disc...

Страница 29: ...Erase the title Yes No Instructions Enter Confirm Move Erase Title Title is being erased Please wait a moment 54 If Lock Disc is set to On in the DISC Settings menu you cannot rename your disc see pa...

Страница 30: ...dit Function Add Delete Delete All After editing is complete a DVD RW disc will not be compatible with other DVD players until you make the disc compatible see page 53 Change Name To change the name o...

Страница 31: ...video heads Use Tracking for manual tracking adjustment while a tape is playing Insert a disc or tape Check that the disc indicator on the front panel display is lit Insert a playable disc Check the...

Страница 32: ...to record is copy protected When setting the recording channel the channel is tuned on your TV s tuner Clock in DVD Recorder VCR is not set to correct time Timer has been programmed incorrectly TIMER...

Страница 33: ...r Systems Inc Accessories Outputs Video output DVD VCR Video output terminal 1 0 Vp p unbalanced Video output DVD RGB output 75 in load R 0 7Vp p G 0 7Vp p B 0 7Vp p Audio output DVD VCR Audio output...

Страница 34: ...quired if service is needed on this product during the guarantee period KEEP THIS SECTION FOR FUTURE REFERENCE On the expiry date of the manufacturer s guarantee you will be sent details of our annual...

Страница 35: ...tained in the manual It must be used solely for domestic purposes For further information regarding your guarantee please see the section at the rear of your user manual The guarantee will be rendered...

Отзывы: