background image

Neutral (N), Green & Yellow = Earth (E). 


  The Blue wire must be connected to the terminal marked N or coloured 

Black.  

  The Brown wire must be connected to the terminal marked L or coloured 

Red.  

  The Green & Yellow wire must be connected to the terminal marked E or 

coloured Green.  

  Check that there are no cut or stray strands of wire inside the plug.  

  Use a 13 Amp BS 1362 fuse, only use BSI or ASTA approved fuses.  

  If you are in any way unsure which plug or fuse to use, always refer to a 

qualified electrician. 

  After replacing or changing a fuse on a moulded plug, the cover must be 

refitted to the plug; the appliance must not be used without a fuse cover. 


Technical Specification. 

Voltage 


220-240V ~ 50 Hz 

Rated Power 

 : 

1400W 

Protection Class     :        I (This appliance MUST be earthed) 
Model Number 

 :        SDA1132 

 
Waste electrical products should not be disposed of with household waste. 
Please recycle where facilities exist. Check with your Local Authority or 
retailer for recycling advice. 


Connect Green 
& Yellow to 
Earth (E) 

Connect 
Brown to 
Live (L) 

Connect 
Blue to 
Neutral (N) 

Europasonic (UK) Ltd 
Manchester M3 1JS 

www.europasonic.com


Ensure the outer sheath is 
securely held by the cord clamp 

Daewoo Electricals is a 

registered trademark. 

Produced and imported under 

licence by Europasonic (UK) 

Ltd 


Содержание SDA1132

Страница 1: ......

Страница 2: ...n a repair centre or contact the supplier if the unit is under warranty If the supply cord is damaged it must be replaced by the manufacturer it s service agent or similarly qualified persons in order...

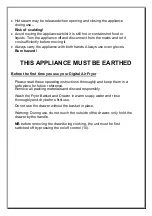
Страница 3: ...E EARTHED Before the first time you use your Digital Air Fryer Please read these operating instructions thoroughly and keep them in a safe place for future reference Remove all packing materials and d...

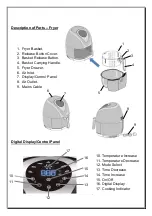
Страница 4: ...elease Button 4 Basket Carrying Handle 5 Fryer Drawer 6 Air Inlet 7 Display Control Panel 8 Air Outlet 9 Mains Cable 1 5 2 3 4 6 7 8 9 10 11 12 13 14 15 16 17 10 Temperature Increase 11 Temperature De...

Страница 5: ...crease 13 and or Time Increase 14 controls The set cooking time will be shown on the Digital Display 16 NB refer to the Cooking Chart Below Food Typical Quantity Temperature Setting Cooking Time Shake...

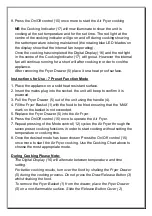
Страница 6: ...ill beep to confirm it is powered 3 Pull the Fryer Drawer 5 out of the unit using the handle 4 4 Fill the Fryer Basket 1 with the food to be fried ensuring that the MAX mark on the basket is not excee...

Страница 7: ...once the oil has been added For crispier chips do not fill the basket to maximum Cleaning and Maintenance Always unplug the Air Fryer from the mains supply and allow to fully cool before cleaning Do...

Страница 8: ...on a moulded plug the cover must be refitted to the plug the appliance must not be used without a fuse cover Technical Specification Voltage 220 240V 50 Hz Rated Power 1400W Protection Class I This a...

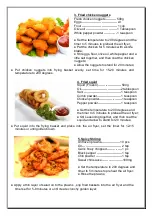
Страница 9: ...wder 1 teaspoon Red chili powder 1 2 teaspoon Peel potatoes and cut into strips Soak potato strips in salt water for at least 20mins and then dry with kitchen paper Mix shallot salt and pepper garlic...

Страница 10: ...to preheat the air fryer Pat the chicken for 5 minutes with a knife blade Stir eggs flour olive oil white pepper and a little salt together and then coat the chicken nuggets Allow the nuggets to stan...

Отзывы: