PLANNING
GUIDE
11.4
Specifications subject to change without notice.
Phone: (800) 793-0093
www.dacor.com
EF36BNNF and IF36BNNF
Product Dimensions
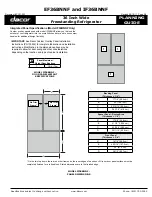
IMPORTANT:
For model IF36BNNF see following pages for custom panel
and handle requirements.
◊
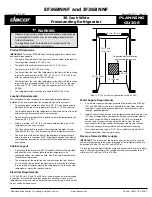
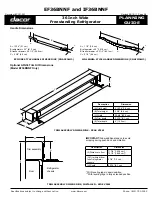
The depth from the front of the door (w/o door handles) to the back of
the refrigerator chassis is 27” (68.6 cm).
◊
The depth of the cabinet less the door is 24 1/4” (61.6 cm).
◊
The power cord is 60” (152.4 cm) long.
◊
The height from the top of the refrigerator to the floor with the leveling
legs in the down position is 69 15/16” (177.6 cm), 71 7/8” (182.6 cm)
with the optional top trim kit (Part # AFG36).
◊
The height from the top of the refrigerator to the floor with the leveling
legs in the fully extended position is 70 9/16” (179.2 cm) at the front
of the unit, 72 1/2” (184.2 cm) with the optional top trim kit (Part #
AFG36).
◊
The refrigerator width from edge to edge is 35 5/8” (90.5 cm).
Location Requirements
The refrigerator can be recessed in an opening between cabinets or
installed at the end of a cabinet run using a side panel to enclose it.
◊
To ensure proper ventilation, allow for a 1/2” (1.3 cm) space on both
sides and at the top of the refrigerator. Allow for 1" (2.5 cm) behind.
◊
The location must allow the refrigerator to be moved out from the wall
without being disconnected if service is required.
◊
Do not install the refrigerator in a location where the temperature will
fall below 55°F (13°C).
◊
Allow a minimum of 2 1/2” (6.4 cm) space between the side of the
refrigerator and an oven or range.
◊
The floor must be able to support the refrigerator’s weight of more
than 600 lbs (272 kg), the door panels and the refrigerator contents.
◊
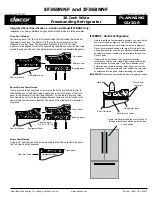
The area to the left and the right of the appliance must permit both
doors to open to a minimum of 90°. Allow space between the side of
the refrigerator doors and a corner wall for the handle and/or custom
door panels.
Cabinet Layout
◊
A grounded three prong non-GFCI electrical outlet must be provided
and should be in a location that allows the refrigerator to be
connected without an extension cord. See “Electrical Requirements”
for additional information.
◊
The plumbing for the water line can come through the floor flush to
or from the back wall. Install the water valve in a location that allows
it to be turned off without moving the refrigerator out in the event the
refrigerator or water line requires service.
Electrical Requirements
A 115 Volt, 60 Hz. AC only 15 or 20 Amp. fused, grounded electrical supply
is required. It is recommended that a separate circuit serving only your
refrigerator be provided. Use an outlet that cannot be turned off by a switch.
Do not use an extension cord.
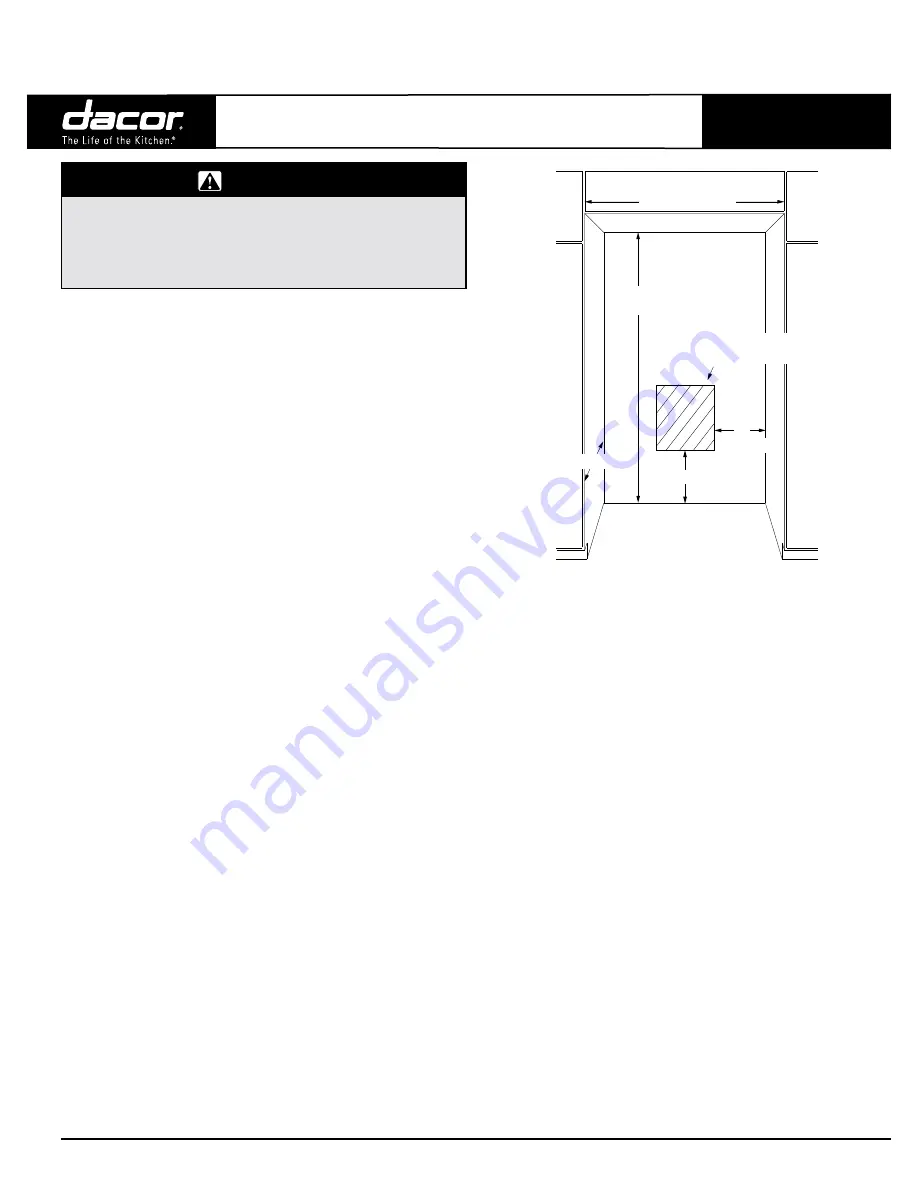
70 1/2” min.*
(179.1 cm)
36” min. (91.4 cm)
*Add 1 3/4” (4.4 cm) for the optional top gril kit (AFG36).
Suggested electrical location
approximate dimensions
12” (30.5 cm)
24” (61.0 cm)
12”
(30.5 cm)
wARNINg
• Observe all governing codes and ordinances during planning
and installation. Contact your local building department for
further information.
• This appliance must be installed in accordance with the
accompanying installation instructions.
water Supply Requirements
◊
A cold water supply with water pressure of between 35 and 120 psi
(241 and 827 kPa) is required to operate the water dispenser and
ice maker. If you have questions about your water pressure, call a
licensed, qualified plumber.
◊
Install a shut off valve between the refrigerator and water supply. Use
1/4” copper tubing with a compression nut and compression sleeve
and check for leaks. Allow a minimum of 24” (61.0 cm) diameter
service loop of copper tubing outside the wall or floor for easy
connection to the water supply. Install copper tubing only in areas
where the household temperatures will remain above freezing.
◊
Do not use a piecing type or 3/16” (5 mm) saddle valve which will
reduce water flow and clog more easily.
Reverse Osmosis water supply
IMPORTANT:
The pressure of the water supply coming out of a reverse
osmosis system going to the water inlet valve of the refrigerator needs to
be between 35 and 120 psi (241 and 827 kPa).
If a reverse osmosis water filtration system is connected to your cold water
supply, the water pressure to the reverse osmosis system needs to be a
minimum of 40 to 60 psi (276 to 414 kPa).
Document # PG11-003
Revised 08/10/11 Page 1/4
36 Inch Wide
Freestanding Refrigerator

