background image

14

ENGLISH

OPERATION 

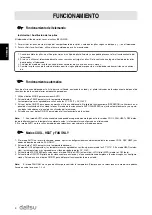
Operating of the Remote Controller

Install / Replace Batteries

The Remote Controller uses two alkaline dry batteries (R03/Ir03X2). 

1.  To install batteries, slide back the cover of the battery compartment and install the batteries according to the directions (+and -)

shown on the Remote Controller.

2.  To replace the old batteries , use the same method as mentioned above.

1.  When replacing batteries, do not use old batteries or a different type battery. This may cause the remote controller to mal-

function.

2.  If you do not use the remote controller for several weeks remove the batteries. Otherwise battery leakage may damage the

remote controller.

3.  The average battery life under normal use is about 6 months.
4.  Replace the batteries when there is no answering beep from the indoor unit or if the Transmission Indicator light fails to appear.

Automatic Operation

When the Air Conditioner is ready for use, switch on the power and the OPERATION indicator lamp on the display panel of the indoor
unit starts flashing.

1.  Use the MODE select button to select AUTO.
2.  Push the TEMP button to set the desired room temperature. O The most comfortable temperature settings are between 21ºC/70ºF

to 28ºC/82ºF.

3.  Push the ON/OFF button to start the air conditioner. The OPERATION lamp on the display panel of the indoor unit lights. The ope-

rating mode of AUTO FAN SPEED is automatically set and there are no indicators shown on the display panel of the remote contro-
ller.

4.  Push the ON/OFF button again to stop the unit operation.

Note:

1. In the AUTO mode, the air conditioner can logically choose the mode of COOL, FAN, HEAT and DRY by sensing the diffe-

rence between the actual ambient room temperature and the set temperature on the remote controller.
2. If the AUTO mode is not comfortable for you, the desired mode can be selected manually.

COOL , HEAT, and FAN ONLY Operation

1.  If the AUTO mode is not comfortable, you may manually override the settings by using COOL, DRY, HEAT (HEAT PUMP units only),

or FAN ONLY modes.

2.  Push the TEMP button to set the desired room temperature. When in COOLING mode, the most comfortable settings are 21ºC/70ºF

or above. When in HEATING mode, the most comfortable settings are 28ºC/82ºF or below.

3.  Push the FAN SPEED to select the FAN mode of AUTO, HIGH, MED or LOW.
4.  Push the ON/OFF button. The operation lamp lights and the air conditioner starts to operate per your settings. Push the ON/OFF

button again to stop this unit operation.

Note:

The FAN ONLY mode cannot be used to control the temperature. While in this mode, only steps 1, 3 and 4 may be perfor-

med.

Содержание CS259-R

Страница 1: ...ONAMIENTO ANTES DE UTILIZAR EL APARATO DE AIRE ACONDICIONADO LER ESTE MANUAL DE FUNCIONAMENTO ANTES DE UTILIZAR O APARELHO DE AR CONDICIONADO PLEASE READ THIS OPERATION MANUAL BEFORE USING THE AIR CONDITIONER TELEMANDO CONTROLO REMOTO REMOTE CONTROLLER MODELO CS259 R ESPAÑOL PORTUGUÊS ENGLISH ...

Страница 2: ......

Страница 3: ...res del telemando 3 Funcionamiento del Telemando 4 5 Advertencia 5 CONTENIDOS NOTA 1 Este manual de instrucciones sirve para los siguientes modelos de telemando R51H R51H C 2 El modelo R51H se utiliza para los aires acondicionados con refrigeración y calefacción o de bomba de calor El modelo R51H C se utiliza para los aires acondicionados que son sólo de refrigeración ...

Страница 4: ...pagado fin del funcionamiento Cada vez que pulse el tiempo programado para el apagado se incre mentará en periodos de 30 minutos Cuando aparezca 10 00 con cada pulsación del botón el tiempo de apaga do se incrementará en periodos de 60 minutos Para can celar el programa de fin de funcionamiento sólo tiene que ajustar la hora de apagado a 0 00 Especificaciones del telemando Características de las f...

Страница 5: ...figurada la hora de puesta en marcha mostrará TIMER ON Si sólo está configurada la hora de parada de funcionamiento mostrará TIMER OFF Si se han configu rado las dos operaciones mostrará TIMER ON OFF que indica que usted ha escogido configurar la hora de pues ta en marcha y la hora de apagado Visualizador del VENTILADOR Al pulsar el botón FAN este indicador de señal se enciende Área de visualizaci...

Страница 6: ...iloto de funcionamiento OPERATION se iluminará en el panel de visualización de la unidad interior El modo de funcionamiento AUTO FAN SPEED se ajusta automáticamente y no apare ce ningún indicador en el panel de visualización del telemando 4 Pulse de nuevo el botón ON OFF para detener el funcionamiento de la unidad Nota 1 En el modo AUTO el aire acondicionado puede escoger de manera lógica entre lo...

Страница 7: ...e el telemando transmita la señal al aire acondicionado A continuación unos dos segundos más tarde la señal h desaparecerá y la temperatura selec cionada reaparecerá en el área de visualización digital 3 Configuración de la hora de puesta en marcha y apagado 3 1 Pulse el botón TIMER ON El telemando mostrará TIMER ON la última hora configurada para la puesta en marcha y la señal h aparecerán en el ...

Страница 8: ...icadores do Controlo Remoto 8 Funcionamento do Controlo Remoto 9 10 Advertência 10 CONTEÚDO NOTA 1 Este manual de funcionamento é aplicável aos seguintes modelos de controlo remoto R51H R51H C 2 O modelo R51H é utilizado com os aparelhos de ar condicionado dos tipos frio calor ou com bomba de calor O modelo R51H C é utilizado com o ar condicionado do tipo só frio ...

Страница 9: ...esmente a hora ON para 0 00 6 Tecla TIMER OFF Premir esta tecla para programar a hora OFF parar o funcionamento Cada pressão aumentará a hora OFF em intervalos de 30 minutos Quando a hora de programação se apresentar como 10 00 cada pressão na tecla aumentará a programação OFF em intervalos de 60 minutos Para cancelar a hora de desligar programar OFF em 0 00 7 Tecla ON OFF Premir esta tecla para i...

Страница 10: ...ício do funcionamento mostrará TIMER ON hora de ligação Se só estiver programada a hora de desligar mostrará a hora TIMER OFF paragem Se ambas as programações estiverem introduzidas mostra rá TIMER ON OFF o que indica que foram programadas ambas as horas de início e paragem do funcionamento Visor FAN Quando a tecla FAN é premida este indicador ilumina se Zona do Visor Digital Esta zona mostrará a ...

Страница 11: ... 3 Premir a tecla ON OFF para ligar o ar condicionado A lâmpada OPERATION no visor do aparelho interior acende O modo de fun cionamento do ventilador é automaticamente programado em AUTO FAN SPEED velocidade automática do ventilador e não há indicações no mostrador do controlo remoto 4 Premir de novo a tecla ON OFF para suspender o funcionamento do aparelho Nota 1 No modo AUTO o ar condicionado es...

Страница 12: ...itir o sinal ao ar condicionado Aproximadamente após mais 2 segundos o sinal h desaparece e a temperatura programada reaparecerá no visor digital 3 Programação da hora de ligar desligar 3 1 Premir a tecla TIMER ON o controlo remoto mostrará TIMER ON a última programação de início de funcionamento START e o sinal h na zona do VISOR digital Pode se agora acertar a hora TIMER ON para iniciar o funcio...

Страница 13: ...ctions of indicators on Remote Controller 13 Operating of the Remote Controller 14 15 Warning 15 CONTENTS NOTE 1 This operating manual is applicable to the following models of remote controller R51H R51H C 2 Model R51H is used for cooling heating type or heating pump type air conditioner Model R51H C is used for cooling only type air conditioner ...

Страница 14: ...ON to 0 00 6 TIMER OFF Button Press this button to preset the time OFF turn off the operation Each press will increase the time OFF setting in 30 minutes increments When the set ting time displays 10 00 each press will increase the time OFF setting in 60 minutes increments To cancel the time OFF program simply adjust the time OFF to 0 00 7 ON OFF Button Push this button to start the unit opera tio...

Страница 15: ...operation is set it will display the TIMER ON If only the turning off time of operation is set it will display the TIMER OFF If both ope rations are set it will show TIMER ON OFF which indica tes you have chosen to set both the starting time and off time FAN Display When the FAN button is pushed this signal indicator lights Digital Display Area This area will show the temperature and if in the TIM...

Страница 16: ...70ºF to 28ºC 82ºF 3 Push the ON OFF button to start the air conditioner The OPERATION lamp on the display panel of the indoor unit lights The ope rating mode of AUTO FAN SPEED is automatically set and there are no indicators shown on the display panel of the remote contro ller 4 Push the ON OFF button again to stop the unit operation Note 1 In the AUTO mode the air conditioner can logically choose...

Страница 17: ...ts the signal to the air conditioner Then after approximately another 2 seconds the signal h disappears and the set temperature will re appear on the digital display 3 Set the starting stopping time 3 1 Push the TIMER ON button the remote controller will show TIMER ON the last set time for START operation and the signal h will be shown on the DIGITAL display area You are now ready to readjust the ...

Страница 18: ......

Страница 19: ......

Страница 20: ......

Отзывы: