background image

DAZ-530/DAZ-523

A U TO FOCUS, DAY&NIGHT

ZOOM COLOR CAMERA

USER MANUAL

DISTRIBUTED BY


 DAZ-530/523(동양표지3.10)  2008.3.10 4:34 PM  페이지1   (주)조은프린트02-2269-9980  2400DPI 175LPI  T

Содержание DAZ-530

Страница 1: ...DAZ 530 DAZ 523 AUTO FOCUS DAY NIGHT ZOOM COLOR CAMERA USER MANUAL...

Страница 2: ...Components 5 4 Name and Functions of Each Parts 6 1 Front 6 2 Back 7 5 Connection 9 1 Connecting to Monitor 9 2 Connecting to Connection 9 6 Operating Your Camera 12 1 Menu Configuration 12 2 Menu Se...

Страница 3: ...oduct Do not install correct installation place to prevent possible fall to product Do not handle power plug with wet hand it might cause electric shock Do not insert foreign objects into the product...

Страница 4: ...noise has been significantly reduced and resulting in a clear and sharp image display in the dark Low illumination Day Night The camera automatically determines whether it is night time or day time s...

Страница 5: ...e Mirror Effect Up Down reversion etc Control via OSD menu and RS 485 The OSD menu and RS 485 pins allow for remote control for the camera the user can control the lens using external control connecti...

Страница 6: ...5 1 Color zoom camera DAZ 530 DAZ 523 2 Instruction Manual 3 Products Components...

Страница 7: ...f the camera but it can install the mounting in the top of camera when the user need 2 Remote receive Zoom and focus functions can be controlled by using external controllers Optional Remote controlle...

Страница 8: ...view ZOOM OUT SET To access the main setup menu LEFT F NEAR button To move the arrow indicator to left To see a near object clearly RIGHT F FAR button To move the arrow indicator to right To see a fa...

Страница 9: ...communication Power LED Illuminates when power is supplied Tripod Mount Pole Used to install the camera on an optional Tripod or Bracket Notes If the Adaptor Power Line is extended improperly it may...

Страница 10: ...1 Connecting to Monitor 2 Connecting to connection External Control Connector 9 5 Connection...

Страница 11: ...MD Motion Detection Output Signal Level less than 10mA Communication Control Connector 1 0...

Страница 12: ...Protocol 0 D max 9600 bps 4 P D 9600 bps 1 P P 9600 bps 5 P D 4800 bps 2 P P 4800 bps 6 P D 2400 bps 3 P P 2400 bps 7 S T 9600 bps Select the protocol to move the arrow indicator below Factory defaul...

Страница 13: ...MENU CAM TITLE OFF ON WHITE BALANCE ATW AWC SET MANUAL BACKLIGHT OFF LOW MIDDLE HIGH MOTION DET OFF ON FOCUS MODE ZOOM TRK ZOOM SPEED D ZOOM DISP ZOOM MAG ZOOM POS INIT LENS INIT END EXPOSURE BRIGHTN...

Страница 14: ...n completed move the arrow indicator to EXIT and press the SET button Use this feature to designate a name for the camera which will display on the monitor screen 1 Press the SET button to display the...

Страница 15: ...king character The character is then saved and the cursor in the entry field moves to thenext position Repeat steps through until the desired name has been entered 1 4 Notes If the CAM TITLE feature i...

Страница 16: ...the position by using the 4 directional buttons then press the SET button to confirm the position 6 When completed move the cursor to END and press SET button Your camera provides three WHITE BAL cont...

Страница 17: ...10500 K AWC Auto White balance Control The white balance is automatically adjusted in a specific environment In order to obtain the best result press the SET button while the camera focuses on white p...

Страница 18: ...P menu by using the UP and DOWN buttons 2 Please select the mode you wish to operate by pressing the LEFT or RIGHT button HIGH MIDDLE LOW You can adjust the sensitivity of Backlight Compensation BACKL...

Страница 19: ...d hence a single individual can conduct supervision efficiently The camera detects an object s movement by sensing disparity of outline and level of brightness and color The camera receives detection...

Страница 20: ...s Tips on Using the Motion Detection Feature The feature may not function properly under flickering light conditions The camera interprets sudden changes in lighting and subsequent change in brightnes...

Страница 21: ...tion the indicator over FOCUS using the UP or DOWN button 2 Press the SET button MODE You can select the most suitable zoom mode Move the arrow indicator to M O D E by using UP or DOWN button Digital...

Страница 22: ...ality is obtained AUTO Select AUTO and press the SET button to confirm Increase or decrease optical zoom ZOOM or digital zoom D ZOOM positions by using the UP or DOWN button while verifying the change...

Страница 23: ...OM Configure magnification limit from x2 x10 using this feature Position the indicator over D ZOOM by using the UP or DOWN button Set D ZOOM to O N and press the SET button to confirm DISP ZOOM MAG Us...

Страница 24: ...nction of the initial ZOOM position control LENS INIT Use this feature to initialize the lens Position the indicator over LENS INIT By using the UP or DOWN button Press the SET button to confirm Notes...

Страница 25: ...onfirm BRIGHTNESS Use this feature to adjust image brightness Position the indicator over BRIGHTNESS using the UP or DOWN button Then increase or decrease brightness level by using the LEFT or RIGHT b...

Страница 26: ...ing the LEFT or RIGHT button and then press the SET button Increase or decrease iris level by using the LEFT or RIGHT button while verifying the changes on screen SHUTTER Control image brightness by a...

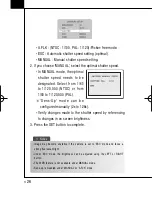
Страница 27: ...rom 1 50 to 1 120 000 PAL Sens Up mode can be configured manually 2x to 128x Verify changes made to the shutter speed by referencing to changes in on screen brightness 3 Press the SET button to comple...

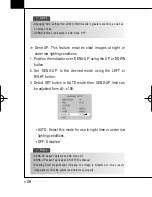
Страница 28: ...ange gain value adjustment MIDDLE Middle range gain value adjustment LOW Narrow range gain value adjustment OFF Disabled SSNR Samsung Super Noise Reduction 1 Position the indicator over SSNR by using...

Страница 29: ...usted from x2 x128 AUTO Select this mode for use in night time or under low lighting conditions OFF Disabled 2 8 Notes Changing AGC setting from LOW to HIGH results in greater sensitivity as well as o...

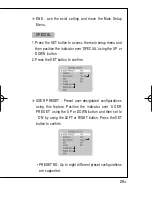
Страница 30: ...the UP or DOWN button 2 Press the SET button to confirm USER PRESET Preset user designated configurations using this feature Position the indicator over USER PRESET using the UP or DOWN button and th...

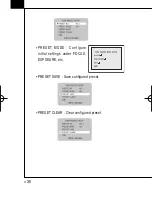
Страница 31: ...PRESET MODE Configure initial settings under FOCUS EXPOSURE etc PRESET SAVE Save configured preset PRESET CLEAR Clear configured preset 3 0...

Страница 32: ...tion GROUP SEL Choose up to eight groups Each group has been can consisted of four mask areas MASK COLOR Adjust desired mask color level AREA SEL Configure eight mask areas AREA MODE Mask area display...

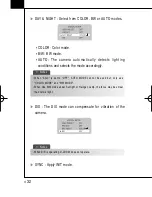
Страница 33: ...ts the mode accordingly DIS The DIS mode can compensate for vibration of the camera SYNC Apply INIT mode 3 2 Notes When AGC is set to OFF AUTO MODE cannot be used but only use COLOR MODE and B W MODE...

Страница 34: ...DISP CAM ID Displays camera ID on top left corner of the screen BAUD RATE Configure baud rate from 2400 4800 9600 19200 38400 57600 bps UART MODE Configure parity bit to NON EVEN or ODD Data bit is se...

Страница 35: ...edges Too high of a setting however produces noise and may obscure the image COLOR Adjusting this value affects the chroma level only the burst level is unaffected END evert back to the USER PRESET me...

Страница 36: ...nce with specifications Ensure DAY NIGHT mode the mode set to AUTO Ensure AGC mode is set to ON Ensure that the feature is set to ON Check the WHITE BAL mode the setting is properly Adjust and configu...

Страница 37: ...ode Zoom Rate 30X f 3 3 99mm F1 6 3 4 Min Focus Distance 1m Angle Field of view H 58 0 Wide 2 22 Tele V 44 8 Wide 1 68 Tele Back Light Low Middle High Off Day Night AUTO COLOR B W Privacy Zone On Off...

Страница 38: ...ate 23X f 3 84 88 4mm F1 6 3 0 Min Focus Distance 1m Angle Field of view H 52 2 Wide 2 36 Tele V 40 25 Wide 1 78 Tele Back Light Low Middle High Off Day Night AUTO COLOR B W Privacy Zone On Off 32 Zon...

Страница 39: ...DISTRIBUTED BY...

Отзывы: