background image

146

D-Link ShareCenter DNS-325 User Manual

Section 4 - Configuration

mydlink Cloud

.is.a.

D-link

.service.that.brings.cloud.services.to.the.ShareCenter

..Access.these.services.by.clicking.the.

mydlink Cloud

.icon.on.

the.Home.screen..The.ShareCenter

.downloads.the.software.and.installs.it.on.your.

NAS.

mydlink Cloud Activation

Содержание ShareCenter Shadow DNS-325

Страница 1: ......

Страница 2: ...the Front Cover and Connect to the Local LAN 16 Power and Device Selection 17 Admin password 18 Network Setup 19 Dynamic DNS 20 DDNS Account and System Time 21 E mail Settings and Volume Information 22 RAID Configuration and Drive Mapping 23 Configuration Summary and Drive Formatting 24 Format Complete 25 Installing mydlink Cloud and Selecting Add on Packages 26 Add on Packages 27 Wizard Complete ...

Страница 3: ...ation Management 106 FTP Server 106 UPnP AV Server 111 iTunes Server 115 Add On 116 AFP Service 119 NFS Service 121 System Management 122 Language 122 Time and Date 123 Device 124 System Settings 125 Power Management 127 Notifications 130 Logs 136 Firmware Upgrade 137 Status 138 System Info 138 Hard Drive Info 139 Home 140 My Folder 140 My Files 141 My Files Upload 142 My Files Upload 143 My Files...

Страница 4: ...oud Upgrade to Pro 182 mydlink Cloud Miscellaneous Settings 183 mydlink Cloud Miscellaneous Settings Accounts 184 mydlink Cloud Miscellaneous Settings Network 185 mydlink Cloud Miscellaneous Settings Misc 186 mydlink Cloud Miscellaneous Settings Log 187 mydlink Cloud Miscellaneous Settings About 188 mydlink Cloud Miscellaneous Settings Help 189 mydlink Cloud Tools 190 mydlink Cloud Tools 191 mydli...

Страница 5: ...r Manual Table of Contents Add Ons 230 Application Menu with Add Ons 231 AjaXplorer 232 Audio Streamer 233 aMule 234 Blog 235 Photo Center 236 Squeeze Center 237 Surveilllance Center 238 Connecting your Camera s to the ShareCenter 240 ...

Страница 6: ...he D Link s Boxee Box This feature is highly convenient as it allows you to turn off a computer that would normally be needed for the same function The availability of four different hard drive modes Standard JBOD RAID 0 RAID 1 allows you to choose the configuration best suited to your needs Standard mode creates two separately accessible hard drives JBOD combines both drives in linear fashion for...

Страница 7: ...ile accessing music library and Photo Gallery browsing from any location via web browser Before you Begin Check box contents Check system requirements Ensure that you have the hardware you need for your ShareCenter device Note Using a power supply with a different voltage than the one included with the ShareCenter will cause damage and void the warranty for this product If any of the above items a...

Страница 8: ...nk ShareCenter DNS 325 User Manual Section 1 Product Overview D Link ShareCenter DNS 325 CD ROM with Manual and Software Quick Installation Guide Power Adapter Power Cord CAT5 Ethernet Cable Package Contents ...

Страница 9: ...ration Standard to RAID1 Supports Advanced Format HDD HDD S M A R T test y y Account Management Users and Groups can be assigned to Folders with Read or Read Write Permissions Quotes for Users and Groups Support ISO mount Shares Built in FTP Server for File Access Over the Internet Supports FTP over SSL TLS and FXP y y Download Management Scheduled Downloads from Web or FTP sites Support P2P and a...

Страница 10: ...TPs Management Network Recycle Bin Supports Yahoo Widgets Supports System Logging FTP logging Automatic email and SMS notifications Windows and Mac version D Link Storage utility y y My Folder My Files Allows user s to access files on the NAS using a web browser y y mydlink Cloud Access files Store Music Browse your Photo Gallery Sync your files from any location ...

Страница 11: ...e and helps distribute loads more effectively This section will help you Select the hard drives you will use Choose the amount of space to have available on those drives Ensure your data is protected Understand the basic requirements for a router or switch Selecting Hard Drives You can use hard drives from any manufacturer and with any capacity with your ShareCenter All D Link devices support stan...

Страница 12: ...ther day The DNS 325 accepts standard 3 5 inch internal SATA hard drives regardless of manufacturer capacity or speed For dual disk redundancy it is recommended that you using two drives for storing data and two for redundancy The drives used for redundancy must have a total capacity of at least the sum of the two drives used for storing data Using a Router or Switch If you are connecting your Sha...

Страница 13: ...its box and ensured you meet all system and hardware requirements it is now time to set up your DNS 325 for use This can be done in just a few easy steps 1 Insert the hard drives 2 Connect the power and LAN cables to your ShareCenter 3 Power on the device 4 Run the D Link ShareCenter Setup Wizard to configure the DNS 325 5 Configure the hard drives ...

Страница 14: ...ives are connected but inactive The lights will blink when the drives are being accessed formatted or synchronized They will illuminate AMBER if a drive has failed Power Button Press once to power on the device To power down press and hold the button until it begins to blink Drive Bays With the front cover off SATA hard drives can be slid in and out of the of device Use the tabs on the rear of the...

Страница 15: ...K L and Traffic LED R to indicate connectivity and traffic respectively to the local LAN Power Receptacle Connect the supplied power cord to the receptacle USB Connector A single USB 2 0 Type A connector The USB Host port is for Print Servers USB memory disks or USB UPS monitoring Reset Button Press and hold this button for more than 5 seconds to reset the unit to factory defaults HDD Eject Lever ...

Страница 16: ...CD to locate the device on your network and make any necessary changes Network Storage Device The D Link Storage Utility displays any ShareCenter devices it detects on the network Refresh Click Refresh to refresh the device list Configuration Click Configuration to access the web based configuration of the ShareCenter LAN Configure the LAN Settings for the ShareCenter here Apply Click Apply to sav...

Страница 17: ... and direct it to the IP address listed for the device Make sure the browser is not configured to use a proxy server Note The computer used to access the ShareCenter web based configuration manager must be on the same subnet as the ShareCenter If your network is using a DHCP server and the computer receives IP settings from DHCP server the ShareCenter will automatically be in the same subnet ...

Страница 18: ...5 User Manual Section 2 Getting Started To get started with the ShareCenter Setup Wizard insert the supplied CD into your CD ROM drive Getting Started ShareCenter Software CD ClicktheInstallbuttontostarttheShareCenter Setup Wizard ...

Страница 19: ...er ready for immediate use Select the Language of your choice and click the Start button Installation Setup Wizard To run the Setup Wizard insert the ShareCenter CD into your CD ROM drive Step 1 Click Setup Wizard Utility Note Windows Firewall presents you with a warning message to unblock the device Click Unblock to give your computer access to the NAS ...

Страница 20: ...t Cover and install the Hard Drives Step 3 Follow the instructions to remove the front cover of your ShareCenter Click Next to continue Step 4 Follow the instructions to slide either one or two hard drive s into an available hard drive bay of your ShareCenter Click Next to continue ...

Страница 21: ...erly into each bay close the chassis by sliding the panel down into place Click Next to continue Step 6 Connect a CAT5 Ethernet cable with RJ 45 connectors to your ShareCenter and connect the other end to a switch or router Local LAN Click Next to continue Replace the Front Cover and Connect to the Local LAN ...

Страница 22: ...he power receptacle at the back of the ShareCenter Then power on the ShareCenter by pressing the power button located under the OLED screen Click Next to continue Step 8 With the power on press the Next button on the device and check and make sure the IP address of your ShareCenter matches what you see on the screen Click Next to continue ...

Страница 23: ...ator password If this is the first time you are doing the installation on this NAS leave the password blank Click Next to continue Step 10 In this step you can create a new password for the Admin username It is recommended you set a password however you may also leave the fields blank Click Next to continue ...

Страница 24: ...gure the second IP network settings of the ShareCenter If you select Static IP then enter the IP parameters as listed Click Next to continue Step 11 You may either use Static IP or DHCP to configure the first IP network settings of the ShareCenter If you select Static IP then enter the IP parameters as listed Click Next to continue ...

Страница 25: ...unt to use for the ShareCenter DDNS settings If you do not have a DDNS account or do not want to use one click on the No Radio button Click Next to continue Click Next to continue Step 14 If you clicked Yes enter the DDNS parameters requested in this window so that your ShareCenter can be accessed by a URL over the Internet Click Next to continue ...

Страница 26: ...te a DDNS account and configure your LAN equipment and ShareCenter to work with the new settings Click Close to continue Step 16 Select the ShareCenter system time date and time zone settings using this step You can set the time and date manually from an NTP server or from the computers settings The time zone is set manually Click Next to continue ...

Страница 27: ... e mail service with the ShareCenter to receive e mail events to alert users of any changes to the system You must have all mail server information nearby or contact your systems administrator for assistance Click Next to continue Step 18 This step shows the configured Volumes set up on the ShareCenter Click Next to continue ...

Страница 28: ... File Systems desired Clicking on each file system type radio button will give a description if needed For more information concerning the different RAID Disk Formats please refer to the user manual Click Next to continue Step 20 This step allows you to map the volume s created as network drive s on your computer Click Next to continue ...

Страница 29: ...led summary of your volume configuration here before clicking next and starting the drive format IfnecessaryusethePREVbuttontogoback and reconfigure the RAID configuration of the volume s Click Next to continue Step 22 During the format process the wizard displays a percentage complete bar for each hard drive Click Next to continue ...

Страница 30: ...25 D Link ShareCenter DNS 325 User Manual Section 3 Installation Format Complete Step 23 The wizard will notify you when formatting is complete successfully Click Next to continue ...

Страница 31: ...led allows you to send files from your NAS to the mydlink Cloud service Read the installation instructions and wait for the process to complete Click Next to continue Step 25 Your ShareCenter supports Add On packages Here you may install the AjaXplorer Audio Streamer Blog SqueezeCenter Photo Center aMule and Surveillance Center add ons which extend the application functionality of your ShareCenter...

Страница 32: ...Installation Add on Packages Step 26 The wizard will notify you that the Add on packages are being installed successfully Click Next to continue Step 27 The next screen allows you to enable or disable the installed add on packages Click Next to continue ...

Страница 33: ...Computer icon If you did not use the wizard to map the drives you can manually map or access the created volumes through your computers operating system Detailed configurations using the Web UI is explained in the configuration section of this manual Wizard Complete Step 28 The ShareCenter Setup Wizard is complete Click Finish to exit the wizard and start using your DNS 325 Click Next to continue ...

Страница 34: ...k diagnostics Account Management Configures user and group management network shares active directory paths and distributed file systems Network Management Configures LAN Dynamic DNS and Port Forwarding Application Management Configures FTP UPnP iTunes server configurations Add ons AFP and NFS services System Management Configures language time and date device and system settings Also allows you t...

Страница 35: ...sword you created during the Setup Wizard Click Login Note The computer used to access the web based configuration manager must be on the same subnet as the ShareCenter If your network is using a DHCP server and the computer receives IP settings from DHCP the ShareCenter will automatically be in the same subnet Web UI Login Configuration ...

Страница 36: ...e Web File Server Other applications which may be added to the page Management Contains the Setup Wizard Step through settings for accounts time and date and connectivity Disk Management Configures the Volume Setup and perform Disk Diagnostics Account Management Configures the Admin Password Users Groups Quotas and Network Share Folders Network Management Configures the LAN settings and Dynamic DN...

Страница 37: ...5 User Manual Section 4 Configuration Management ThistabcontainstheSetupWizard DiskManagement AccountManagement NetworkManagement ApplicationManagement System Management and Status Icons Click each of the icons to see the submenus ...

Страница 38: ...tion Setup Wizard Web UI Click the Run Wizard button to start the setup wizard Click Next to continue The ShareCenter has a SystemWizard that allows you to quickly configure some of the basic device settings Click the System Wizard icon to start the Setup Wizard ...

Страница 39: ...25 User Manual Section 4 Configuration It is recommended you set an admin password here Enter thenewpasswordandre enteritforconfirmation ClickNext to continue Set the appropriate Time Zone for your location Click Next to continue ...

Страница 40: ...cription or leave the default values and click Next to continue Edit or change the LAN settings Selecting DHCP Client will cause the device to obtain an IP address from the local DHCP server such as a router Selecting Static IP requires you to assign the IP information manually Click Next to continue ...

Страница 41: ...nter your e mail parameters in the boxes to send event alerts from the device Click Next to continue Click Finish to save your settings and complete the wizard You may click the Previous button to go back and edit your settings or click Exit to end the wizard without saving the settings ...

Страница 42: ...nthisbuttontolaunchawizardtoallowyouto select the RAID configuration and format the drives Refertothesectiontitled WhatisRAID onpage224 for more information about RAID Auto Rebuild Configuration If you selected RAID 1 as the configuration option then set the Auto Rebuild function here using the radio buttons Enable Auto Rebuild Enabling Auto Rebuild will rebuild a failed RAID 1 drive when a new dr...

Страница 43: ...ow focus on each individual hard drive configuration process Lets start with Standard configuration setup Initiallythe steps of the configurationprocess are shown You must decide on the RAID type you would like to format your HDDs with Click the Next button to continue or click Exit to cancel This screen displays the currently installed HDD information Any data on the installed hard drives will be...

Страница 44: ...the format desired by clicking on the RAID type box to highlight it in blue In this example we select Standard configuration settings In this example we select Standard Click Next to continue Choose a volume or volumes that you would like to configure Click Next to continue ...

Страница 45: ...nter DNS 325 User Manual Section 4 Configuration Awarningmessageappearstocheckifyouwanttore formatthedrive Click Yes to continue or No to revert back to the original process The system initializes and formats the drives ...

Страница 46: ...nter DNS 325 User Manual Section 4 Configuration Once the format process is complete the drives are updated with their new settings In step 6 the setup is complete and the volumes are formated to Standard configuration ...

Страница 47: ...42 D Link ShareCenter DNS 325 User Manual Section 4 Configuration Click Finish to return to the main menu Here you can have an overall view of Disk Management ...

Страница 48: ... DNS 325 User Manual Section 4 Configuration JBOD Select JBOD to create a single volume from all of the drives Click Next to continue Choose a volume or volumes that you would like to change to JBOD Click Format to continue ...

Страница 49: ...44 D Link ShareCenter DNS 325 User Manual Section 4 Configuration Confirm your format confirmation Click Yes to continue or click No to discontinue The system initializes and starts formatting ...

Страница 50: ...45 D Link ShareCenter DNS 325 User Manual Section 4 Configuration The volume is updated Setup is complete You can now view the JBOD configuration Click Finish to continue ...

Страница 51: ...46 D Link ShareCenter DNS 325 User Manual Section 4 Configuration This returns the wizard back to the original Disk Management screen Here you can see the JBOD settings ...

Страница 52: ...47 D Link ShareCenter DNS 325 User Manual Section 4 Configuration View your current disk information Click Next to continue RAID 0 Select RAID 0 Click Next to continue ...

Страница 53: ...ser Manual Section 4 Configuration Select how much disk space you want to allocate to the RAID volume using the slider Click Next to continue A summary of the volume configuration is provided in table format Click Format to continue ...

Страница 54: ...ction 4 Configuration A warning summary is provided to query your choice Click Yes to continue or No to return to the previous screen The system is initialized to prepare the volumes for the format process and begins the format process afterwards ...

Страница 55: ...50 D Link ShareCenter DNS 325 User Manual Section 4 Configuration Once the format process is complete the system updates The setup is complete once a volume is displayed Click Finish to continue ...

Страница 56: ...51 D Link ShareCenter DNS 325 User Manual Section 4 Configuration Return to the main screen where you can view the Hard Drive Configuration settings ...

Страница 57: ...52 D Link ShareCenter DNS 325 User Manual Section 4 Configuration View your current disk information Click Next to continue RAID 1 Select RAID 1 Click Next to continue ...

Страница 58: ...uto Rebuild or Disable Auto Rebuid Rebuilding the configurationmeansthatwhentheRAIDconfigurationfailsthesystem is able to rebuild once the system goes down Click Next to continue Select how much disk space you want to allocate to the RAID volume using the slider Click Next to continue ...

Страница 59: ...NS 325 User Manual Section 4 Configuration Here is a summary of the volume configuration Click Format to continue A warning summary is provided to query your choice Click Yes to continue or No to return to the previous screen ...

Страница 60: ...enter DNS 325 User Manual Section 4 Configuration The system is initialized to prepare the volumes for the format process and begins the format process afterwards Once the format process is complete the system updates ...

Страница 61: ...ShareCenter DNS 325 User Manual Section 4 Configuration The setup is complete once a volume is displayed Click Finish to continue Return to the main screen where you can view the Hard Drive Configuration settings ...

Страница 62: ...lable Storage If you have remaining space on your hard drives you are able to set or change the drive settings by clicking the Create a New Volume from the Remaining Available Storage Click Create a NewVolume from the Remaining Available Storage The Physical Disk Information wizard starts Click Next to continue ...

Страница 63: ...eCenter DNS 325 User Manual Section 4 Configuration View your disk information Click Format to continue A warning summary is provided to query your choice Click Yes to continue or No to return to the previous screen ...

Страница 64: ...59 D Link ShareCenter DNS 325 User Manual Section 4 Configuration The system initializes ready for formatting The system formats the remaining space ...

Страница 65: ...60 D Link ShareCenter DNS 325 User Manual Section 4 Configuration The system updates Setup is complete View your configuration settings ...

Страница 66: ...61 D Link ShareCenter DNS 325 User Manual Section 4 Configuration Return to the main screen where you can view the Hard Drive Configuration settings ...

Страница 67: ... at a pre determined time and date Quick Test Runs a quick S M A R T test The test usually takes less than 10 minutes This test will check the electrical mechanical and read performance of the hard drive The results are displayed as Passed Failed on the web UI and can also be sent as an e mail alert Extended Test RunsanextendedS M A R Ttest Thistestrequiresalot moretimetocomplete However itisamore...

Страница 68: ...re this test will run automatically at the configured time Select the frequency Daily Weekly Monthly and the Time here Click on the Create button to add a schedule Schedule List In the window all the created schedule lists will be displayed Note When performing a S M A R T test your hard drives will not be available over the network until it has completed testing ...

Страница 69: ...e Click on the Scan Disk button to start the test If the test fails you can try reformatting the drive and test again Otherwise you will need 3rd party disk troubleshooting tools Volume Use the drop down menu to select the disk volume that you want to run the Scan Disk test on Scan Disk Progress Window If you have started a Scan Disk test then a window with a progress bar will appear to monitor th...

Страница 70: ...ll services hard drive and network activity Click Yes to proceed or No to cancel The DNS 325 will initialize the volume s and begin scanning Please wait while the software scans your machine or click Exit to cancel the scan When the scan is complete the table will either display Success or Failure Click Finish to exit ...

Страница 71: ...nage user and group accounts Up to 512 users and 64 groups can be created By default all users have read and write access to all folders However access rules can be created and edited in the Network Shares menu Click Management Account Management Under Users Groups User Settings click New The User Setup Wizard will appear Click Next to continue ...

Страница 72: ...up window Step 1 This window welcomes the user to the setup wizard for adding or modifyingauser Thiswizardwillguidetheuserthroughthestepsofsetup In this wizard the user will be able to 1 Create a new user account 2 Join a group 3 Configure the appropriate network shares settings 4 Configure the user quota 5 Viewasummaryoftheconfigurationbeforecompletingtheaddition Click on the Next button to conti...

Страница 73: ...he Next button to accept the change and continue to the next window Click on the Exit button to discard the changes made and return to the User Group window Step 3 Here you can add this user account to a group Select the appropriate Group Name by clicking the check box ClickonthePreviousbuttontoreturntothepreviouswindow Click on the Next button to accept the change and continue to the next window ...

Страница 74: ...on to return to the previous window Click on the Next button to accept the change and continue to the next window Click on the Exit button to discard the changes made and return to the User Group window Step 3 1 Here the user can configure the WebDAV settings for the user account Selectthevolumes theusercan haveWebDAV accessto andthenselectwhethertogiveReadOnlyorRead Writeaccess Click on the Previ...

Страница 75: ...t button to discard the changes made and return to the User Group window Step 4 Here you can confirm to create the new account Click on the Previous button to return to the previous window Click on the Finish button to accept the change and complete the wizard Click on the Exit button to discard the changes made and return to the User Group window After the new account has been created a window wi...

Страница 76: ...enter DNS 325 User Manual Section 4 Configuration Modifying Users Click the user you wish to modify The user will be highlighted in red Click Modify to continue The User Setup Wizard will appear Click Next to continue ...

Страница 77: ...72 D Link ShareCenter DNS 325 User Manual Section 4 Configuration Change the username or password Click Next to continue Change the Network Share Settings accordingly Click Next to continue ...

Страница 78: ...ation Reassign Privileges Access Methods for the user s Check the options you want and then click Next to continue Enterthere assignedamountofdiskspaceyouwishtoassigntheuser on each volume Type 0 to provide unlimited disk space to the user Click Next to continue ...

Страница 79: ... 4 Configuration The final step is a summary of all the configurations you made Click Finish to accept the changes or Exit to cancel the changes A message will appear stating the user details have been changed successfully Click Yes to exit the wizard ...

Страница 80: ...iguration Deleting Users Click the user you wish to delete The user will be highlighted in red Click Delete to continue A message will appear prompting you to confirm deleting the user Click Yes to confirm The user is now automatically removed from the list ...

Страница 81: ...ill be able to 1 Create a new group 2 Add a user to a group 3 Configure the appropriate network shares settings 4 Configure the quota settings 5 Viewasummaryoftheconfigurationbeforecompletingtheaddition Click on the Next button to continue Click on the Exit button to discard the changes made and return to the User Group window Enter the name for your new group Click on the Previous button to retur...

Страница 82: ...dow Click on the Exit button to discard the changes made and return to the User Group window Step 2 Assign the appropriate Network Access settings for this group by simply clicking one of the following options Read Only Read Write or Deny Access ClickonthePreviousbuttontoreturntothepreviouswindow Click on the Next button to accept the change and continue to the next window Click on the Exit button...

Страница 83: ...eviousbuttontoreturntothepreviouswindow Click on the Next button to accept the change and continue to the next window Click on the Exit button to discard the changes made and return to the User Group window Step 3 1 Configure the Quotas settings for this group Enter the quota amount in the block indicated in Megabytes By entering 0Mb the quota will be set to unlimited ClickonthePreviousbuttontoret...

Страница 84: ... Verify the settings and click Finish ClickonthePreviousbuttontoreturntothepreviouswindow ClickontheFinishbuttontoacceptthechangeandcompleted the wizard Click on the Exit button to discard the changes made and return to the User Group window After the new group has been created a window will appear that states the group was created successfully Click on the OK button to continue Step 5 ...

Страница 85: ...80 D Link ShareCenter DNS 325 User Manual Section 4 Configuration OnceyouhaveclickedYes thewizardreturnsyoutothegroup settings information table Check to see if your new group is added ...

Страница 86: ...n 4 Configuration Modifying a Group Click Account Management Users Groups Click the blue arrow and the Group Settings table will appear Select the group you want to modify Your selection will turn red Click Modify to change the settings for the Group ...

Страница 87: ... D Link ShareCenter DNS 325 User Manual Section 4 Configuration The Group Setup Wizard will now start Click Next to continue Make the necessary modifications to the group s and then click Next to continue ...

Страница 88: ...ppropriate Network Share Settings read read write deny access for the corresponding disk volume for the group Click Next to continue Select the appropriate AssignedPrivileges to the group The greyed out selections are there by default and cannot be modified Click Next to continue ...

Страница 89: ...t the amount of space you want to assign to the group for each volume Enter zero to give unlimited disk space to the group Click Next to continue When editing the quota make sure the size is not smaller than the user quota on his her account Click Yes to change the quota ...

Страница 90: ...DNS 325 User Manual Section 4 Configuration The wizard is now complete and will show a summary of the group you edited Click Previous to change your settings or Finish to end the wizard Exit will cancel all changes you made ...

Страница 91: ...ual Section 4 Configuration Select the Group you want to delete and click Delete Deleting a Group A warning message will appear asking you to verify if you want to delete the Group Click Yes to delete the Group or No to cancel your decision ...

Страница 92: ...r both groups and individual users Assigning a quota to a group or user will limit the amount of storage they are allocated By default users and groups do not have a quota In the User Quota Settings table you can view the current user usage and limit setting Click on the blue font to set usage limits IntheGroupQuotaSettingstableyoucanviewthecurrent group usage and limit setting Click on the blue f...

Страница 93: ... read all the files within it Network Shares TheNetworkSharesSettingswindowallowsyoutoadd modify and remove both new and existing Network Share and ISO Mount Share Settings To add a rule click on the New button To modify an existing rule click on the Modify button To remove a rule click on the Delete button To select a rule simply click on the rule and the entry should change to red Atthebottomoft...

Страница 94: ...ill be able to 1 Select share folders 2 Configure shared folder access rights 3 Configure network access settings 4 View a summary of the configuration before completing Click on the Next button to continue Click on the Exit button to discard the changes made and return to the Network Shares Page Start Select the folder you want to include in this network share by checking the box Click on the Pre...

Страница 95: ...pt the change and continue to the next window Click on the Exit button to discard the changes made and return to the Network Shares Page Step 2 Select the appropriate access rights for the share Options to choose from are Read Only Read Write and Deny Access This procedure can also be used to block certain users from accessing certain folders Click on the Previous button to return to the previous ...

Страница 96: ...ontinue to the next window Click on the Exit button to discard the changes made and return to the Network Shares Page Step 2 2 If you select Specific User Group in Step 2 then this step allows you to set the access rights for each Group configured on the device Click on the Previous button to return to the previous window Click on the Next button to accept the change and continue to the next windo...

Страница 97: ...file attribute Map Archive will becopied as the fileis being stored on the device Click on the Previous button to return to the previous window Click on the Next button to accept the change and continue to the next window Click on the Exit button to discard the changes made and return to the Network Shares Page Step 3 Assign protocol privileges that a user can use to access this share Options to c...

Страница 98: ...made and return to the Network Shares Page Step 3 1 1 If you selected NFS as an access method to your network share then set the parameters below Host Allowable host address that can access using NFS indicates all hosts Root Squash Disables writing to the Root owned directories andfilesonthesystemwhentheuserhasrootaccessprivileges Write provide write permission to the file system Click on the Prev...

Страница 99: ... Exit button to discard the changes made and return to the Network Shares Page Step 3 1 3 Click Finish to save your settings Click on the Previous button to return to the previous window Click on the Finish button to accept the change and complete the wizard Click on the Exit button to discard the changes made and return to the Network Shares Page Step 4 Note When you use FTP or WebDav on your Sha...

Страница 100: ...uration Deleting a Network Share Select the Network Shareyou wish to delete Your selection will turn red Click Delete to remove the share A warning message will appear prompting you to verify if you wish to delete the Share Click Yes to delete or No to Cancel ...

Страница 101: ...96 D Link ShareCenter DNS 325 User Manual Section 4 Configuration The deleted Share will be removed from the Network Share List ...

Страница 102: ...eCenter DNS 325 User Manual Section 4 Configuration Resetting the Network Share Select the Reset Network Shares button A warning message will prompt you to confirm your selection Click Yes to confirm or No to cancel ...

Страница 103: ...select the appropriate network protocols 4 Confirm the changes Click Next to continue Expand one of your Volume File System trees to select the desired iso file Check the box to the left of the iso file to select it and click Next to continue Adding New ISO Mount Shares Wizard The following section will describe how to add a new ISO mount on the ShareCenter To add an ISO Mount click on the New but...

Страница 104: ...Click on the Next button to accept the change and continue to the next window Click on the Exit button to discard the changes made and return to the Network Shares Page You can assign Read Only or Deny Access privileges to the ISO Mount share here Click on the appropriate radio button for the privileges you would like to assign Click on the Previous button to return to the previous window Click on...

Страница 105: ...es that a user can use to access this share Options to choose from are FTP NFS and WebDAV CIFS and AFP are set as default CIFS is short for Common Internet File System AFP is short for Apple Filing Protocol FTP is short for File Transfer Protocol NFS is short for Network File System WebDAV is short for Web based Distributed Authoring and Versioning Click on the Previous button to return to the pre...

Страница 106: ...ious button to return to the previous window Click on the Finish button to accept the change and complete the wizard Click on the Exit button to discard the changes made and return to the Network Shares Page Using the D Link Storage Utility the ISO Mount Share can now be mapped to your computer so that you can access it ...

Страница 107: ...min Password Username The administrator user name is admin and this cannot be changed Password Enter the current password Leave this blank if you have not set a password yet New Password Enter a new password Confirm Password Enter the new password again for confirmation ...

Страница 108: ...ss for your device The IP address of each device on the local area network must be within the same IP address range and subnet mask Subnet Mask Enter the Subnet Mask The default subnet mask is 255 255 255 0 Gateway IP Address Enter the Gateway IP Address for the device The Gateway IP Address is almost always the LAN address of your router Most D Link routers have a default LAN IP address of 192 16...

Страница 109: ... per second Link Speed Select either Auto Auto Negotiate 100 Mbps or 1000 Mbps by clicking the appropriate radio button Then click the Save Settings button to save the new settings LLTD The device supports LLTD Link Layer Topology Discovery andisusedbytheNetworkMapapplicationthatisincluded in Windows Vista and Windows 7 Select to enable or disable LLTD ...

Страница 110: ... regardless of your IP address DDNS Select Enable or Disable Server Address Select a DDNS Server from the combo box on the right hand side or type in the server address manually Host Name Enter your DDNS host name Username or Key Enter your DDNS username or key Password or Key Enter your DDNS password or key Verify Password or Key Re enter your password or key Status Displays your DDNS status When...

Страница 111: ...device from the Internet Once the port has been forwardedontherouter usersfromtheInternetwillaccess the FTP server through the WAN IP address of the router Passive Mode In situations where the device is behind a firewall and unabletoacceptincomingTCPconnections passivemode must be used Client Language Most standard FTP clients likeWindows FTP only support Western European code page when transferri...

Страница 112: ...op down menu select the amount of users you want to give access to 2 Set an idle time 3 Configure the default FTP port 4 Select a default port range or select a passive mode type 5 Select a language 6 Select the correct flow control 7 Click to enable SSL TLS and click Enable FXP to continue Click Save Settings to save the changes ...

Страница 113: ...Server Status reports Click the blue arrow to see the drop down list Click New to block a specific IP address Enter the IP address of a machine you wish to block Select Permanent if you wish to block the IP address permanently or Temporary if you wish to set a time frame If your choice is permanent click Apply and continue ...

Страница 114: ... ShareCenter DNS 325 User Manual Section 4 Configuration If your choice was Temporary then you need to select a time frame and click Apply to continue The Blocked IP list will display the IP addresses you blocked ...

Страница 115: ... D Link ShareCenter DNS 325 User Manual Section 4 Configuration Click theblue arrownexttoFTPserverstatustorevealtheFTPdetails The FTP server is stopped by default Click Start FTP Server to run the process ...

Страница 116: ... the Refresh All button to update all the shared files and folder lists UPnP AV Server Select Enable or Disable After enabling the UPnP AV Server option the following window will appear In the window you will be able to add delete and view existing UPnP AV Server shared folders Add Delete To add a new folder to the shared list click on the Add button To delete an existing folder click on the Delet...

Страница 117: ...25 User Manual Section 4 Configuration Click Application Management then UPnP server Click the Enable radio button to enable the UPnP server Click Add to configure the UPnP share Select the volume you like to share and click Apply ...

Страница 118: ...nk ShareCenter DNS 325 User Manual Section 4 Configuration The system will now build the media library When the system has finished building the media library a success message will appear Click Yes to continue ...

Страница 119: ...114 D Link ShareCenter DNS 325 User Manual Section 4 Configuration The selected volume will appear in the table under the UPnP server ...

Страница 120: ... enable or disable the iTunes Server Specifies the folder or directory that will be shared by the iTunes server Select root to share all files on all volumes or click Browse to select a specific folders Password Sets password for the iTunes server Optional MP3 Tag Codepage Here the user can select the MP3 Tag Codepage used by this device Currently the Codepage is set toWestern European Auto Refres...

Страница 121: ...evice Blog Wordpress Create your own device based customized Blog Using the ShareCenter s Internet connection the Blog created using WordPress can be accessed and commented on from any Internet connection Audio Streamer Turn your device into an Internet Streaming Music site From your device the Audio Streamer add on can transmit multiple streams of playing music files to any Internet connection Su...

Страница 122: ...nter DNS 325 User Manual Section 4 Configuration Click Application Management then Add Ons Click Choose File to locate the add on packages on your local hard drive Once you have located the file select it and click Open ...

Страница 123: ...Manual Section 4 Configuration Once the path of the package has been located click Apply to add the package UnderAdd ons aredmessagewillappeartoshowthattheinstallation of the package was successful Click the Start button under Start Stop ...

Страница 124: ... need to use AFP service enable it here otherwise leave it disabled to reduce CPU resource overhead AFP Service Select enable to allow MAC OS based systems connect to your device using AFP protocol Select disable to prevent unnecessary CPU resource depletion when AFP is not being used Save Settings Click to save your AFP settings Note Enabling AFP service will disable oplocks ...

Страница 125: ...ication Management then AFP Service Click the Enable radio button to turn AFP services on Click Save Settings to save the AFP services Click Application Management then NFS Service Click the Enable radio button to turn NFS services on Click Save Settings to save the NFS service ...

Страница 126: ... your device enable it here Otherwise disable the option to prevent unnecessary CPU overhead NFS Service Select Enable to allow systems that support NFS to connecttoyourdeviceusingNFSprotocol SelectDisable topreventunnecessaryCPUresourcedepletionwhenNFS is not being used Save Settings Click to save your NFS settings Note Applying NFS service to any Share will disable oplocks ...

Страница 127: ...website or the CD and follow the instructions below When you disable the language pack the GUI will return to English System Management Click System Management then Language to install a new language Click Choose File Then browse your computer hard drive for the selected pack and click Apply If you have not selected a language package a message will prompt you to locate one Click Yes to continue ...

Страница 128: ...ttings of the device Manually Enter the complete time and date settings manually Click SaveSettings to apply these settings To synchronize the device clock with your computer click the Set time from my computer button Time Zone Select your time zone from the drop down menu Click Save Settings after selecting your time zone NTP Server NetworkTimeProtocol NTP synchronizesthedevicewith an Internet ti...

Страница 129: ...rdevicenamehere Thisnameiswhatthedevice willappearasonthenetwork Bydefault thedevicename is dlink xxxxxx where xxxxxx is the last six digits of the MAC address Description Assign a device description to the device Click Save Settings to accept these changes Device The device settings page allows you to assign a workgroup name and description to the device You can access this device by typing the h...

Страница 130: ...tion 4 Configuration System Settings Restart Clicking to reboot the device Default Click to restore the device back to the factory default settings All previous settings that have been configured will be erased Shutdown Click to turn off the device ...

Страница 131: ...nfiguration after a system reset browse to the file and click Load Idle Time Enter the time in minutes that the administrator and users will be allowed to remain idle while accessing the web UI System Temperature Threshold Here the user can configure the system temperature threshold value This value can be set in Fahrenheit or Celsius The device will automatically shutdown when it reaches the temp...

Страница 132: ...o shut down while power remains constant to the device The drives will power up again when data is accessed Click System Management then Power Management Click Enable to enable hard drive hibernation Then from the drop down list select a time frame Click the blue arrow to reveal Power Recovery Select Enable to use Power Recovery Click Save Settings to continue ...

Страница 133: ...e blue arrow to reveal the Fan Control Settings Select the type of control settings you want Click Save Settings to continue Click the blue arrow to reveal Power On Off Schedule Settings Click Enable and choose the day and time for the schedule Click Save Settings to continue ...

Страница 134: ... Link ShareCenter DNS 325 User Manual Section 4 Configuration Click the blue arrow to reveal OLED Display Settings Click Enable to Display the OLED for a specific time period Click Save Settings to continue ...

Страница 135: ...s that alert you about operational and drive status conditions These alerts can prove helpful in managing and safeguarding important data Click System Management Notifications and then E mail Settings Create an account by entering your e mail details Click Save Settings to continue Click SystemManagement Notifications andthenSMSSettings Follow the instructions on the wizard Click Next to proceed ...

Страница 136: ...131 D Link ShareCenter DNS 325 User Manual Section 4 Configuration Enter your SMS provider details and then click Next to continue Click Save Settings to proceed ...

Страница 137: ...132 D Link ShareCenter DNS 325 User Manual Section 4 Configuration ClickSystemManagement Notifications andthenEventSettings Select the events you wish to enable Click Save Settings to continue ...

Страница 138: ...with the Add button Add button Click on the Add button and enter the information into the appropriate fields that your provider has given you to use for the configuration Delete button Remove the selected Service Provider from the configuration URL The specific service provider URL provided and added in the Add procedure Replace space character with If required by your service provider enter a cha...

Страница 139: ...der wizard Enter the URL in the first window with an appropriate Provider Name In the next window select the appropriate HTTP API URL parameter types definitions from the drop down menus next to the parsed fields of the URL Enter the HTTP API URL provided to you Enter your SMS Provider name here Choose the appropriate type parameter in the drop down menu fortheparsedparametersoftheURL on the left ...

Страница 140: ...gs You can limit which events are sent as alerts to the Email or SMS settings by checking the events here Event Settings Select the information you want e mailed to the above address or sent over SMS messages to the above mobile number The items checked will be sent when necessary ...

Страница 141: ... from other ShareCenters or send the ShareCenter s log events to another ShareCenter or SysLog server You can also view the NAS system logs and the FTP logs here Click System Management then Logs 1 Click the blue arrow to reveal the Server Settings 2 Click Enable Syslog 3 Enter an IP address Click Save Settings Click the blue arrow to reveal the Logs ...

Страница 142: ...section provides a link to check for new firmware on the D Link support website If new firmware is available download the file to your local computer Click System Management then Firmware Upgrade 1 Click the blue arrow to reveal the current firmware version 2 Click Choose File to locate the new firmware 3 Click Browse Open 4 Click Apply The system will now reboot Do not disconnect the power ...

Страница 143: ... information on all hard drives including the manufacture details temperatures size and status Resource Monitor offers more detailed specs on the CPU Memory Bandwidth and Processes Status Click System Status then System Info Click the blue arrow from each of the headings to reveal information on each segment LAN Information Device Information and Volume Information Click System Status then Hard Dr...

Страница 144: ...e total capacity size and status The Status of the hard drive will display the health of the hard drive If your hard drive is healthy the status will display Normal If your hard drive is not healthy the status will display Abnormal At any time if you wish to view the S M A R T table of the hard drive you can press the Normal Abnormal button After pressing the button a table appears with the S M A ...

Страница 145: ...tion My Folder The Home tab is the center for all files on your ShareCenter Home is divided into one main subfolder called My Folder Under My Folder resides two main utilities My Files and mydlink Cloud Let s take a closer look at both utilities independently Home ...

Страница 146: ...r ShareCenter by clicking the My Files icon in the My Folder window under Home My Files provides access to all your files on the NAS Click My Files The My Files window provides a list of all volumes created on the NAS Click on any Volume you created to see a directory listing of the files My Files ...

Страница 147: ...4 Configuration To upload more files to the volume you have selected click the Upload button Click the Select Files button to find files on your computer to upload to the NAS Locate the path of the file you want to upload and click Open My Files Upload ...

Страница 148: ... Link ShareCenter DNS 325 User Manual Section 4 Configuration Locate the path of the file you want to upload and click Open The file updates to the NAS and is displayed on the directory table My Files Upload ...

Страница 149: ...5 User Manual Section 4 Configuration To download photos from the NAS on to another workstation click the Download button Depending on your browser the file automatically downloads the file to your saved location My Files Download ...

Страница 150: ...enter DNS 325 User Manual Section 4 Configuration mydlink Cloud is a D link service that brings cloud services to the ShareCenter Access these services by clicking the mydlink Cloud icon on the Home screen mydlink Cloud ...

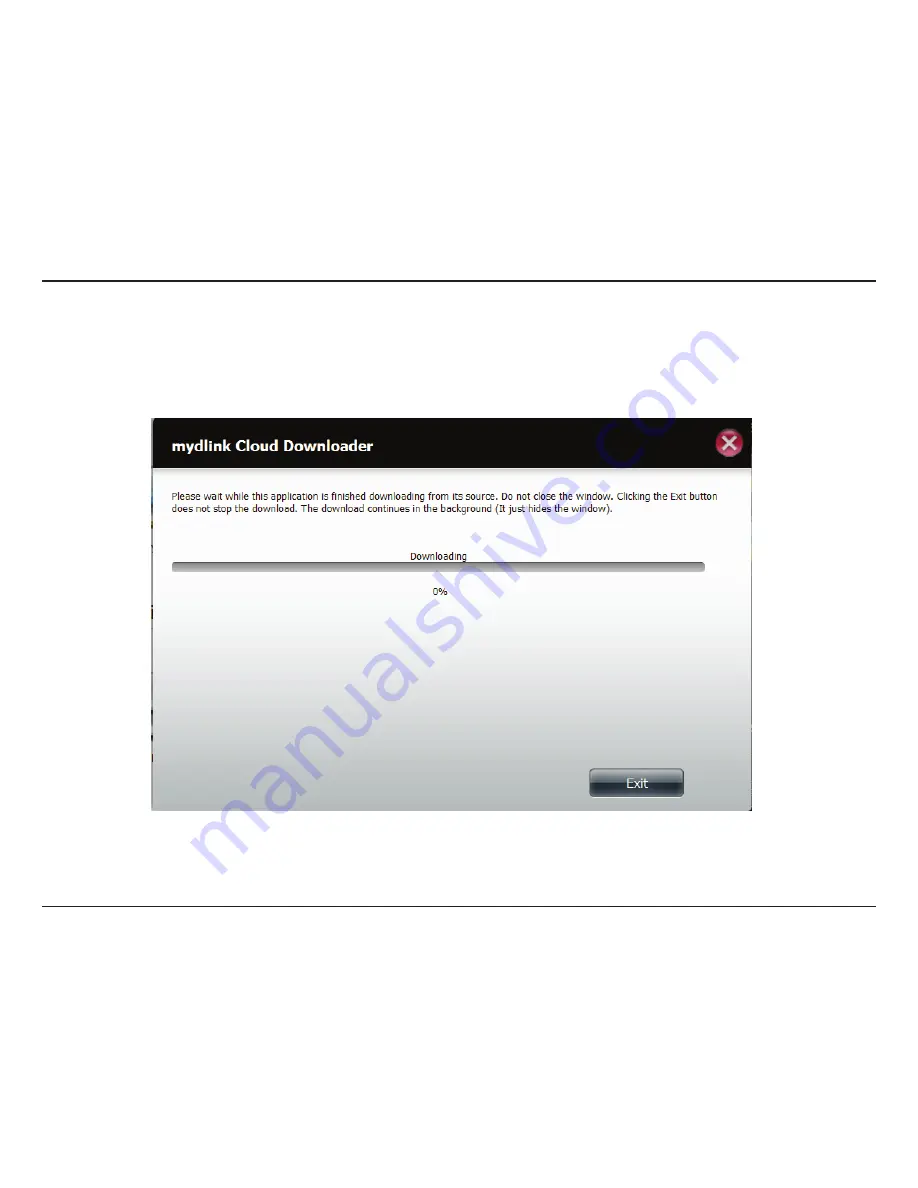
Страница 151: ...figuration mydlink Cloud is a D link service that brings cloud services to the ShareCenter Access these services by clicking the mydlink Cloud icon on the Home screen The ShareCenter downloads the software and installs it on your NAS mydlink Cloud Activation ...

Страница 152: ...147 D Link ShareCenter DNS 325 User Manual Section 4 Configuration Once the software is installed on the NAS the setup is complete Click Finish to exit the wizard mydlink Cloud Activation ...

Страница 153: ...NS 325 User Manual Section 4 Configuration mydlink Cloud connects to the D Link website in order to run the cloud service If you do not have an internet connection a mydlink Cloud error will appear mydlink Cloud Access Failure ...

Страница 154: ...149 D Link ShareCenter DNS 325 User Manual Section 4 Configuration Once you have accessed your DNS 325 click on the mydlink Cloud icon in the Home window Accessing mydlink Cloud ...

Страница 155: ...150 D Link ShareCenter DNS 325 User Manual Section 4 Configuration Register for a My D Link Cloud Account Fill in all the fields provided agree with the Terms of Use and click the Create button ...

Страница 156: ...151 D Link ShareCenter DNS 325 User Manual Section 4 Configuration After you have clicked the Create button the software logs you onto the mydlink Cloud ...

Страница 157: ...iguration You are now connected to the mydlink Cloud web interface The three main sections in this browser view are Files Share and Mobile If you wish to return to the main section click the mydlink Cloud Home link to the left of the window in the side panel ...

Страница 158: ... the mydlink Cloud service you registered using an email address The mydlink Cloud administrators will send you an email showing you how to log onto the service from any device and will also provide you with a link to connect to the server Click on the http link as seen above to access the Cloud service online ...

Страница 159: ...The mydlink Cloud web interface is divided into two parts The left panel shows the hiarachical structure of the files connected to mydlink Cloud Home and the right panel shows the separate categories for each feature The mydlink Cloud Interface Left Sidebar Right Panel ...

Страница 160: ...onnect your NAS using a mydlink Cloud URL Enter the mydlink Cloud URL into your browser and press Enter You will be provided with your mydlink Cloud account login page enter your password and press Login to continue Logging in to mydlink Cloud using a mydlink Cloud URL ...

Страница 161: ...ar and a right panel The left sidebar has the cloud s main hierachical structure and the right panel has the Cloud s functions The left sidebar contains the main mydlink Cloud Home with the following structure tree below My NAS My Favorites My Shared Files My Synced Files Applications and Miscellaneous Exploring the mydlink Cloud Interface ...

Страница 162: ...u can Explore the directory Listen to Music explore the music directory Browse Photos explore the photo directory and Sync files The Share directory allows you to do similar functions share Files share Music and share Photos Mobile allows you to configure mobile options for iPhone iPad Android Windows Phone and Blackberry Exploring the mydlink Cloud Interface ...

Страница 163: ...he files on your system If you have created several drives or volumes on your NAS they will all appear in this section List mode provides a list of folders on your NAS Gallery shows a larger image of the folders on your NAS Music shows where the music files are located mydlink Cloud My NAS ...

Страница 164: ...anual Section 4 Configuration My Favorites is a selection of folders you have created on your NAS that represent functions on the NAS Follow the instructions on the screen to add and manage your Favorites Folders mydlink Cloud My Favorites ...

Страница 165: ...utility that allows you to share edit delete create user access view shared items access a historical view of the files and email a dedicated URL to users The first tab is a Share List of the functions you can do Click each icon to refer specifically to its capability mydlink Cloud My Shared Files ...

Страница 166: ...161 D Link ShareCenter DNS 325 User Manual Section 4 Configuration Create a share folder file by clicking the Share File button Click Additonal options to see a wider choice of selections ...

Страница 167: ...162 D Link ShareCenter DNS 325 User Manual Section 4 Configuration Click the Browse button to find the file you wish to share enter a Share Name and click Add ...

Страница 168: ...163 D Link ShareCenter DNS 325 User Manual Section 4 Configuration Select the user access rights for the file and click Close The file now appears in the Share List directory ...

Страница 169: ...der you wish to edit The Edit Share screen comes up and provides you with several options mydlink Cloud My Shared Files Edit These options allow you to change the File Folder you are sharing the Share Name the Expiration the Size Limit and or as a Photo Gallery When you have completed making the changes click Save to continue ...

Страница 170: ...anual Section 4 Configuration In the Share List click the Delete icon next to the file folder you wish to delete The Delete prompt asks you to confirm the delete click Yes or ignore the delete click No mydlink Cloud My Shared Files Delete ...

Страница 171: ...tion In the Share List click the User Access icon next to the file folder you wish to change user access levels The User Access window asks you to select the user s you want to add to the Share Folder Click Close when done mydlink Cloud My Shared Files User Access ...

Страница 172: ...In the Share List click the View Share icon next to the file folder you wish to view The View Share link opens a new browser tab and shows you all the files available to share The Shares can be viewed in File and Gallery format mydlink Cloud My Shared Files View Share ...

Страница 173: ...nual Section 4 Configuration In the Share List click the Access History icon next to the file folder you wish to view the history The Access History link opens the History tab in the same window mydlink Cloud My Shared Files Access History ...

Страница 174: ...are List click the Email URL icon next to the file folder you wish to send a link via email The Email URL link opens the Send Webshare URL window Enter the contact details of the person s you want to send the email to and click Send Email mydlink Cloud My Shared Files Email URL ...

Страница 175: ... the Advanced tab This tab highlights a few Advanced Settings a Personal Header Enter a name in the empty field provided and click Save Under Maintenance click the Clear button to remove images from the Cache and click the Clear button to remove all History mydlink Cloud My Shared Files Advanced ...

Страница 176: ...171 D Link ShareCenter DNS 325 User Manual Section 4 Configuration The Downloads tab provides a list of downloads mydlink Cloud My Shared Files Downloads ...

Страница 177: ...wnload and use on your personal PC The mydlink Cloud sync window is divided into three sections Syncing Guest Users and Recent Activity Syncing allows you to sync your NAS content to the cloud Guest users means exactly what it implies it adds guest users and Recent Activity shows who and how many people have accessed the cloud service at any given time There is also a Pro version mydlink Cloud My ...

Страница 178: ...eCenter DNS 325 User Manual Section 4 Configuration The mydlink Cloud Sync software application comes in three varieties Windows Linux and Mac For Windows double click the MyDLinkCloudSync exe file mydlink Cloud Sync ...

Страница 179: ...figuration mydlink Cloud Sync Installation Click the checkbox next to Create a desktop icon and click the checkbox next to Create a Quick Launch icon to set additional links Click Next to continue Before running Install check the parameters and click Install ...

Страница 180: ...175 D Link ShareCenter DNS 325 User Manual Section 4 Configuration mydlink Cloud Sync Installation The program installs The installation is complete Click Finish to exit ...

Страница 181: ...ows 7 click Start All Programs mydlink Cloud Sync If mydlink Cloud Sync is already in the Start Menu click it When the mydlink Cloud Sync program starts enter the mydlink Cloud Sync Server URL the Account details and a relavant Password Enter a Remote Answer if required and click Apply The program runs in the background ...

Страница 182: ...d Sync The mydlink Cloud shortcut can be found in the System Tray in Windows 7 while its running Right click on the shortcut in the System Tray to reveal all the options From here you can Open the Sync Folder Re enable Sync Run at Windows Startup Check for New Versions Settings and About ...

Страница 183: ...178 D Link ShareCenter DNS 325 User Manual Section 4 Configuration Track the Changes Easily view and track all recent activity ...

Страница 184: ...nk ShareCenter DNS 325 User Manual Section 4 Configuration Guest Users allows you to manage guest users you add to the NAS This function works only if you have setup users on your NAS mydlink Cloud Guest Users ...

Страница 185: ...D Link ShareCenter DNS 325 User Manual Section 4 Configuration Applications has two main tabs Manage and App Store Manage has three main Applications Explorer WebSharePro and Sync mydlink Cloud Applications ...

Страница 186: ...tore app allows you to upgrade to the mydlink Cloud Pro service This service creates a dedicated cloud service on the web for you and allows you to make backups of your entire NAS This is a paid service Click Set Store Account to activate this service mydlink Cloud Applications ...

Страница 187: ...irected to a store where you can purchase the upgraded version By default the mydlink Cloud software allows up to 2 GB free sync If you want up to 50 GB free sync you can upgrade to mydlink Cloud Pro Once upgraded you will get 50 GB sync capacity as well as the ability to let specified guest accounts sync to the NAS mydlink Cloud Upgrade to Pro ...

Страница 188: ...ions General Account Network Misc Log and About The General Tab offers a general status indicator which provides Account Name mydlink Cloud ID Relay Service Connection Status Network Connected to WebServer Port Communication Port Uptime and Version number The General Tab also offers Updates Click the Check for Updates button to run updates mydlink Cloud Miscellaneous Settings ...

Страница 189: ...ation The Account Settings tab allows users to change account settings Enter the details according to your requirements and click the Update button Access or change the directory location by clicking the Browse button mydlink Cloud Miscellaneous Settings Accounts ...

Страница 190: ...ngs and Network Settings The mydlink Cloud Relay Service allows users to enable Relay Services In Web Access Settings you can enable Remote Web Access allow Remote Admin and Account Creation and change HTTP port settings For Network Settings you can shut down the network change the Network Speed and change the UPD Port settings mydlink Cloud Miscellaneous Settings Network ...

Страница 191: ...unning Jobs If there are no Running Jobs then it displays nothing You can also switch to a different user by clicking the Create or Swirch to a Different Account Currently you can switch between ten languages from the drop down menu under Change Language mydlink Cloud Miscellaneous Settings Misc ...

Страница 192: ...g of all your connections and other accounts connected to the mydlink Cloud service The Log Level indicator offers eight options fatal critical error warning notice information debug and trace Click the Download Log File button to keep a record of the file mydlink Cloud Miscellaneous Settings Log ...

Страница 193: ...88 D Link ShareCenter DNS 325 User Manual Section 4 Configuration The About page provides details on the software developers the version number and legal links mydlink Cloud Miscellaneous Settings About ...

Страница 194: ...189 D Link ShareCenter DNS 325 User Manual Section 4 Configuration The Help link directs you to the DLink website for further reference mydlink Cloud Miscellaneous Settings Help ...

Страница 195: ...e top of the cloud service have several options Tools has three main sub menus Manage Applications Manage Guest Users and Settings These sub menus are links to pages we have discussed in earlier sections mydlink Cloud Tools Manage Applications is linked to the Manage window under Applications ...

Страница 196: ...f the cloud service have several options Tools has three main sub menus Manage Applications Manage Guest Users and Settings These sub menus are links to pages we have discussed in earlier sections mydlink Cloud Tools Manage Guest Users is linked to the Manage Guest Users under the Guest Users window ...

Страница 197: ...op of the cloud service have several options Tools has three main sub menus Manage Applications Manage Guest Users and Settings These sub menus are links to pages we have discussed in earlier sections mydlink Cloud Tools Settings is linked to the Settings configuration window under Miscellaneous ...

Страница 198: ...r at the top of the cloud service have several options Mobile has four main sub menus iPhone iPad Android Blackberry and Windows Phone 7 These sub menus are links to pages we have discussed in earlier sections mydlink Cloud Mobile iPhone iPad is linked to the D link iPhone Application ...

Страница 199: ...e have several options Mobile has four main sub menus iPhone iPad Android Blackberry and Windows Phone 7 These sub menus are links to pages we have discussed in earlier sections mydlink Cloud Mobile Android is linked to the D link Android Application and is represented by a mydlink Cloud icon in the Google Play Store ...

Страница 200: ... at the top of the cloud service have several options Mobile has four main sub menus iPhone iPad Android Blackberry and Windows Phone 7 These sub menus are links to pages we have discussed in earlier sections mydlink Cloud Mobile Blackberry is linked to the D link Blackberry Application ...

Страница 201: ...the top of the cloud service have several options Mobile has four main sub menus iPhone iPad Android Blackberry and Windows Phone 7 These sub menus are links to pages we have discussed in earlier sections mydlink Cloud Mobile Windows Phone 7 is linked to the D link Windows Phone Application ...

Страница 202: ...nfiguration The navigation bar at the top of the cloud service have several options Help has two main sub menus Help and About These sub menus are links to pages we have discussed in earlier sections mydlink Cloud Help Help is linked to the D link web site ...

Страница 203: ...op of the cloud service have several options Help has two main sub menus Help and About These sub menus are links to pages we have discussed in earlier sections mydlink Cloud Help About is linked to the about mydlink Cloud pop up window It shows the version number developers and web site address ...

Страница 204: ...on When you disconnect the DNS 325 from the network or the device is shut down the connection to your mydlink Cloud also ceases When this happens just reconnect your NAS or contact your network administrator to resolve your network issue Disconnecting mydlink Cloud ...

Страница 205: ...nfiguration The My Favorites Application section allows users to add applications to the Home section so users can easily access these applications Follow thsee easy steps to setup Favorite Applications on the Home screen My Favorite Application Add Remove ...

Страница 206: ...e Add Remove button to add Applications Click the checkbox under each application you wish to add to the Home screen Click Apply to continue My Favorite Application Adding Applications The shortcut is now created on the Home screen Click the shortcut to access the application ...

Страница 207: ...rmation for the site that contains the files that you want to schedule for downloading If no password is required select Anonymous If a password is required select Account and provide the user name and password Username Enter the user name here Password Enter the password here Type Select either File or Folder from the drop down list dependingonwhetheryouwishtodownloadafileor a folder Select File ...

Страница 208: ...art Incremental Backup This type of backup if used will compare files of identical names on both the source and destination folders If the source file was modified later than the destination file the source file will overwrite the existing old destination file If the source file is the same as the destination file no action will be taken Schedule Download List Pending and completed download events...

Страница 209: ...ion 4 Configuration Under Save To click the Browse button to save your HTTP files Enter optional details under Rename Log in and select Applications then FTP HTTP Select HTTP by clicking on the radio button and enter a URL Click Test to test the URL ...

Страница 210: ...ection 4 Configuration Click Test to test the URL The test results will either show pass or fail Click Close to proceed Select a date and time for the download settings Select a recurring backup time frame and then click Save Setting to continue ...

Страница 211: ...ShareCenter DNS 325 User Manual Section 4 Configuration The table below will show the HTTP downloads To edit an item select it and then click Modify To delete an item select it and then click on the Delete button ...

Страница 212: ...ownloads Click Applications then FTP 1 Select Account as the Login Method 2 Enter a username and password 3 Select a type 4 Enter a URL 5 Browse to a location to save files to 6 Select the Language and Scheduling Click Save Settings The table below will now show the FTP path and status ...

Страница 213: ... Manual Section 4 Configuration For Anonymous settings Click the Anonymous radio button and follow the rest of step 1 Since the Login Method is Anonymous the username and password sections are greyed out Click Save Settings once complete ...

Страница 214: ...by the additional overhead used by this process Password Enter a password that the remote client will use Remote Backups list This is the list of remote backup jobs built by pressing the Create button above the list to configure each job Create Click the Create button to build a new remote backup job Modify Click to make changes to your existing Remote Backup jobs in the Remote Backup list You mus...

Страница 215: ...ps of the wizard Service Type NAS to NAS Backup from the local NAS to a remote NAS or vice versa NAS to Linux Backup from the local NAS to a Linux file system or vice versa Local to Remote Sets the backup source as the local NAS and the target destination for the backup files as the remote NAS or Linux file system Remote To Local Sets the backup source as the remote NAS or Linux file system and th...

Страница 216: ...king this box prevents the backup process from writing over any files in the targetfilesystemthatarenotpartofthebackupfiles or folders Therefore any existing files in the target system are preserved Incremental backup support Num Checking this box provides multiple backup capability at scheduled times The first backup in an incremental series captures all the files for backup Subsequent backupsare...

Страница 217: ...stem for backup Schedule Settings Manual Check either Yes or No selection below to start the backup yes immediately on completion of the wizard or no manually start the backup from the Remote Backup list Once Select this option to run the Remote Backup once at a specific date and time set Scheduled Select this option to set the backup to occurdaily weekly ormonthlyperaspecificschedule ...

Страница 218: ...essfully Failed the Remote backup job was unsuccessful during execution Enable Disable If the button shows a red circle the remote backup job is enabled Click the red button to disable the remote backup job and the button will change to a green triangle Clicking the green triangle will enable the job again Backup now Click to execute the backup job immediately as long as the job is enabled Recover...

Страница 219: ...sword is required select Anonymous If a password is required select Account and provide the user name and password This option is only available for LAN Backups Username Enter the user name Password Enter the password Type Select File or Folder depending on what you want to download or backup URL Enter the URL of the site or server you are initiating a transfer from E g ftp 123 456 789 Test or ftp...

Страница 220: ...tically as soon as this function is enabled Enable Time Machine Click this to enable theTime Machine function to work with a MAC OS X Time Machine The Time Machine Settings list will appear when this checkbox is ticked Time Machine Settings list A list of destination folders on the Network Shares associated with the Time Machine backup New Click to add a NAS folder as a Time Machine destination De...

Страница 221: ...block for the appropriate day and time Auto Download Select Enable or Disable Port Settings Click Enable to allow the device to automatically choose incoming connection port or click Custom and configure the incoming connection port manually Seeding Select one of the three seeding options Torrent Save Path Displays the volume where the Torrent will be saved Encryption Select Enable or Disable Band...

Страница 222: ... task list The downloads at the top of the list have a higher priority than the ones listed below them Delete ClickDeletetoremoveaselecteddownload This will remove not only the torrent file but also the partially downloaded files too Start Stop The start and stop button allows the user to start and stop selected P2P downloads in the task list Torrent Scheduling ClicktheTorrentSchedulingbuttontocon...

Страница 223: ...bynavigating in the folder view on the left Click on the file Once the text turns red click on the Download button and save or open the file as needed You may select multiple files at the same time by holding the CTRL key and clicking on the files you want to download Refresh Click the Refresh button to update the folder and file view of the Web File Server Download Downloads the selected file to ...

Страница 224: ...e web service offered by AWS Amazon Web Services it provides a simple web services interface that can be used to store and retrieve any amount of data at any time from anywhere on the web With Amazon S3 support it is possible to upload the data from your the DNS 325 to Amazon S3 or download the data from Amazon S3 to your DNS 325 ...

Страница 225: ...nt Follow the instructions to create your AWS account Click the Sign Up for Amazon S3 button and follow the instructions to select the amount of desired storage and create your Amazon S3 account You will be issued the following keys as credentials to give you access to the account 1 Access Key ID 2 Secret Access Key Save these keys in a secure location as your ShareCenter will need them to create ...

Страница 226: ...o and from the Amazon S3 Cloud Storage You can schedule the job to run immediately once scheduled or manually You will need the following configuration data to create a backup restore job 1 A Job Name A 16 character name identifying the backup restore job 2 Remote Settings the access key id and secret access key the remote bucket name remote path and the Amazon Cloud Server region to use ...

Страница 227: ...existingfiles fullbackuor incremental backup 4 Local Settings This is the path to the ShareCenter file location to be eitherbackeduporrestoredto from the Amazon S3 Cloud 5 Schedule Settings Select when the backup or restore job will execute from either manually now or later from the job list once at a predetermined time and day or scheduled a predetermined time on a daily basis ...

Страница 228: ...The Job Name cannot be modified Delete Button The Delete button is used to delete any backup or restore job listed in the Amazon S3 table Click on a created job in the Amazon S3 table so that its text turns red Then click the Delete button to remove the job from your ShareCenter configuration Enable Disable Colume This field of the jobs created administratively controls whether the job will execut...

Страница 229: ...with each one providing a different method of sharing or distributing data among the drives The device supports Standalone JBOD RAID 0 and RAID 1 Standard provides a single volume for each drive Although performance is improved the lack of any RAID or mirroring means that if one drive fails all data on the volume will be lost Standard JBOD JBOD allows you to create a large virtual disk drive by co...

Страница 230: ...ance is improved the lack of fault tolerance means that if one drive fails all data in the array will be lost RAID 1 RAID 1 provides mirroring over multiple disks with the sameread writespeedofasingledisk ARAID1arraycan only be as large as it s smallest member disk Because the data is stored on multiple disks RAID 1 provides fault tolerance and protection in addition to performance advantages RAID...

Страница 231: ...important to ensure that any of the printer manufacturer s drivers are already installed or available on any computer you want to print from Note The print function is supported in Microsoft Windows Operating Systems only The device does not support the copy and scan functions of Multi Function Printers either To add a printer connect your printer via USB cable to the USB port of your device The p...

Страница 232: ...Base Select the printer driver from the installed Manufacturer list or use the Have Disk button to browse for the printer driver file The Windows Add Printer Wizard will launch Click OK to continue Connect to your device with Samba and then double click the lp icon ...

Страница 233: ...enter DNS 325 User Manual Section 5 Knowledge Base Once you have selected the proper driver as shown in the browse list then click OK to install the printer The printer is now installed and the printer queue will appear ...

Страница 234: ...evice press and hold the USB Copy Unmount Button button for 1 3 seconds The device will create a new folder in the Volume 1 folder and will copy all the files from the USB storage to this folder To unmount the USB storage device after the copy is complete press and hold the USB Copy Unmount Button button for 5 seconds When the USB light has switched off then the USB storage un mounted successfully...

Страница 235: ...hin the Web UI go to the Management Tab Icon Application Management You will find an Add ons menu item that you can click The Add ons menu provides the following y y Installs Apply button add on software onto your ShareCenter y y Displays a list of installed add ons and shows their version and status y y Enables and Disables Start Stop button add ons so that you do not over utilize your ShareCente...

Страница 236: ...pplicationTab If the add ons are enabled you will see them under the Enabled Add Ons area otherwise if they are disabled they will be under the Disabled Add Ons area Note You can add add ons to the My Favorites as shown in the User Manual by right clicking the add on icon and selecting Add to My Favorites Application Menu with Add Ons ...

Страница 237: ...d here http www ajaxplorer info Administrator If you launched the interface as the admin user in your ShareCenter then you will have administrator rights within the AjaXplorer interface As the admin user you will have read write access to all areas of the files systems as well User If you launched the interface as a configured user in yourShareCenter thenyouwillhavetheusersrights withintheAjaXplor...

Страница 238: ...isbuttontoadda newplaylist An add wizard will appear toguide you through adding theplaylist After entering the description click and expand the volume folders and check the folder that contains the audio files to be streamed Modify After selecting a Playlist in the Audio Streamer Playlist click the Modify button to edit the Playlist description Delete To remove a Playlist from the Audio Streamer P...

Страница 239: ...h capability for finding desired P2P files aMule also provides a full featured P2P server client Web UI interface can be launched to work with your ShareCenter P2P functionality Launch Interface ClickthisbuttontocausetheaMuleWebUIinterface to execute and appear The aMule application details and usage guide can be found on the support web page http www amule org ...

Страница 240: ... Launch Interface Click on the Launch Interface button here to cause the Wordpress Web UI to appear where you can then write your own personal blog from your ShareCenter Blog Web UI Once you have launched the Blog interface you can begin using the Web UI that appears Admin Password The Admin password for the Blog Web UI is admin Help For more information regarding using Wordpress and creating a bl...

Страница 241: ...ugh a web interface Web URL TheLaunchbuttonwillautomaticallylaunchtheWeb UI in fhe format of the ShareCenter IPv4 address slash Gallery 2 for example http 192 168 1 1 gallery2 Where 192 168 1 1 is the ShareCenter s network IP address setting Administrator login InthePhotoCenterWebUIusetheusername admin password the ShareCenter s admin password Adding Gallery Users Youcanaddusersthroughtheaccountma...

Страница 242: ...to your ShareCenter music files for playback Launch Interface Click this button to launch the Web UI interface to the Logitech SqueezeCenter Help For more information regarding using Squeeze Center to play music on your Logitech media player from your ShareCenter refer to the following link http en wikipedia org wiki Squeezebox_Server ...

Страница 243: ...ion activated recorded video and to playback any surveillance material recorded and stored The Application only runs in Internet Explorer so make sure you have it installed Click the Surveillance Center icon This leads to the Surveillance Center details panel Here you can view the Installation Date the software version number and the Installation path Click Launch Interface to access the Surveilla...

Страница 244: ...e You are prompted to install an Addon for Internet Explorer at the botom of your screen Click Install to install the necessary plugin for Internet Explorer Internet Explorer is required to run this application Click Install to install the add on used for the browser ...

Страница 245: ...e ShareCenter When you connect one of the above mentioned cameras to the network the Surveillance Center software detects the camera s automatically The software is able to recognize the IP address model number and bit rate speed Please refer to the Surveillance Center How To Guide for more details ...

Отзывы: